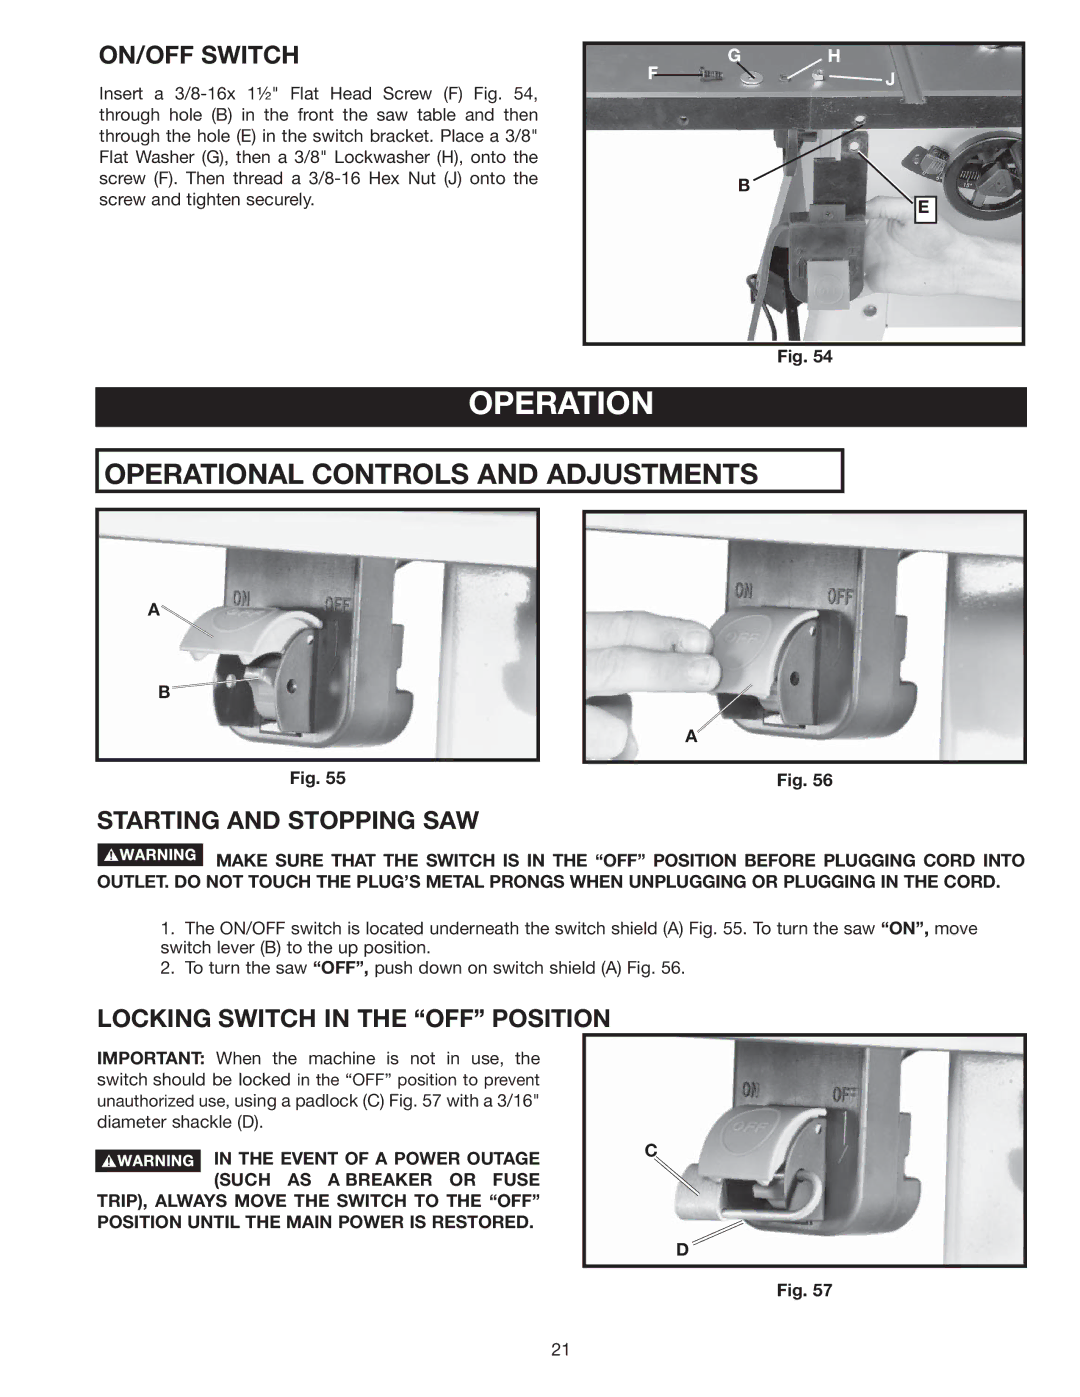
ON/OFF SWITCH
Insert a
G H
F![]() J
J
B
E
Fig. 54
OPERATION
OPERATIONAL CONTROLS AND ADJUSTMENTS
A![]()
B
Fig. 55
A
Fig. 56
STARTING AND STOPPING SAW
![]() MAKE SURE THAT THE SWITCH IS IN THE “OFF” POSITION BEFORE PLUGGING CORD INTO OUTLET. DO NOT TOUCH THE PLUG’S METAL PRONGS WHEN UNPLUGGING OR PLUGGING IN THE CORD.
MAKE SURE THAT THE SWITCH IS IN THE “OFF” POSITION BEFORE PLUGGING CORD INTO OUTLET. DO NOT TOUCH THE PLUG’S METAL PRONGS WHEN UNPLUGGING OR PLUGGING IN THE CORD.
1.The ON/OFF switch is located underneath the switch shield (A) Fig. 55. To turn the saw “ON”, move switch lever (B) to the up position.
2.To turn the saw “OFF”, push down on switch shield (A) Fig. 56.
LOCKING SWITCH IN THE “OFF” POSITION
IMPORTANT: When the machine is not in use, the switch should be locked in the “OFF” position to prevent unauthorized use, using a padlock (C) Fig. 57 with a 3/16" diameter shackle (D).
![]() IN THE EVENT OF A POWER OUTAGE (SUCH AS A BREAKER OR FUSE TRIP), ALWAYS MOVE THE SWITCH TO THE “OFF”
IN THE EVENT OF A POWER OUTAGE (SUCH AS A BREAKER OR FUSE TRIP), ALWAYS MOVE THE SWITCH TO THE “OFF”
POSITION UNTIL THE MAIN POWER IS RESTORED.
C
D
Fig. 57
21