ASSEMBLING MITER GAUGE
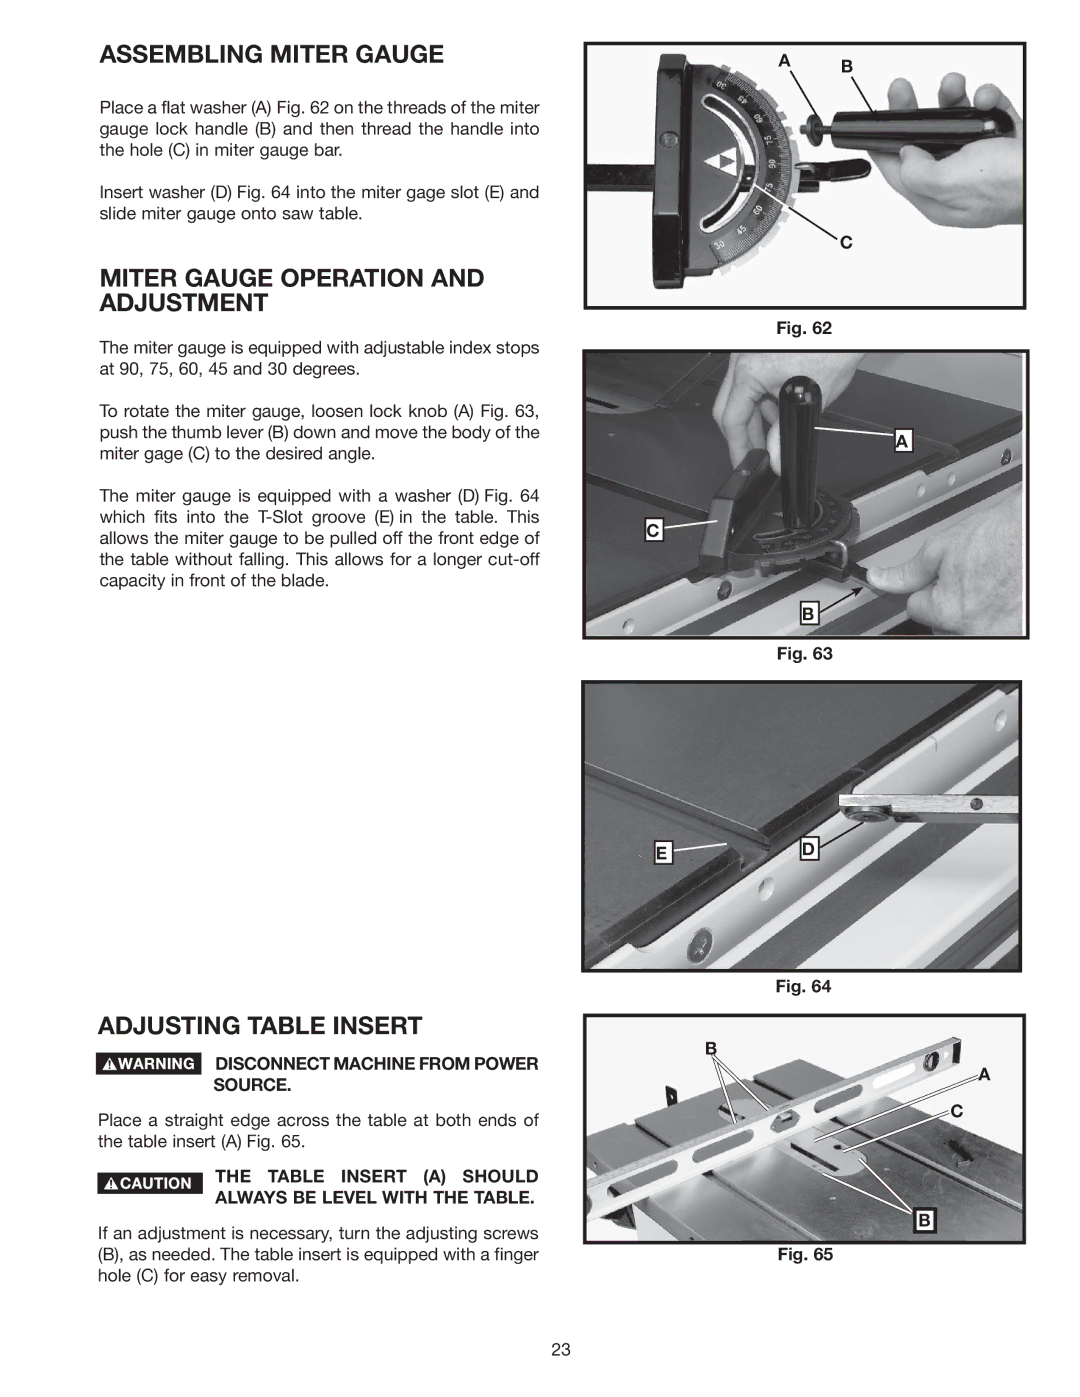
Place a flat washer (A) Fig. 62 on the threads of the miter gauge lock handle (B) and then thread the handle into the hole (C) in miter gauge bar.
Insert washer (D) Fig. 64 into the miter gage slot (E) and slide miter gauge onto saw table.
MITER GAUGE OPERATION AND ADJUSTMENT
The miter gauge is equipped with adjustable index stops at 90, 75, 60, 45 and 30 degrees.
To rotate the miter gauge, loosen lock knob (A) Fig. 63, push the thumb lever (B) down and move the body of the miter gage (C) to the desired angle.
The miter gauge is equipped with a washer (D) Fig. 64 which fits into the
A B
C
Fig. 62
A
C![]()
B
Fig. 63
ADJUSTING TABLE INSERT
DISCONNECT MACHINE FROM POWER
SOURCE.
Place a straight edge across the table at both ends of the table insert (A) Fig. 65.
THE TABLE INSERT (A) SHOULD
ALWAYS BE LEVEL WITH THE TABLE.
If an adjustment is necessary, turn the adjusting screws (B), as needed. The table insert is equipped with a finger hole (C) for easy removal.
E ![]() D
D
Fig. 64
B
A
C
B |
Fig. 65
23