ALIGNING MITER SLOTS TO BLADE
The saw table has been aligned at the factory so the miter gauge slots are parallel to the saw blade. However, it is recommended to check the alignment before initial operation as follows:
DISCONNECT MACHINE FROM POWER
SOURCE.
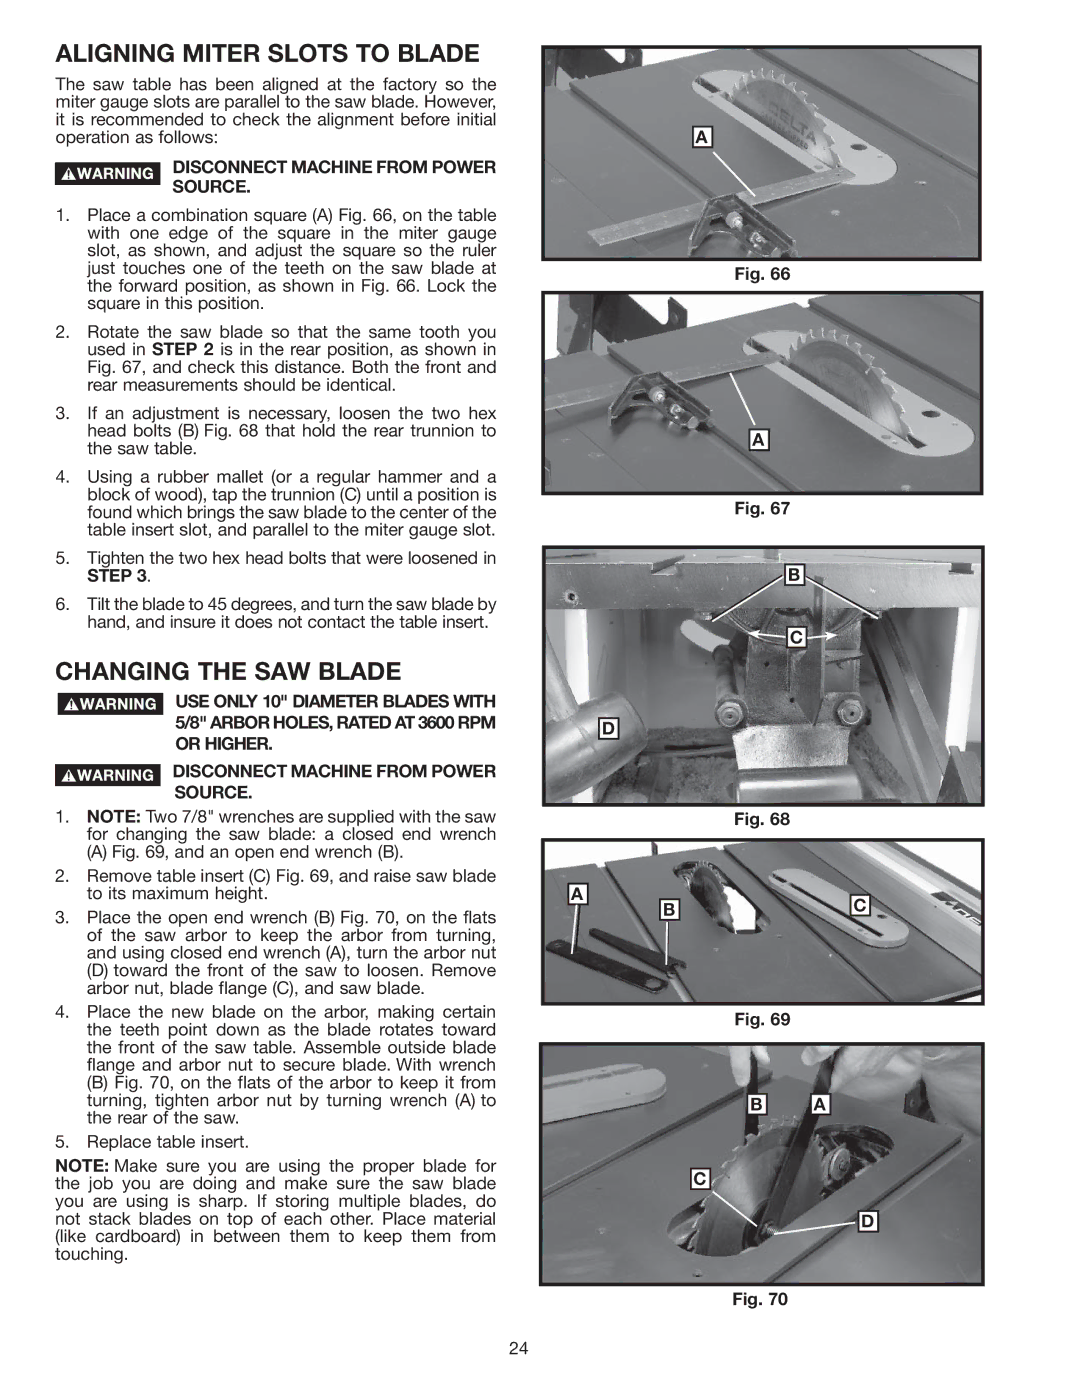
1.Place a combination square (A) Fig. 66, on the table with one edge of the square in the miter gauge slot, as shown, and adjust the square so the ruler just touches one of the teeth on the saw blade at the forward position, as shown in Fig. 66. Lock the square in this position.
2.Rotate the saw blade so that the same tooth you used in STEP 2 is in the rear position, as shown in Fig. 67, and check this distance. Both the front and rear measurements should be identical.
3.If an adjustment is necessary, loosen the two hex head bolts (B) Fig. 68 that hold the rear trunnion to the saw table.
4.Using a rubber mallet (or a regular hammer and a block of wood), tap the trunnion (C) until a position is found which brings the saw blade to the center of the table insert slot, and parallel to the miter gauge slot.
5.Tighten the two hex head bolts that were loosened in STEP 3.
6.Tilt the blade to 45 degrees, and turn the saw blade by hand, and insure it does not contact the table insert.
CHANGING THE SAW BLADE
USE ONLY 10" DIAMETER BLADES WITH 5/8" ARBOR HOLES, RATED AT 3600 RPM OR HIGHER.
DISCONNECT MACHINE FROM POWER
SOURCE.
1.NOTE: Two 7/8" wrenches are supplied with the saw
for changing the saw blade: a closed end wrench
(A)Fig. 69, and an open end wrench (B).
2.Remove table insert (C) Fig. 69, and raise saw blade to its maximum height.
3.Place the open end wrench (B) Fig. 70, on the flats of the saw arbor to keep the arbor from turning, and using closed end wrench (A), turn the arbor nut
(D)toward the front of the saw to loosen. Remove arbor nut, blade flange (C), and saw blade.
4.Place the new blade on the arbor, making certain the teeth point down as the blade rotates toward the front of the saw table. Assemble outside blade flange and arbor nut to secure blade. With wrench
(B)Fig. 70, on the flats of the arbor to keep it from turning, tighten arbor nut by turning wrench (A) to the rear of the saw.
5.Replace table insert.
NOTE: Make sure you are using the proper blade for the job you are doing and make sure the saw blade you are using is sharp. If storing multiple blades, do not stack blades on top of each other. Place material (like cardboard) in between them to keep them from touching.
A
Fig. 66
A
Fig. 67
B
![]()
![]() C
C ![]()
![]()
D
|
|
|
| Fig. 68 | ||
|
|
|
|
|
|
|
|
|
|
|
|
|
|
| A |
|
|
| ||
|
|
|
| C |
| |
|
| B |
|
| ||
|
|
|
|
| ||
|
|
|
|
|
| |
|
|
|
|
|
|
|
Fig. 69
B |
| A |
C
D
Fig. 70
24