INSTALLATION
Continued
HARD-WIRING FIREBOX
NOTICE: A qualified electrician must connect electrical wiring to duplex outlet for
The “Handy Box” with duplex outlet is provided in the firebox located in the lower right base area.
1.Remove screw holding duplex outlet cover to handy box. Remove duplex outlet.
2.Route electrical cable through strain relief and handy box (see Figure 17).
3.Connect electrical cable to duplex outlet. Match wire colors to those on duplex outlet. Be sure to connect the ground wire.
4.Place duplex outlet back into handy box and secure with screws. Replace outlet cover.
Duplex Box/
Handy Box
Strain Relief
Figure 17 - Hard-Wiring Firebox
INSTALLING FIREPLACE HOOD AND SCREEN
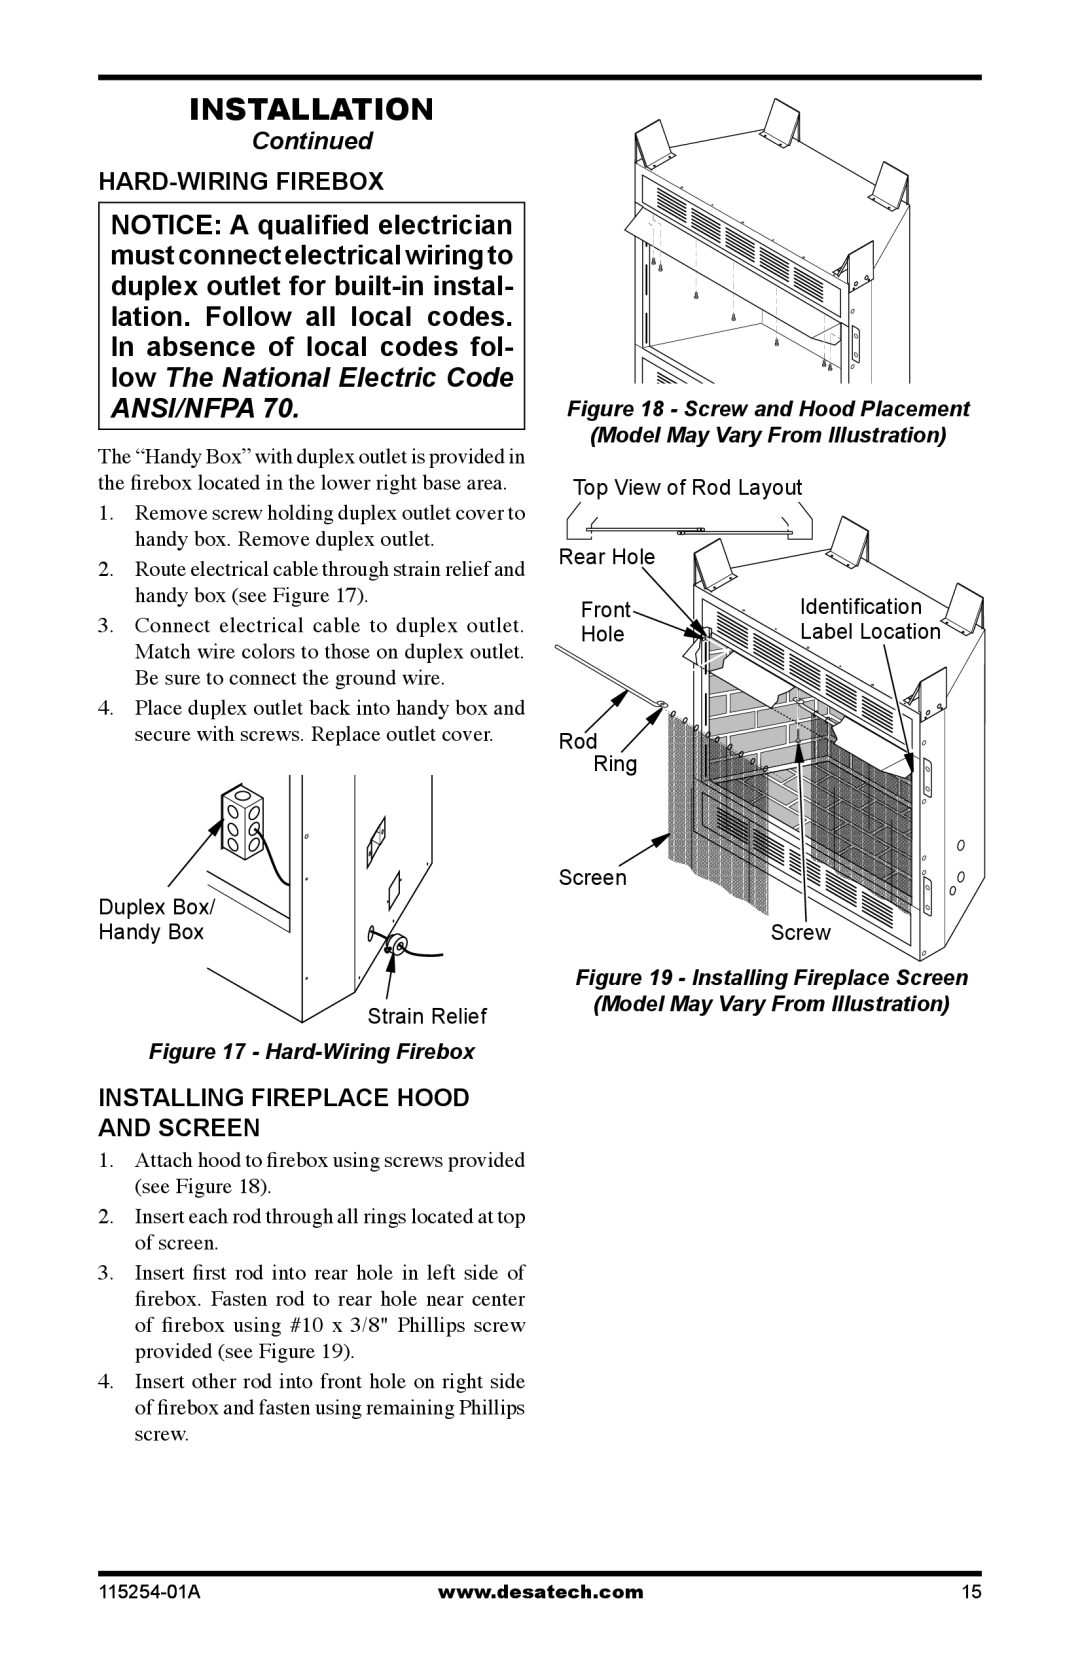
1.Attach hood to firebox using screws provided (see Figure 18).
2.Insert each rod through all rings located at top of screen.
3.Insert first rod into rear hole in left side of firebox. Fasten rod to rear hole near center of firebox using #10 x 3/8" Phillips screw provided (see Figure 19).
4.Insert other rod into front hole on right side of firebox and fasten using remaining Phillips screw.
Figure 18 - Screw and Hood Placement | ||
(Model May Vary From Illustration) | ||
Top View of Rod Layout | ||
Rear Hole |
| |
Front | Identification | |
Label Location | ||
Hole | ||
| ||
Rod |
| |
Ring |
| |
Screen |
| |
| Screw | |
Figure 19 - Installing Fireplace Screen | ||
(Model May Vary From Illustration) | ||
www.desatech.com | 15 |