INSTALLATION
Continued
INSTALLING LOGS
(Models (V)L32HN, (V)L32LHN. (V)L32HP and (V)L32LHP
![]() WARNING: Failure to posi- tion the parts in accordance with these diagrams or failure to use only parts specifically approved with this heater may result in property damage or personal injury.
WARNING: Failure to posi- tion the parts in accordance with these diagrams or failure to use only parts specifically approved with this heater may result in property damage or personal injury.
![]() CAUTION: After installa- tion and periodically thereafter, check to ensure that no flame comes in contact with any log. With the heater set to HI, check to see if flames contact any log. If so, reposition logs according to the log installation instructions in this manual. Flames contact- ing logs will create soot.
CAUTION: After installa- tion and periodically thereafter, check to ensure that no flame comes in contact with any log. With the heater set to HI, check to see if flames contact any log. If so, reposition logs according to the log installation instructions in this manual. Flames contact- ing logs will create soot.
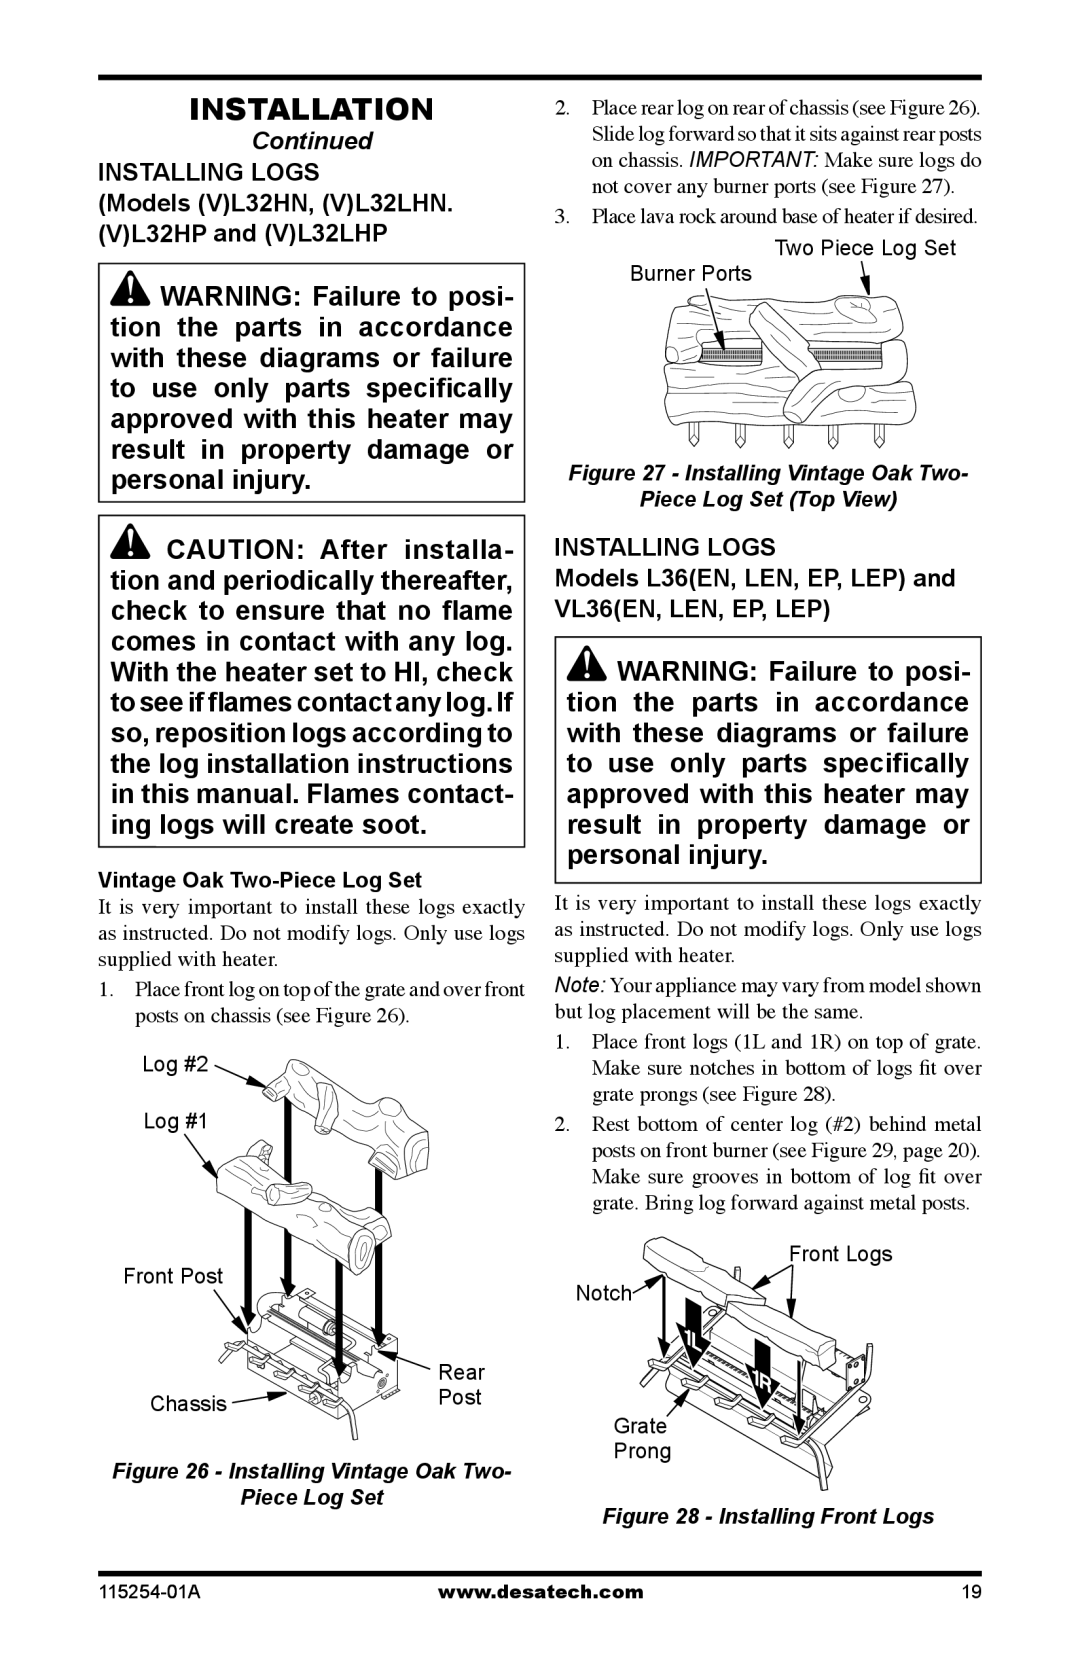
Vintage Oak Two-Piece Log Set
It is very important to install these logs exactly as instructed. Do not modify logs. Only use logs supplied with heater.
1.Place front log on top of the grate and over front posts on chassis (see Figure 26).
Log #2
Log #1
Front Post
![]()
![]()
![]()
![]()
![]()
![]()
![]() Rear
Rear
Chassis ![]()
![]()
![]()
![]()
![]()
![]() Post
Post
Figure 26 - Installing Vintage Oak Two-
Piece Log Set
2.Place rear log on rear of chassis (see Figure 26). Slide log forward so that it sits against rear posts on chassis. IMPORTANT: Make sure logs do not cover any burner ports (see Figure 27).
3.Place lava rock around base of heater if desired.
Two Piece Log Set
Burner Ports
Figure 27 - Installing Vintage Oak Two-
Piece Log Set (Top View)
INSTALLING LOGS Models L36(EN, LEN, EP, LEP) and VL36(EN, LEN, EP, LEP)
![]() WARNING: Failure to posi- tion the parts in accordance with these diagrams or failure to use only parts specifically approved with this heater may result in property damage or personal injury.
WARNING: Failure to posi- tion the parts in accordance with these diagrams or failure to use only parts specifically approved with this heater may result in property damage or personal injury.
It is very important to install these logs exactly as instructed. Do not modify logs. Only use logs supplied with heater.
Note: Your appliance may vary from model shown but log placement will be the same.
1.Place front logs (1L and 1R) on top of grate. Make sure notches in bottom of logs fit over grate prongs (see Figure 28).
2.Rest bottom of center log (#2) behind metal posts on front burner (see Figure 29, page 20). Make sure grooves in bottom of log fit over grate. Bring log forward against metal posts.
Front Logs
Notch![]()
Grate
Prong
Figure 28 - Installing Front Logs
www.desatech.com | 19 |