LOCATING FIREBOX
PLANNING
Plan where you will install the firebox. This will save time and money later when you install the fire- box. Before installation, consider the following:
1.Where the firebox will be located. Allow for wall and ceiling clearances (see Installation Clearances, page 9).
2.Everything needed to complete installation.
3.These models CANNOT be installed in a bedroom unless the maximum Btu rating of the installed
4.Proper air for combustion and ventilation (page 7).
PRODUCT SPECIFICATIONS
32" MODELS
Left Side |
|
View with |
|
Air Kit | Outside Air |
| Kit Location |
| (Optional) |
| 221/2" |
| 4" |
| Firebox Top View |
![]()
![]()
![]()
![]() 5/8"
5/8"
251/8"
| 19 1/2" |
2 13/16" | 16 11/16" |
291/2"
363/8"
347/16"
12 1/4" |
5 |
Standoffs
41/4"
8 /8" |
|
|
|
|
|
|
|
|
|
|
|
|
|
|
|
| ||
|
|
|
|
|
|
| Right Side |
| ||||||||||
|
|
|
|
|
|
|
| Side | ||||||||||
|
|
|
|
|
|
|
|
|
|
|
| View |
| |||||
|
|
|
|
|
|
|
|
|
|
|
|
| Nailing | |||||
|
|
|
|
|
|
|
|
|
|
|
|
|
|
|
|
| Flanges | |
Square |
|
|
|
|
| 19/16" |
|
|
|
|
| |||||||
Gas Line |
|
|
|
|
|
|
|
|
|
|
|
|
|
| ||||
|
|
|
|
|
|
|
|
|
|
|
|
|
| |||||
Access |
|
|
|
|
|
|
|
|
|
|
| 81/8" | ||||||
Holes |
|
|
|
|
|
|
|
|
|
|
|
|
|
| ||||
|
|
|
|
|
|
|
|
|
|
|
|
|
| |||||
|
|
|
|
|
|
|
|
|
|
|
|
|
|
|
|
| 29/16" |
|
|
|
|
|
|
|
|
|
|
|
|
|
|
|
|
|
|
| |
|
|
|
|
|
|
|
|
|
|
|
|
|
|
|
|
|
|
|
187/16" |
163/4" |
291/2" |
361/2"
![]()
![]() 31/2"
31/2"
321/4"
1415/16"
![]()
![]() 33/8" 65/16"
33/8" 65/16"
Electrical | 6" | 21/4" |
Access Hole | 815/16" |
|
| 93/4" |
|
|
|
Front View
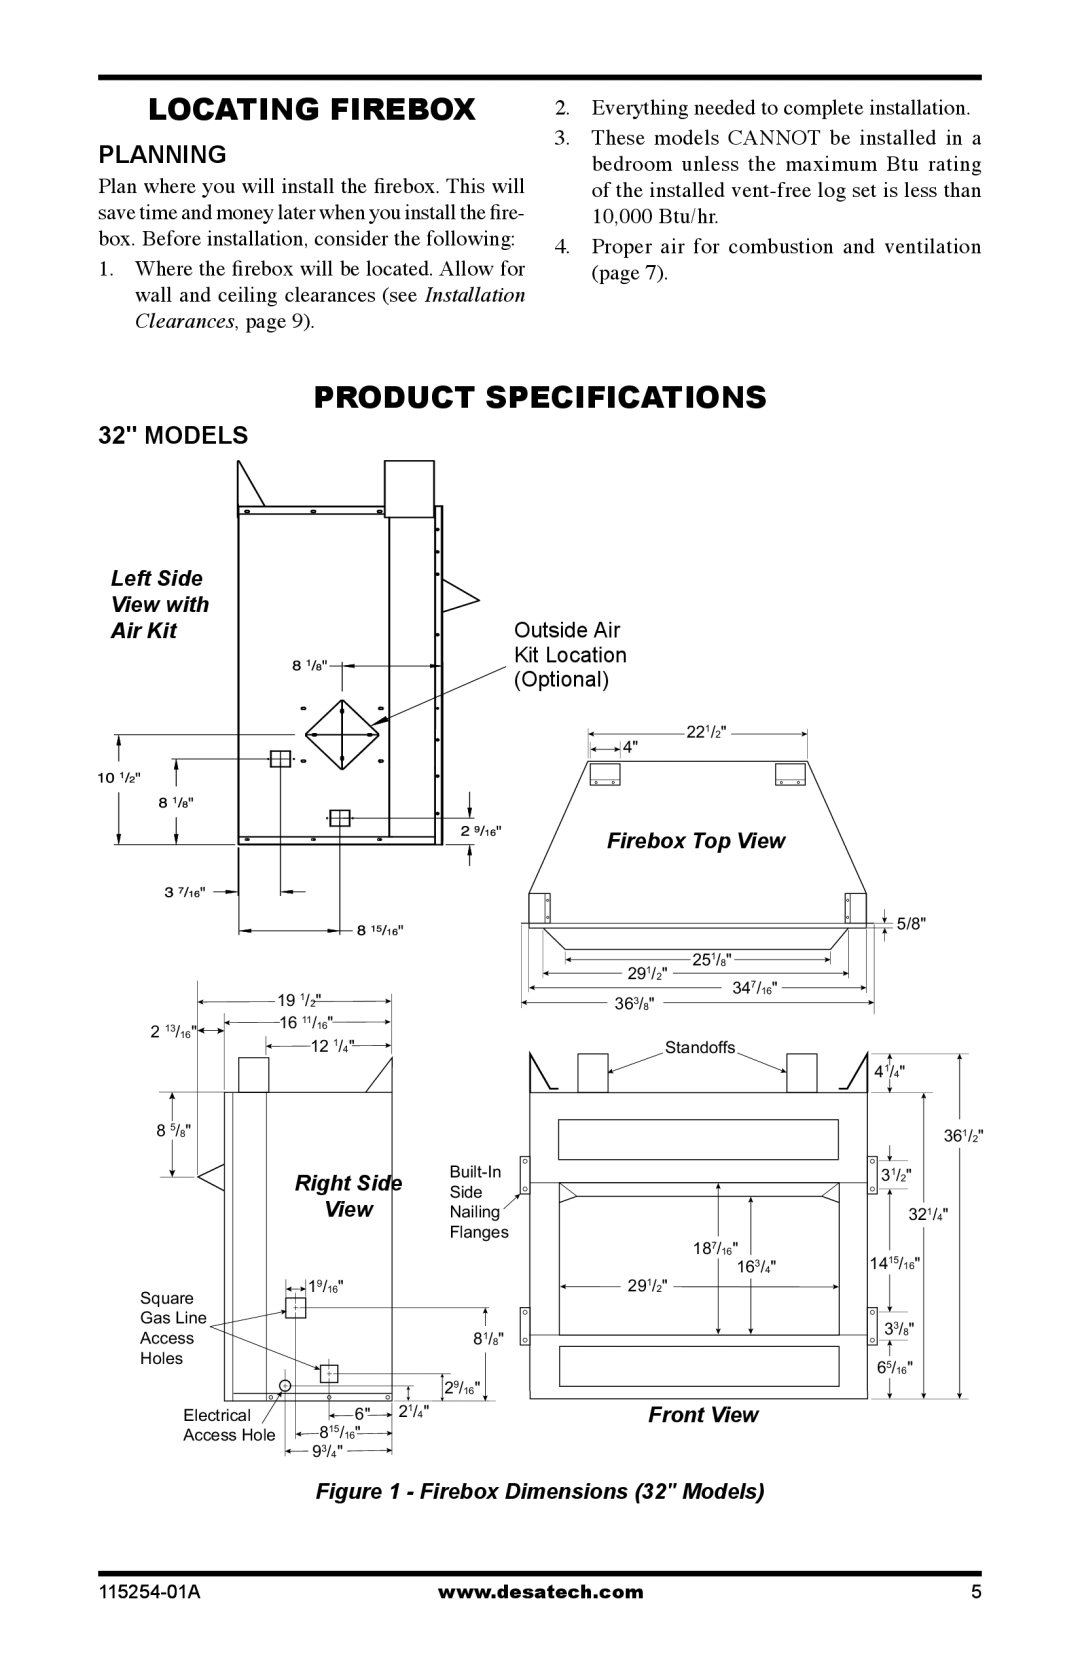
Figure 1 - Firebox Dimensions (32" Models)
www.desatech.com | 5 |