Adjusting system settings
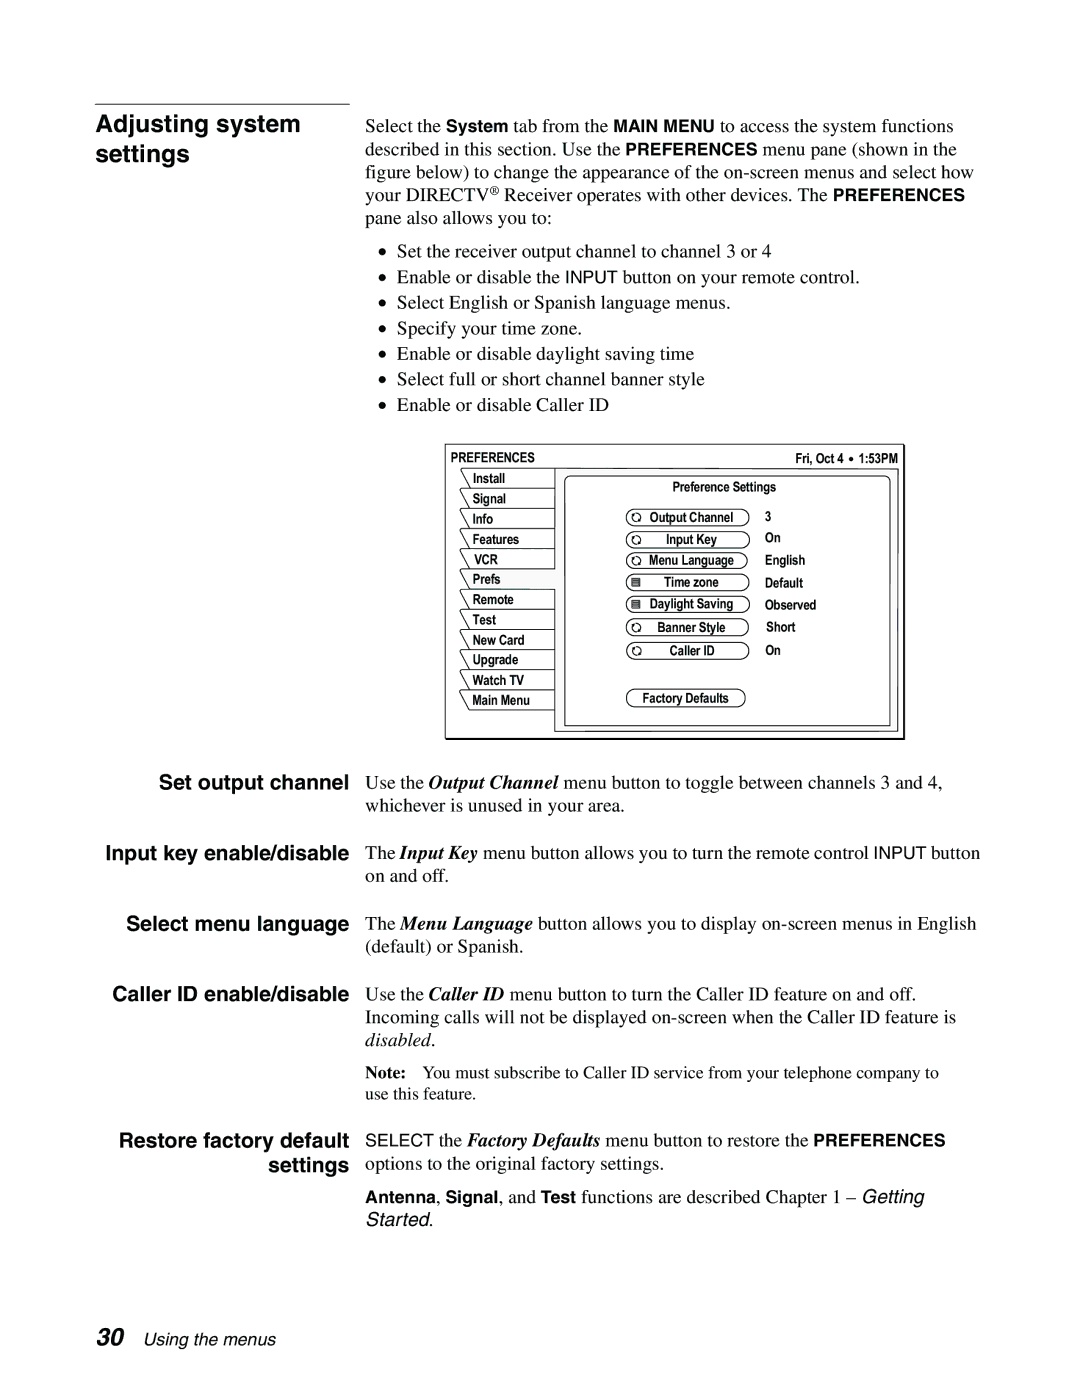
Select the System tab from the MAIN MENU to access the system functions described in this section. Use the PREFERENCES menu pane (shown in the figure below) to change the appearance of the
•Set the receiver output channel to channel 3 or 4
•Enable or disable the INPUT button on your remote control.
•Select English or Spanish language menus.
•Specify your time zone.
•Enable or disable daylight saving time
•Select full or short channel banner style
•Enable or disable Caller ID
PREFERENCES |
| Fri, Oct 4 | 1:53PM |
Install | Preference Settings |
| |
Signal |
| ||
|
|
| |
Info | Output Channel | 3 |
|
Features | Input Key | On |
|
VCR | Menu Language | English |
|
Prefs | Time zone | Default |
|
Test |
| ||
Remote | Daylight Saving | Observed |
|
Test |
| ||
Banner Style | Short |
| |
New Card |
| ||
Caller ID | On |
| |
Upgrade |
| ||
|
|
| |
Watch TV |
|
|
|
Main Menu | Factory Defaults |
|
|
Set output channel Use the Output Channel menu button to toggle between channels 3 and 4, whichever is unused in your area.
Input key enable/disable The Input Key menu button allows you to turn the remote control INPUT button on and off.
Select menu language The Menu Language button allows you to display
Caller ID enable/disable Use the Caller ID menu button to turn the Caller ID feature on and off. Incoming calls will not be displayed
Note: You must subscribe to Caller ID service from your telephone company to use this feature.
Restore factory default settings
SELECT the Factory Defaults menu button to restore the PREFERENCES options to the original factory settings.
Antenna, Signal, and Test functions are described Chapter 1 – Getting Started.
30 Using the menus
