For Husqvarna Parts Call 606-678-9623 or 606-561-4983
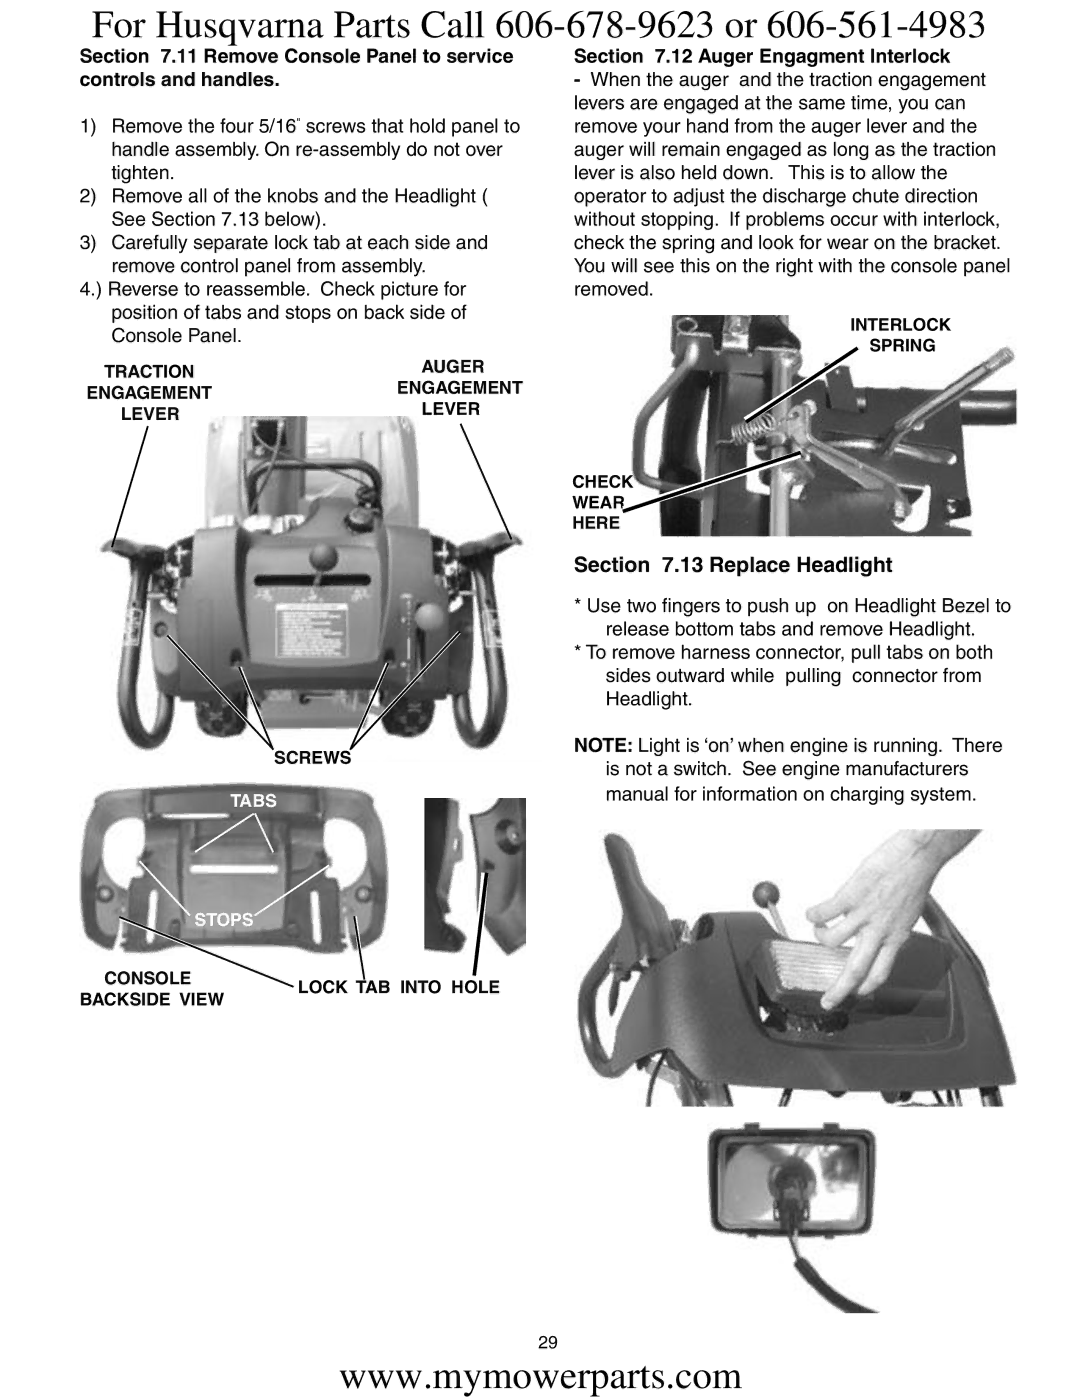
Section 7.11 Remove Console Panel to service controls and handles.
1)Remove the four 5/16" screws that hold panel to handle assembly. On
2)Remove all of the knobs and the Headlight ( See Section 7.13 below).
3)Carefully separate lock tab at each side and remove control panel from assembly.
4.) Reverse to reassemble. Check picture for position of tabs and stops on back side of Console Panel.
TRACTION | AUGER |
ENGAGEMENT | ENGAGEMENT |
LEVER | LEVER |
SCREWS
Section 7.12 Auger Engagment Interlock
-When the auger and the traction engagement levers are engaged at the same time, you can remove your hand from the auger lever and the auger will remain engaged as long as the traction lever is also held down. This is to allow the operator to adjust the discharge chute direction without stopping. If problems occur with interlock, check the spring and look for wear on the bracket. You will see this on the right with the console panel removed.
INTERLOCK
SPRING
CHECK
WEAR
HERE
Section 7.13 Replace Headlight
*Use two fingers to push up on Headlight Bezel to release bottom tabs and remove Headlight.
*To remove harness connector, pull tabs on both sides outward while pulling connector from Headlight.
NOTE: Light is ‘on’ when engine is running. There is not a switch. See engine manufacturers
TABS | manual for information on charging system. |
|
STOPS |
| |
CONSOLE | LOCK TAB INTO HOLE | |
BACKSIDE VIEW | ||
|
29
www.mymowerparts.com