For Husqvarna Parts Call 606-678-9623 or 606-561-4983
7.37 Remove and replace engine. | 7) | Remove Frame Bottom Pan (Section 7.42). |
| 8) | Remove Drive Plate Assy. (Section 7.43). |
1)Remove belt cover ( Sections 7.31 & 7.32).
2)Remove both belts from engine pulleys. See page 20
FRAME SLOT
FOR
DRIVE PLATE
DRIVE SPRING
3)Tape idler Spring to outside of powerhead body. IDLER BRACKET ENGINE PULLEYS
BELT GUIDE
DRIVE BELT
4)Remove traction drive belt idler bracket, belt guide for auger drive, and engine pulleys.
BARREL
 CONNECTOR
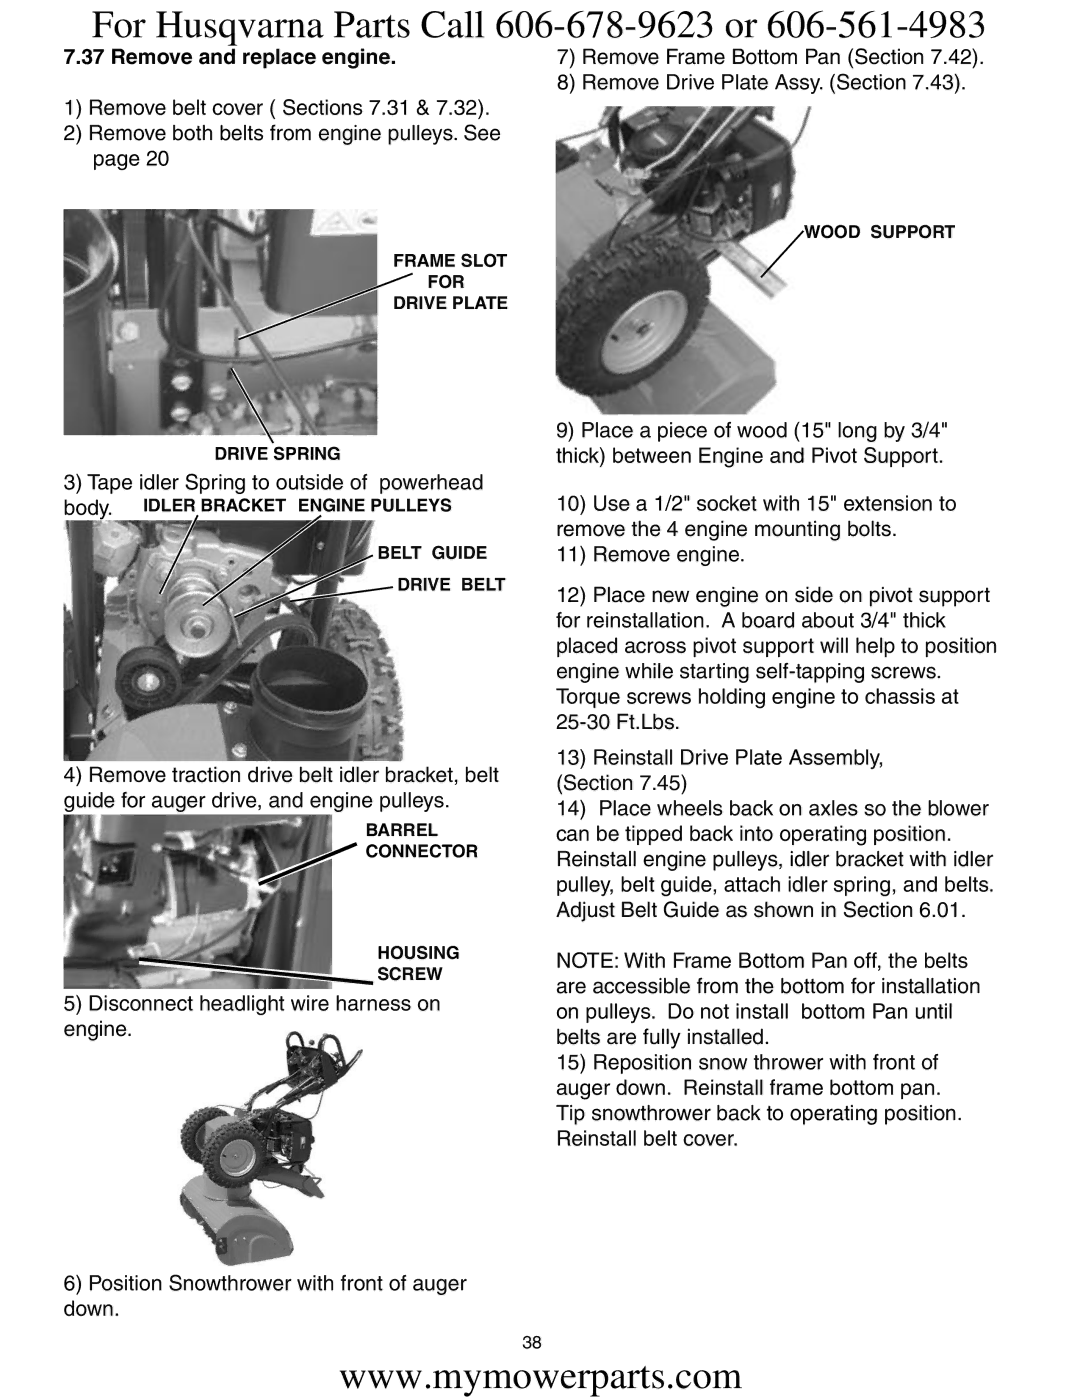
WOOD SUPPORT
9)Place a piece of wood (15" long by 3/4" thick) between Engine and Pivot Support.
10)Use a 1/2" socket with 15" extension to remove the 4 engine mounting bolts.
11)Remove engine.
12)Place new engine on side on pivot support for reinstallation. A board about 3/4" thick placed across pivot support will help to position engine while starting
13)Reinstall Drive Plate Assembly,
(Section 7.45)
14)Place wheels back on axles so the blower can be tipped back into operating position. Reinstall engine pulleys, idler bracket with idler pulley, belt guide, attach idler spring, and belts. Adjust Belt Guide as shown in Section 6.01.
HOUSING
SCREW
5)Disconnect headlight wire harness on engine.
6)Position Snowthrower with front of auger down.
NOTE: With Frame Bottom Pan off, the belts are accessible from the bottom for installation on pulleys. Do not install bottom Pan until belts are fully installed.
15)Reposition snow thrower with front of auger down. Reinstall frame bottom pan. Tip snowthrower back to operating position. Reinstall belt cover.
38
www.mymowerparts.com