Installation and
Rectifier meter accuracy
The rectifier's current meter is precise within + 2%.
Start-up and verification
Repeat the following steps for each rectifier in turn.
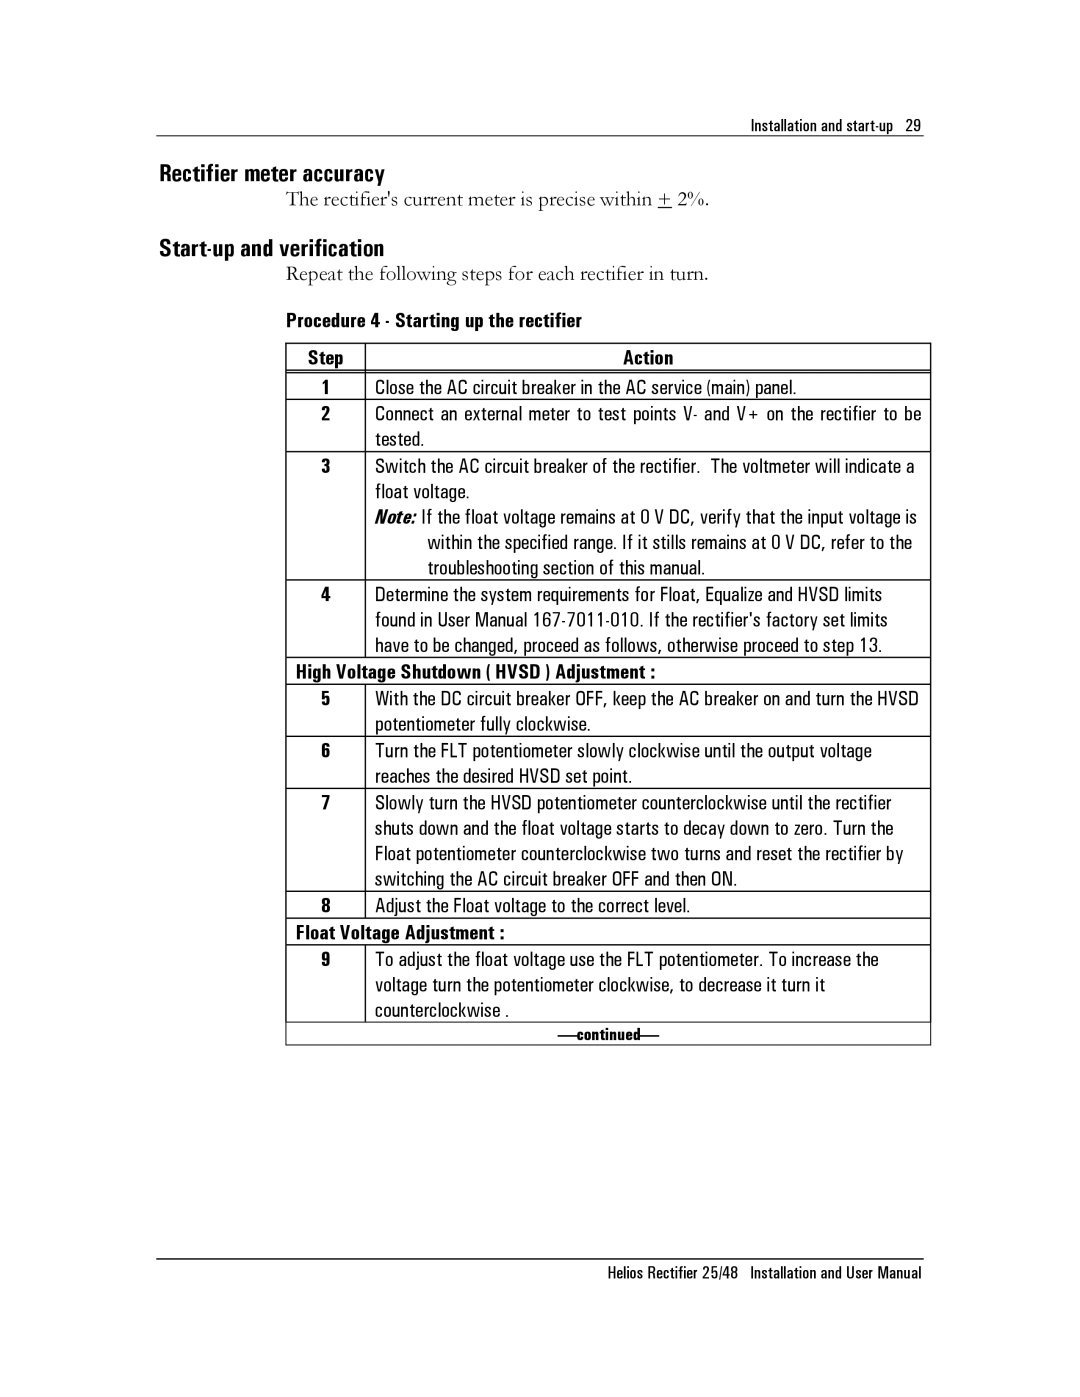
Procedure 4 - Starting up the rectifier
Step | Action |
1Close the AC circuit breaker in the AC service (main) panel.
2Connect an external meter to test points V- and V+ on the rectifier to be tested.
3Switch the AC circuit breaker of the rectifier. The voltmeter will indicate a float voltage.
Note: If the float voltage remains at 0 V DC, verify that the input voltage is within the specified range. If it stills remains at 0 V DC, refer to the troubleshooting section of this manual.
4Determine the system requirements for Float, Equalize and HVSD limits found in User Manual
High Voltage Shutdown ( HVSD ) Adjustment :
5With the DC circuit breaker OFF, keep the AC breaker on and turn the HVSD potentiometer fully clockwise.
6Turn the FLT potentiometer slowly clockwise until the output voltage reaches the desired HVSD set point.
7Slowly turn the HVSD potentiometer counterclockwise until the rectifier shuts down and the float voltage starts to decay down to zero. Turn the Float potentiometer counterclockwise two turns and reset the rectifier by switching the AC circuit breaker OFF and then ON.
8Adjust the Float voltage to the correct level.
Float Voltage Adjustment :
9To adjust the float voltage use the FLT potentiometer. To increase the voltage turn the potentiometer clockwise, to decrease it turn it
counterclockwise .
continued
Helios Rectifier 25/48 Installation and User Manual