
SEIJ98006 specifications
The Epson SEIJ98006 is an advanced printer that brings together innovative technologies and outstanding features to cater to the needs of professionals and businesses alike. Known for its high-quality output and reliable performance, the SEIJ98006 is a perfect choice for those seeking a robust printing solution.One of the standout features of the Epson SEIJ98006 is its wide color gamut, which is made possible by Epson's PrecisionCore technology. This innovative print head technology enables the printer to produce vibrant colors and sharp details, resulting in professional-quality prints. Additionally, the device supports various media types and sizes, allowing users to print everything from business documents to creative marketing materials effortlessly.
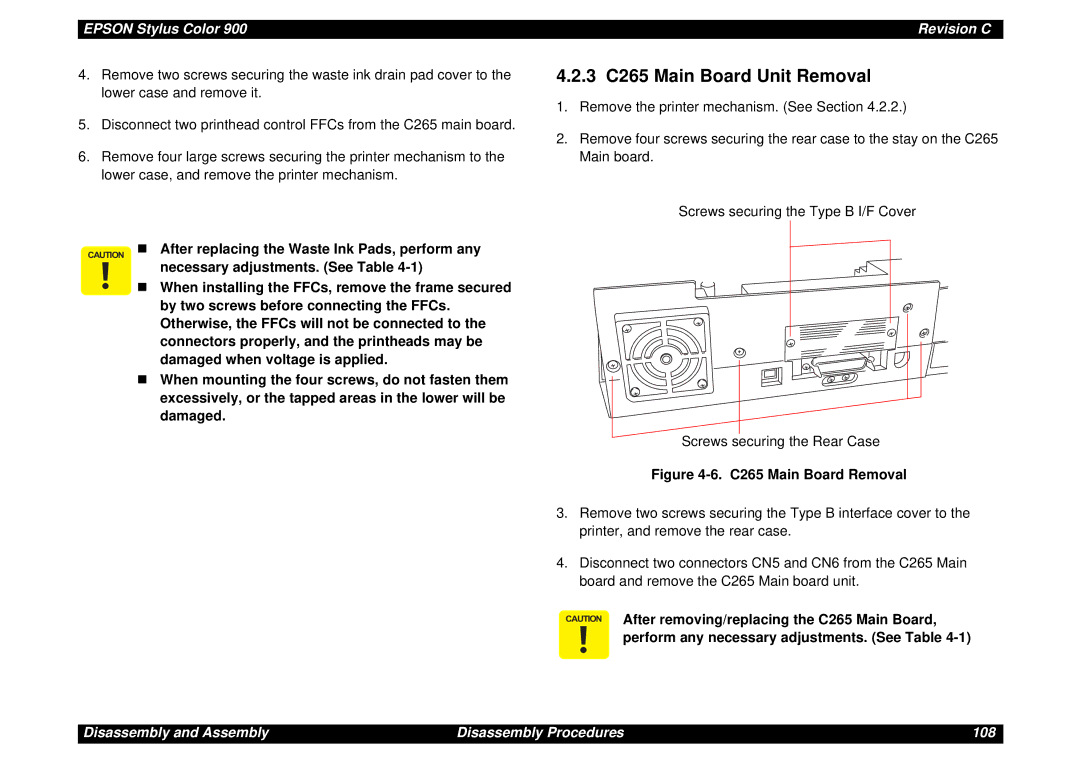
The SEIJ98006 also boasts a high print resolution of up to 4800 x 2400 dpi, ensuring that images and text are rendered with exceptional clarity. This level of precision is particularly beneficial for graphic designers and photographers who require accurate color reproduction and intricate detail in their work. Furthermore, the printer is equipped with advanced ink formulation, which enhances print longevity and reduces the risk of fading over time.
Speed is another key attribute of the Epson SEIJ98006. With its fast printing capabilities, users can expect quick turnaround times, enabling greater productivity. The printer can handle large print jobs with ease, making it an ideal choice for busy offices and print shops.
Connectivity is seamless with the SEIJ98006, as it supports a variety of options, including USB, Ethernet, and wireless printing. This versatility allows users to connect to multiple devices, streamlining the workflow in any setting. The printer is compatible with mobile printing solutions, enabling users to print directly from their smartphones and tablets, which further enhances convenience.
Finally, the maintenance of the Epson SEIJ98006 is user-friendly, thanks to its easy-to-replace ink cartridges and self-cleaning print head technology. This ensures that the printer remains in optimal condition without requiring extensive oversight, allowing users to focus on their work rather than on printer upkeep.
In summary, the Epson SEIJ98006 combines advanced printing technologies, high performance, and user-friendly features to deliver high-quality results for a diverse range of applications. Whether for business or creative purposes, this printer stands out as a reliable choice for those seeking efficiency and excellence in their printing needs.