30
Installation instructions
Connecting gas to your dryer (gas models only)
4A listed connector in compliance with ANSI Z21.24/CSA6.10 must be used to connect the dryer to the gas supply.
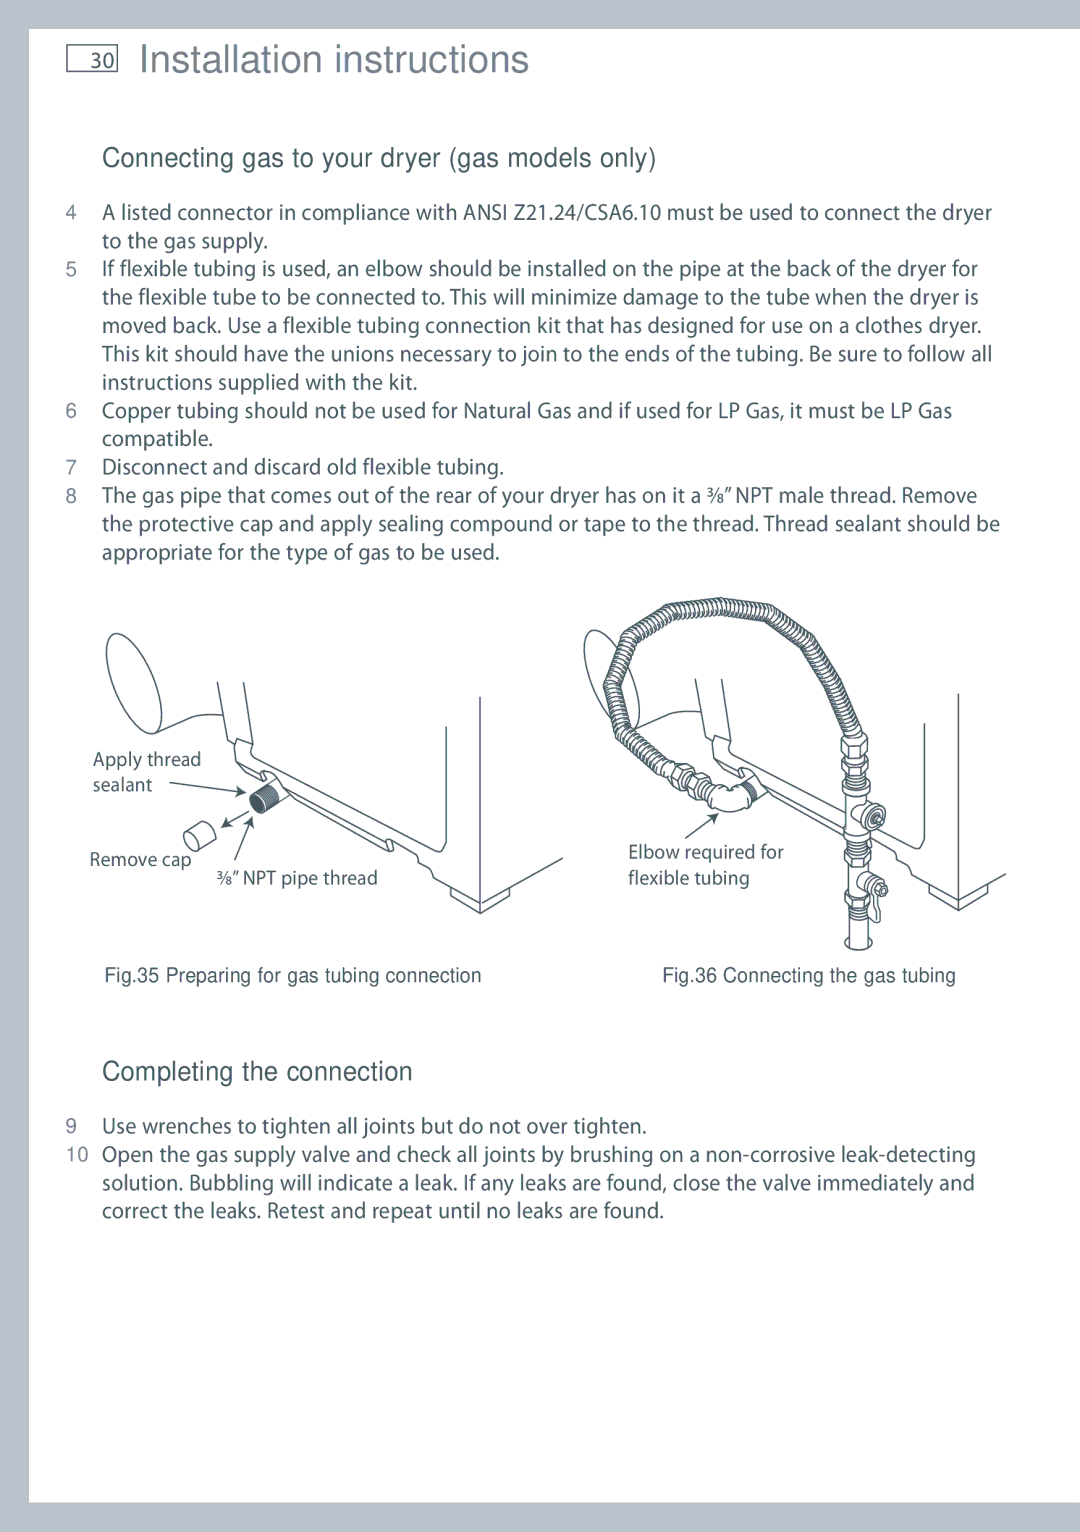
5If flexible tubing is used, an elbow should be installed on the pipe at the back of the dryer for the flexible tube to be connected to. This will minimize damage to the tube when the dryer is moved back. Use a flexible tubing connection kit that has designed for use on a clothes dryer. This kit should have the unions necessary to join to the ends of the tubing. Be sure to follow all instructions supplied with the kit.
6Copper tubing should not be used for Natural Gas and if used for LP Gas, it must be LP Gas compatible.
7Disconnect and discard old flexible tubing.
8The gas pipe that comes out of the rear of your dryer has on it a 3⁄8” NPT male thread. Remove the protective cap and apply sealing compound or tape to the thread. Thread sealant should be appropriate for the type of gas to be used.
Apply thread sealant
Remove cap | Elbow required for |
3⁄8” NPT pipe thread | flexible tubing |
Fig.35 Preparing for gas tubing connection | Fig.36 Connecting the gas tubing |
Completing the connection
9Use wrenches to tighten all joints but do not over tighten.
10Open the gas supply valve and check all joints by brushing on a