Basic Operation 2
Capturing Images
Note
The Japanese model of the Ti20 requires you to press and hold Fto turn on the laser and keep it on. When you release F, the laser turns off.
Capturing Images
Recording images is a simple process but before starting you should note the current image location number. If you have not stored any images, the location number should be set at 1 (default) and the location descriptor will be blank. Each captured image is numbered, so you may refer to images by number. The Imager can store up to 50 images.
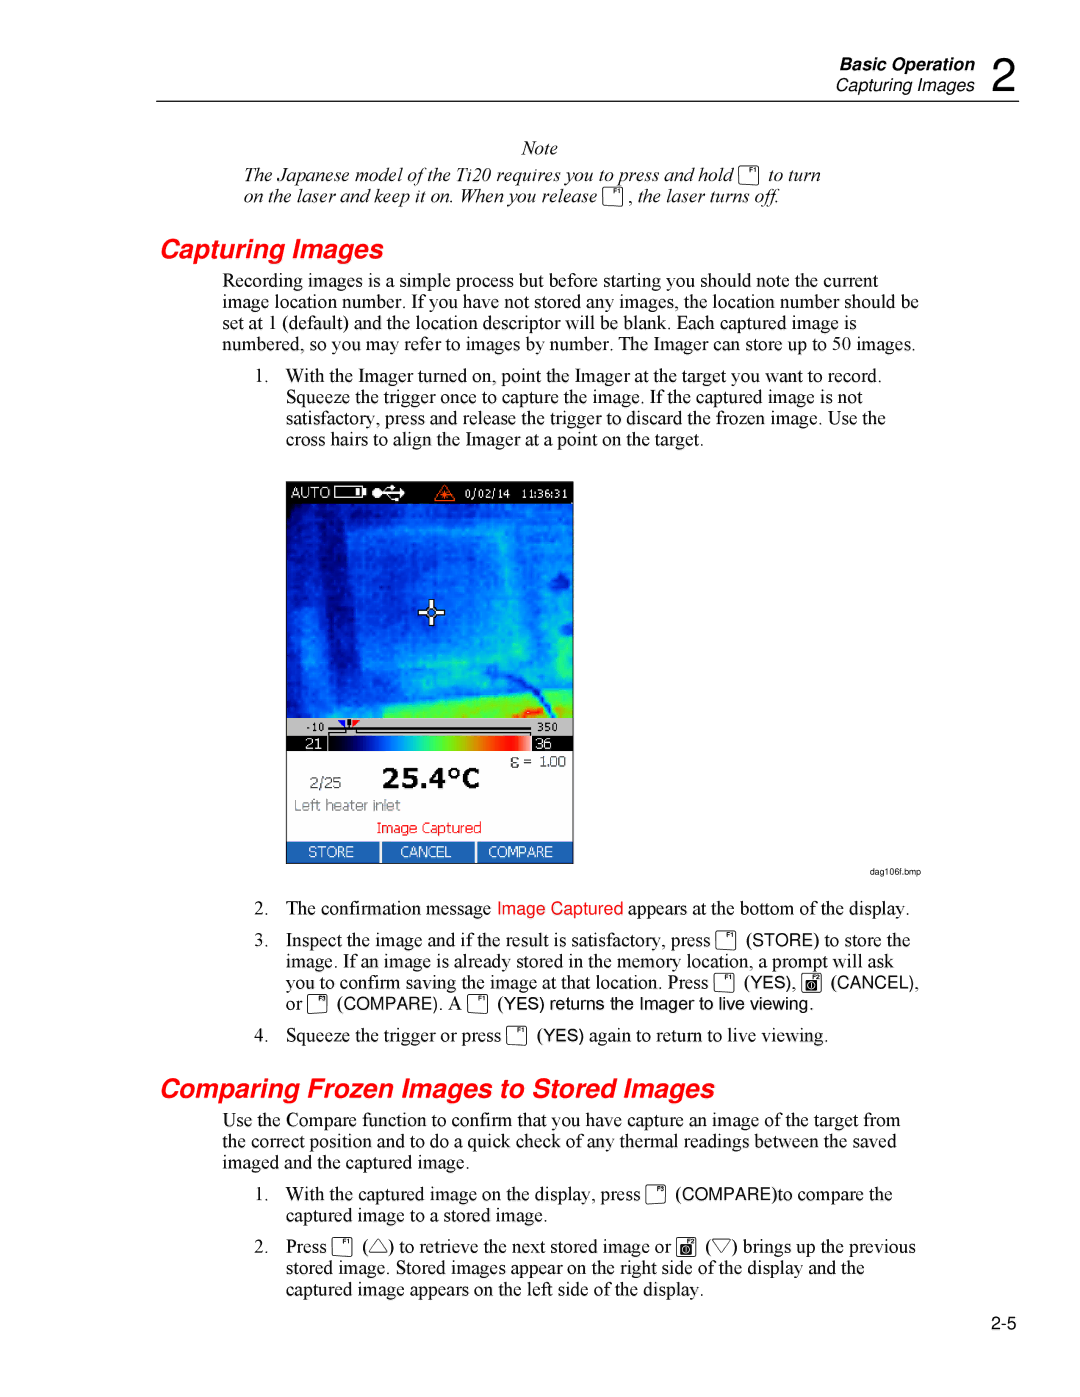
1.With the Imager turned on, point the Imager at the target you want to record. Squeeze the trigger once to capture the image. If the captured image is not satisfactory, press and release the trigger to discard the frozen image. Use the cross hairs to align the Imager at a point on the target.
dag106f.bmp
2.The confirmation message Image Captured appears at the bottom of the display.
3.Inspect the image and if the result is satisfactory, press F(STORE) to store the image. If an image is already stored in the memory location, a prompt will ask you to confirm saving the image at that location. Press F(YES), G(CANCEL), or H(COMPARE). A F(YES) returns the Imager to live viewing.
4.Squeeze the trigger or press F(YES) again to return to live viewing.
Comparing Frozen Images to Stored Images
Use the Compare function to confirm that you have capture an image of the target from the correct position and to do a quick check of any thermal readings between the saved imaged and the captured image.
1.With the captured image on the display, press H(COMPARE)to compare the captured image to a stored image.
2.Press F(2) to retrieve the next stored image or G(1) brings up the previous stored image. Stored images appear on the right side of the display and the captured image appears on the left side of the display.
