DEAN MILLIVOLT GAS FRYERS
CHAPTER 3: INSTALLATION INSTRUCTIONS
3.3 Leveling the Fryer (cont.)
B.If the floor is uneven or has a decided slope, place the fryer on a smooth, level platform.
C.If the fryer is moved,
D.An installed fryer must be restrained to prevent tipping, which could splash hot oil. Restraints can be straps or chains anchored to an immovable object (wall, floor anchor), or the manner of installation (installing the fryer in an alcove, battering to other appliances, etc.).
![]() WARNING
WARNING
For caster retrofit, the unit must be at room temperature and drained of shortening
before installing the casters.
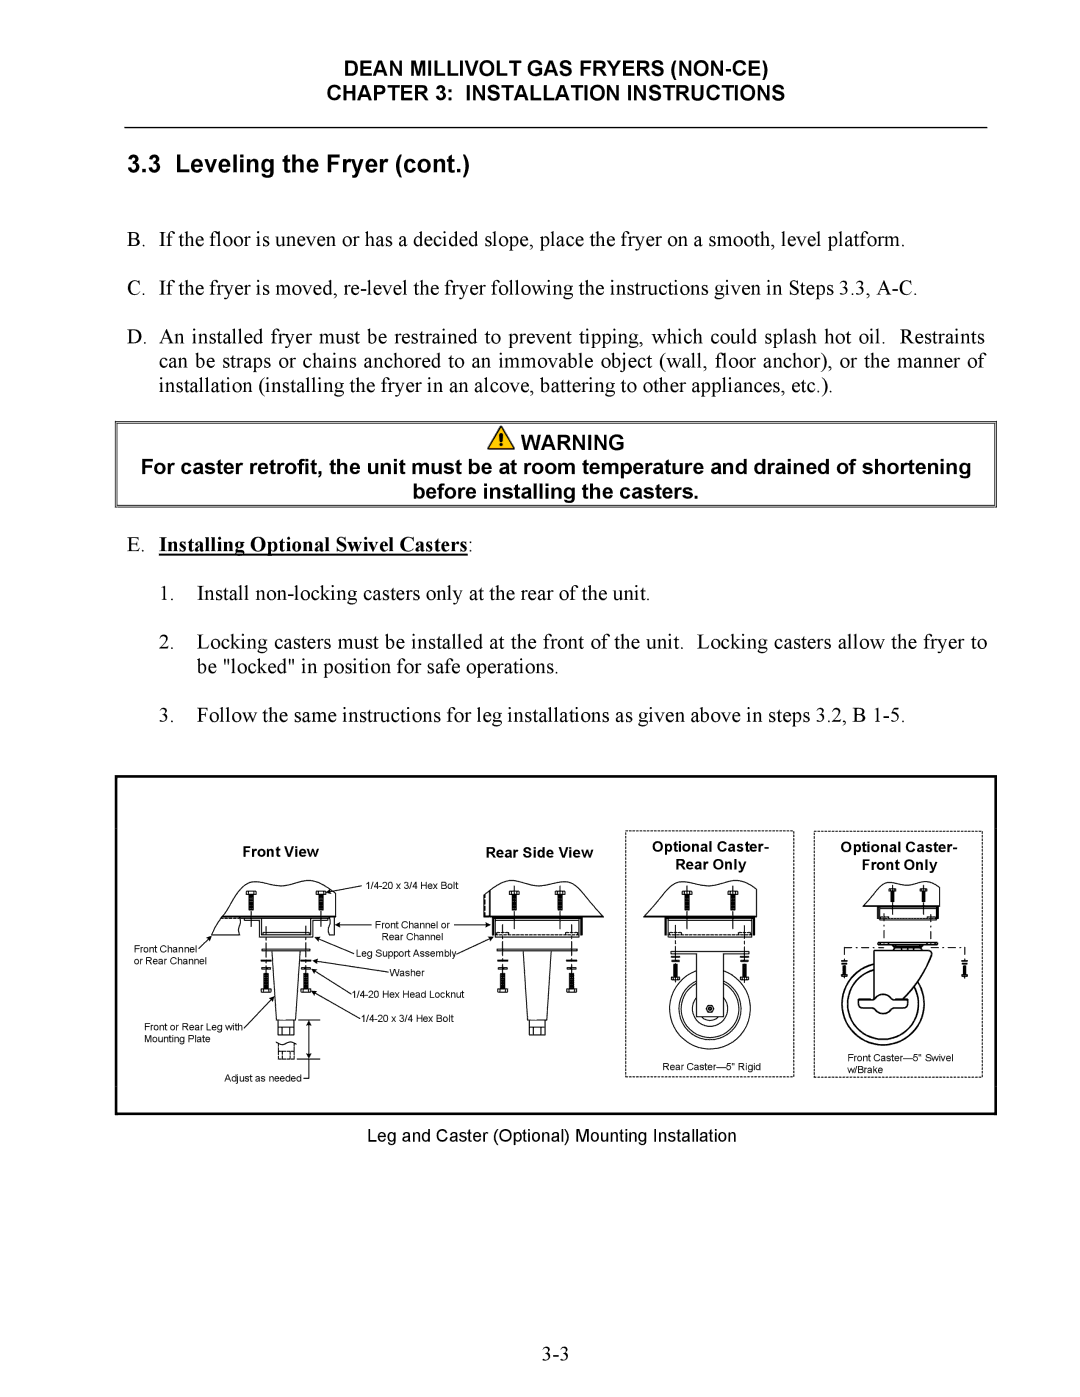
E.Installing Optional Swivel Casters:
1.Install
2.Locking casters must be installed at the front of the unit. Locking casters allow the fryer to be "locked" in position for safe operations.
3.Follow the same instructions for leg installations as given above in steps 3.2, B
Front ViewRear Side View
| ||
| Front Channel or | |
Front Channel | Rear Channel | |
Leg Support Assembly | ||
or Rear Channel | ||
Washer | ||
|
Optional Caster- | Optional Caster- |
Rear Only | Front Only |
Front or Rear Leg with Mounting Plate
Adjust as needed ![]()
Rear | Front |
w/Brake |
Leg and Caster (Optional) Mounting Installation
