Density button:
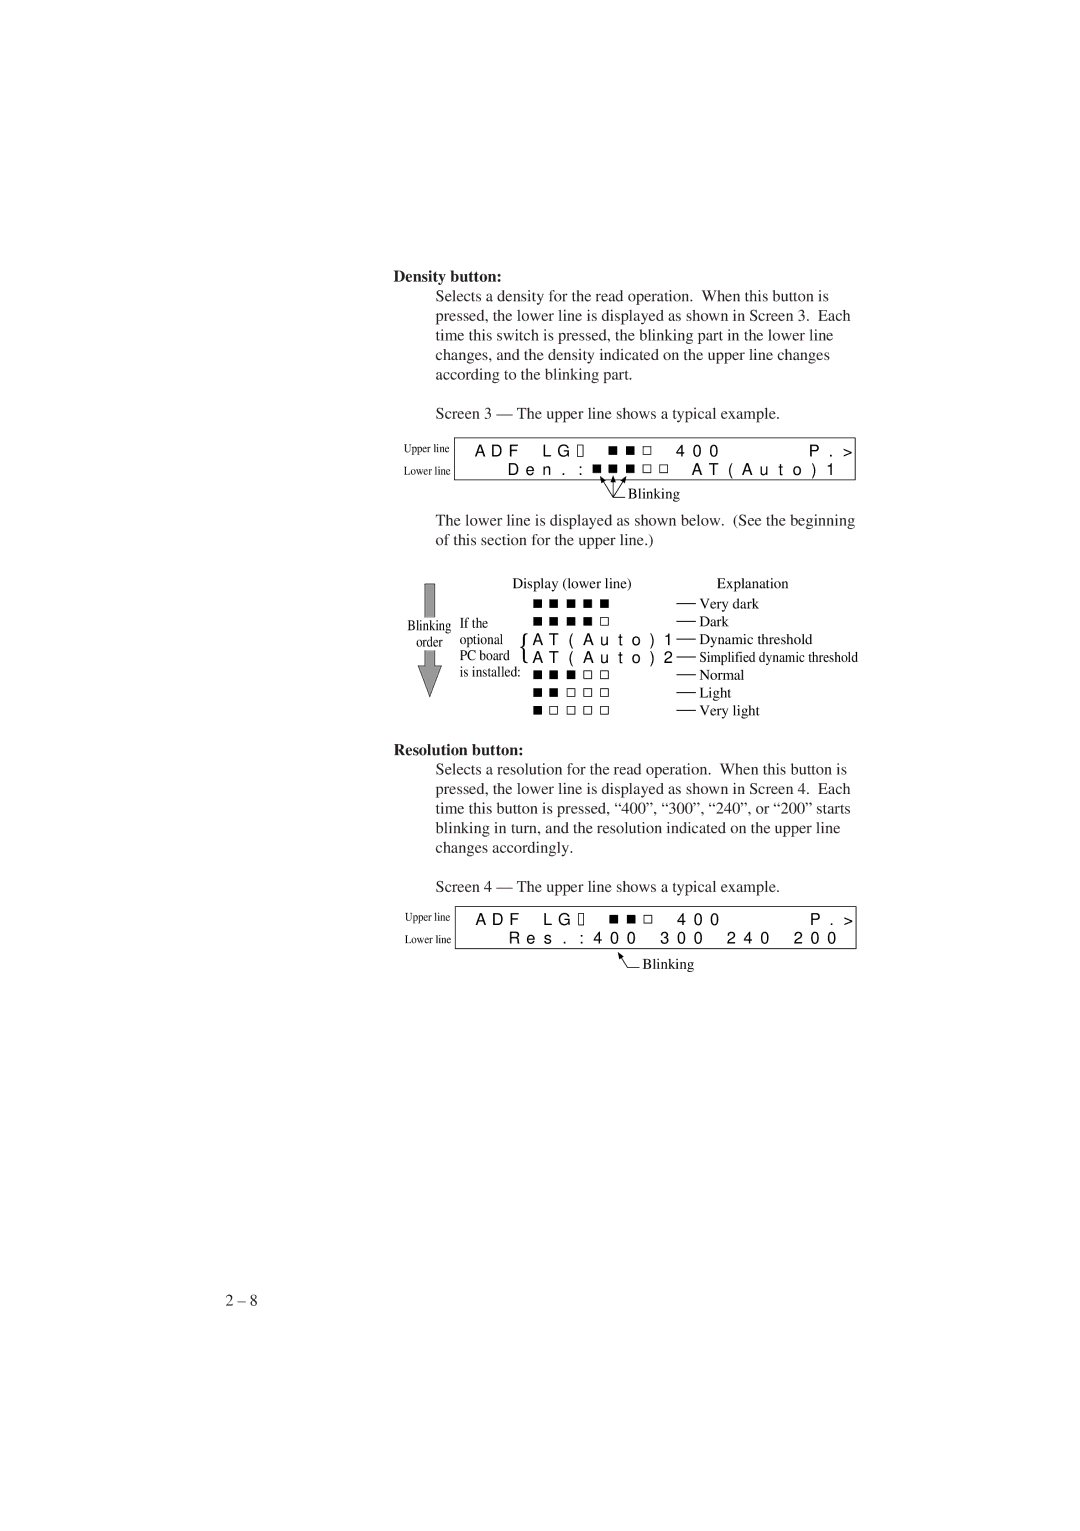
Selects a density for the read operation. When this button is pressed, the lower line is displayed as shown in Screen 3. Each time this switch is pressed, the blinking part in the lower line changes, and the density indicated on the upper line changes according to the blinking part.
Screen 3 — The upper line shows a typical example.
Upper line
Lower line
A D F L G |
|
|
| 4 0 0 | P . > | ||||
|
| ||||||||
|
| ||||||||
D e n . : |
|
|
|
|
|
|
| A T | ( A u t o ) 1 |
|
|
|
| ||||||
|
|
|
| ||||||
![]() Blinking
Blinking
The lower line is displayed as shown below. (See the beginning of this section for the upper line.)
|
|
|
| Display (lower line) |
|
|
| |||||||||||
|
|
| If the |
|
|
|
|
|
|
|
|
|
|
|
|
|
|
|
|
|
|
|
|
|
|
|
|
|
|
|
|
|
|
|
|
| |
|
|
|
|
|
|
|
|
|
|
|
|
|
|
|
|
|
| |
| Blinking |
|
|
|
|
|
|
|
|
|
|
|
|
|
|
|
| |
|
| {A T | ( | A u | t | o | ) | 1 | ||||||||||
| order |
| optional | |||||||||||||||
|
|
| PC board | A T | ( | A u | t | o | ) | 2 | ||||||||
is installed:
Explanation
Very dark Dark
Dynamic threshold Simplified dynamic threshold Normal
Light Very light
Resolution button:
Selects a resolution for the read operation. When this button is pressed, the lower line is displayed as shown in Screen 4. Each time this button is pressed, “400”, “300”, “240”, or “200” starts blinking in turn, and the resolution indicated on the upper line changes accordingly.
Screen 4 — The upper line shows a typical example.
Upper line
Lower line
A D F L G |
|
|
| 4 0 0 | P . > |
|
| ||||
|
|
R e s . : 4 0 0 3 0 0 2 4 0 2 0 0
![]() Blinking
Blinking
2 – 8
