!CAUTION
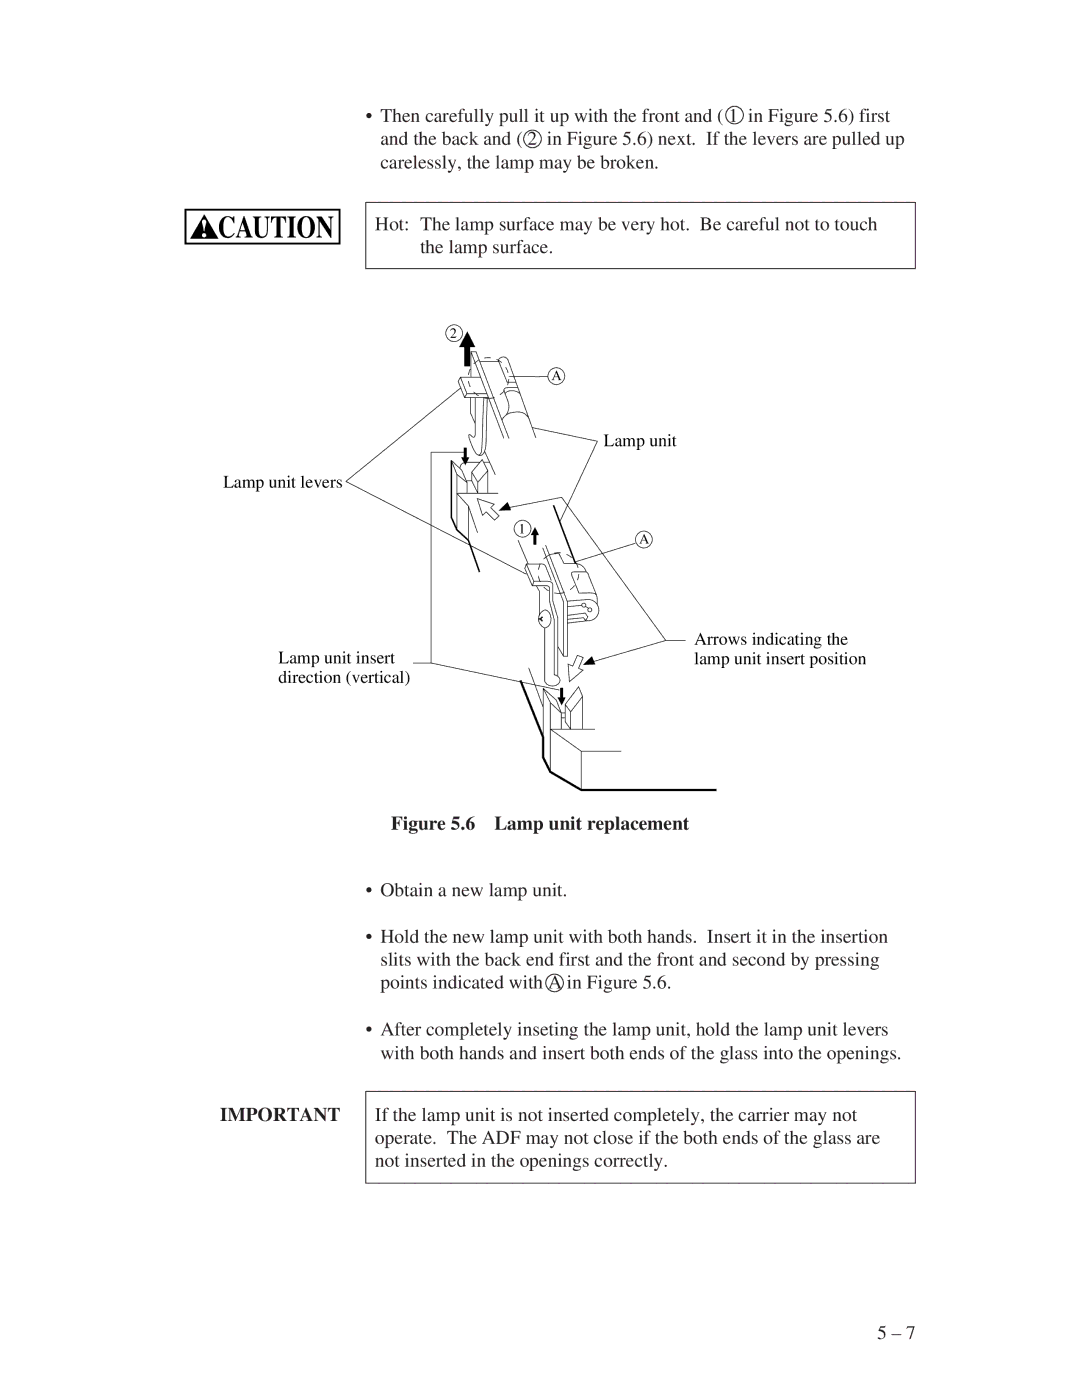
•Then carefully pull it up with the front and ( 1 in Figure 5.6) first and the back and ( 2 in Figure 5.6) next. If the levers are pulled up carelessly, the lamp may be broken.
Hot: The lamp surface may be very hot. Be careful not to touch the lamp surface.
2
A
Lamp unit
Lamp unit levers
1
A
Arrows indicating the
Lamp unit insert![]() lamp unit insert position direction (vertical)
lamp unit insert position direction (vertical)
Figure 5.6 Lamp unit replacement
IMPORTANT
•Obtain a new lamp unit.
•Hold the new lamp unit with both hands. Insert it in the insertion slits with the back end first and the front and second by pressing points indicated with A in Figure 5.6.
•After completely inseting the lamp unit, hold the lamp unit levers with both hands and insert both ends of the glass into the openings.
If the lamp unit is not inserted completely, the carrier may not operate. The ADF may not close if the both ends of the glass are not inserted in the openings correctly.
5 – 7