Installation Instructions
9LEVEL THE REFRIGERATOR
The leveling legs have 3 purposes:
1)Leveling legs adjust so the door closes easily when opened about halfway.
(Front of the refrigerator should be 1/4″ [6 mm] higher than the rear of the refrigerator).
2)Leveling legs adjust so the refrigerator is firmly positioned on the floor and does not wobble.
3)Leveling legs serve as a stabilizing brake to hold the refrigerator securely in position during operation and cleaning.
ATurn the leveling legs clockwise to raise the refrigerator, counterclockwise to lower it.
![]() CAUTION: To avoid possible personal injury or property damage, the leveling feet must be firmly touching the floor.
CAUTION: To avoid possible personal injury or property damage, the leveling feet must be firmly touching the floor.
BInstall the base grille by aligning the prongs on the back of the grille with the holes in the cabinet. Push forward until the grille snaps into place.
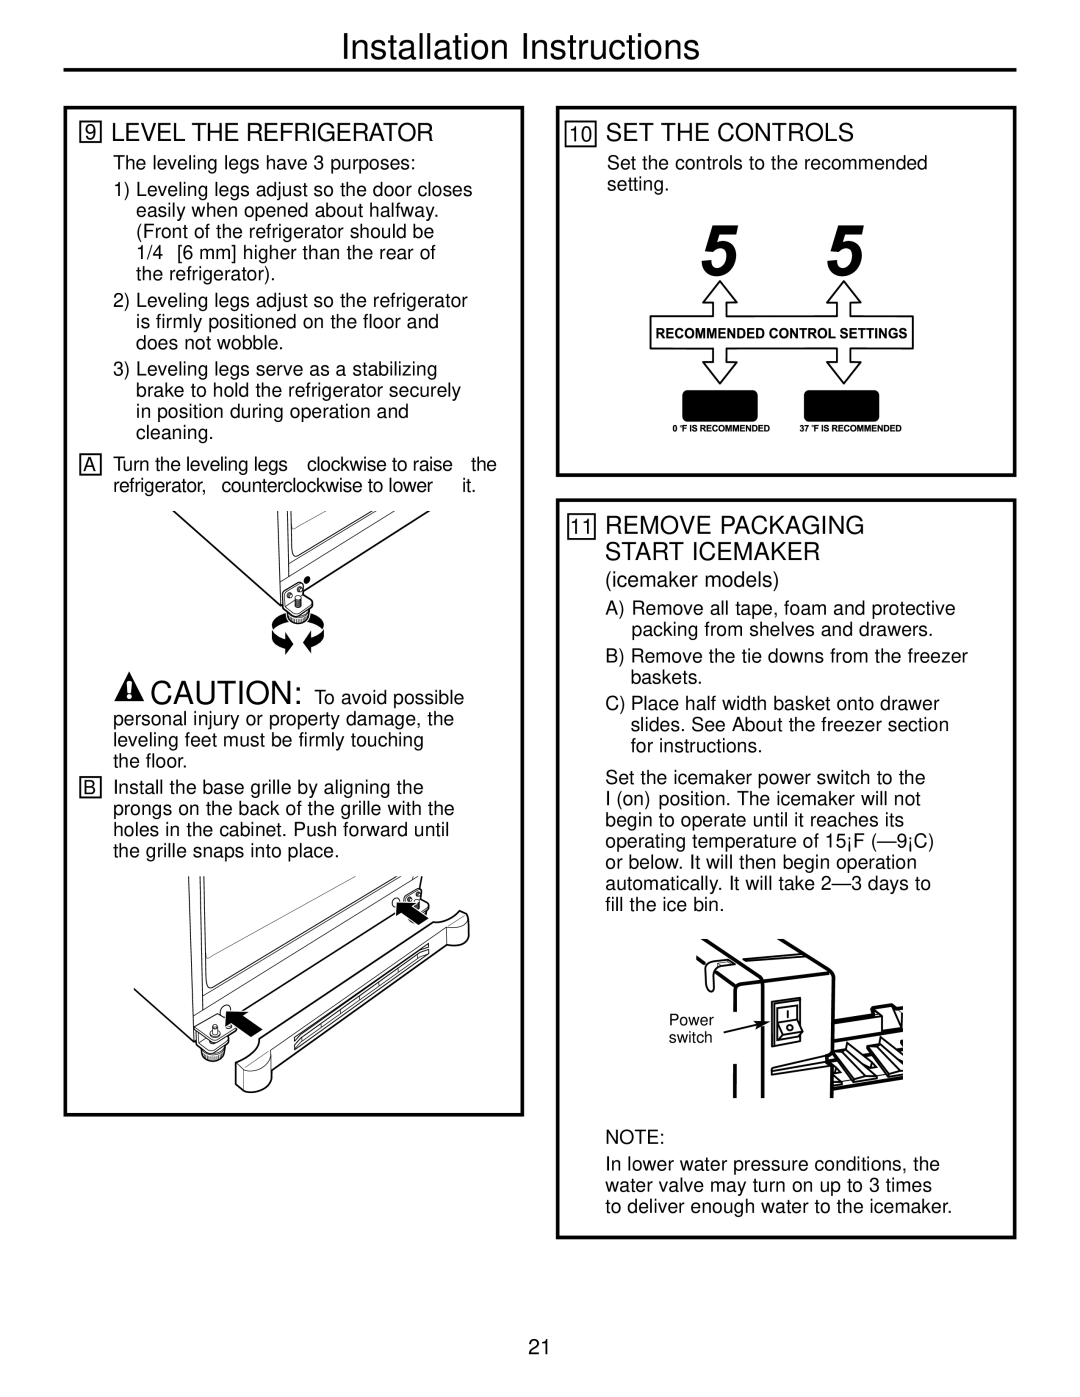
10SET THE CONTROLS
Set the controls to the recommended setting.
11REMOVE PACKAGING START ICEMAKER
(icemaker models)
A)Remove all tape, foam and protective packing from shelves and drawers.
B)Remove the tie downs from the freezer baskets.
C)Place half width basket onto drawer slides. See About the freezer section for instructions.
Set the icemaker power switch to the I (on) position. The icemaker will not begin to operate until it reaches its operating temperature of 15°F
Power switch
NOTE:
In lower water pressure conditions, the water valve may turn on up to 3 times to deliver enough water to the icemaker.
21