About the water filter. (on some models) | www.GEAppliances.com |
Water Filter Cartridge | Filter Bypass Plug |
Safety
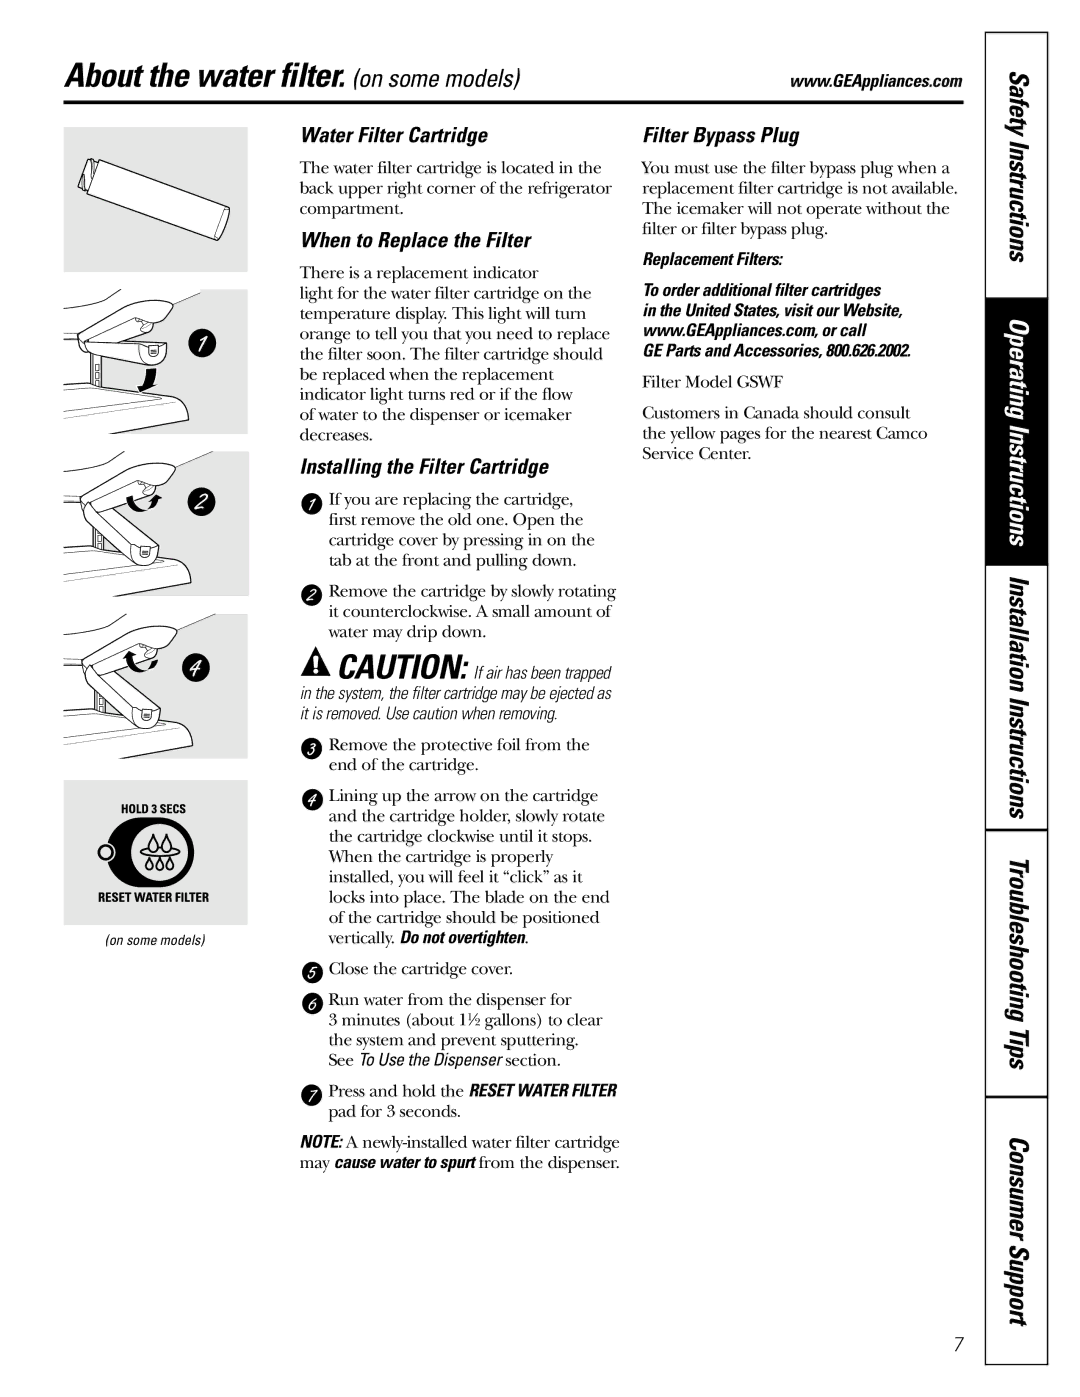
The water filter cartridge is located in the back upper right corner of the refrigerator compartment.
When to Replace the Filter
There is a replacement indicator
light for the water filter cartridge on the temperature display. This light will turn orange to tell you that you need to replace the filter soon. The filter cartridge should be replaced when the replacement indicator light turns red or if the flow
of water to the dispenser or icemaker decreases.
Installing the Filter Cartridge
If you are replacing the cartridge, first remove the old one. Open the cartridge cover by pressing in on the tab at the front and pulling down.
Remove the cartridge by slowly rotating it counterclockwise. A small amount of water may drip down.
![]() CAUTION: If air has been trapped in the system, the filter cartridge may be ejected as it is removed. Use caution when removing.
CAUTION: If air has been trapped in the system, the filter cartridge may be ejected as it is removed. Use caution when removing.
![]() Remove the protective foil from the end of the cartridge.
Remove the protective foil from the end of the cartridge.
| Lining up the arrow on the cartridge |
| and the cartridge holder, slowly rotate |
| the cartridge clockwise until it stops. |
| When the cartridge is properly |
| installed, you will feel it “click” as it |
| locks into place. The blade on the end |
| of the cartridge should be positioned |
(on some models) | vertically. Do not overtighten. |
| Close the cartridge cover. |
| Run water from the dispenser for |
| 3 minutes (about 11⁄2 gallons) to clear |
| the system and prevent sputtering. |
| See To Use the Dispenser section. |
| Press and hold the RESET WATER FILTER |
| pad for 3 seconds. |
You must use the filter bypass plug when a replacement filter cartridge is not available. The icemaker will not operate without the filter or filter bypass plug.
Replacement Filters:
To order additional filter cartridges
in the United States, visit our Website, www.GEAppliances.com, or call
GE Parts and Accessories, 800.626.2002.
Filter Model GSWF
Customers in Canada should consult the yellow pages for the nearest Camco Service Center.
Instructions Operating Instructions Installation Instructions Troubleshooting Tips
NOTE: A
7
