60.Attach the Curl Pad (114) to the Curl Post (113) with two M6 x 16mm Screws (148).
60
114
113 | 148 |
61.Attach the Curl Bumper (141) to the Curl Bar (112) with an M4 x 16mm Screw (82).
Attach the Curl Pin (142) to the Curl Bar (112) with an M4 x 10mm Screw (95).
62.Make sure that all parts are properly tightened. The use of all remaining parts will be explained in ADJUSTMENT starting below.
61
142
95
![]()
![]() 141
141
![]()
![]()
![]()
![]()
![]()
![]() 82 112
82 112
Before using the weight bench, pull each cable a few times to make sure that the cable moves smoothly. If one of the cables does not move smoothly, find and correct the problem. IMPORTANT: If the cables are not prop- erly installed, they may be damaged when heavy weight is used. See the CABLE DIAGRAMS on pages 29 and 30 for proper cable routing. If there is any slack in the cables, you will need to remove it by tight- ening the cables. See MAINTENANCE on page 31.
ADJUSTMENT
This section explains how to adjust the weight bench. See the EXERCISE GUIDELINES on page 32 for impor- tant information about how to get the most benefit from your exercise program. Also, refer to the accompanying exercise guide to see the correct form for several exercises.
ATTACHING ACCESSORIES
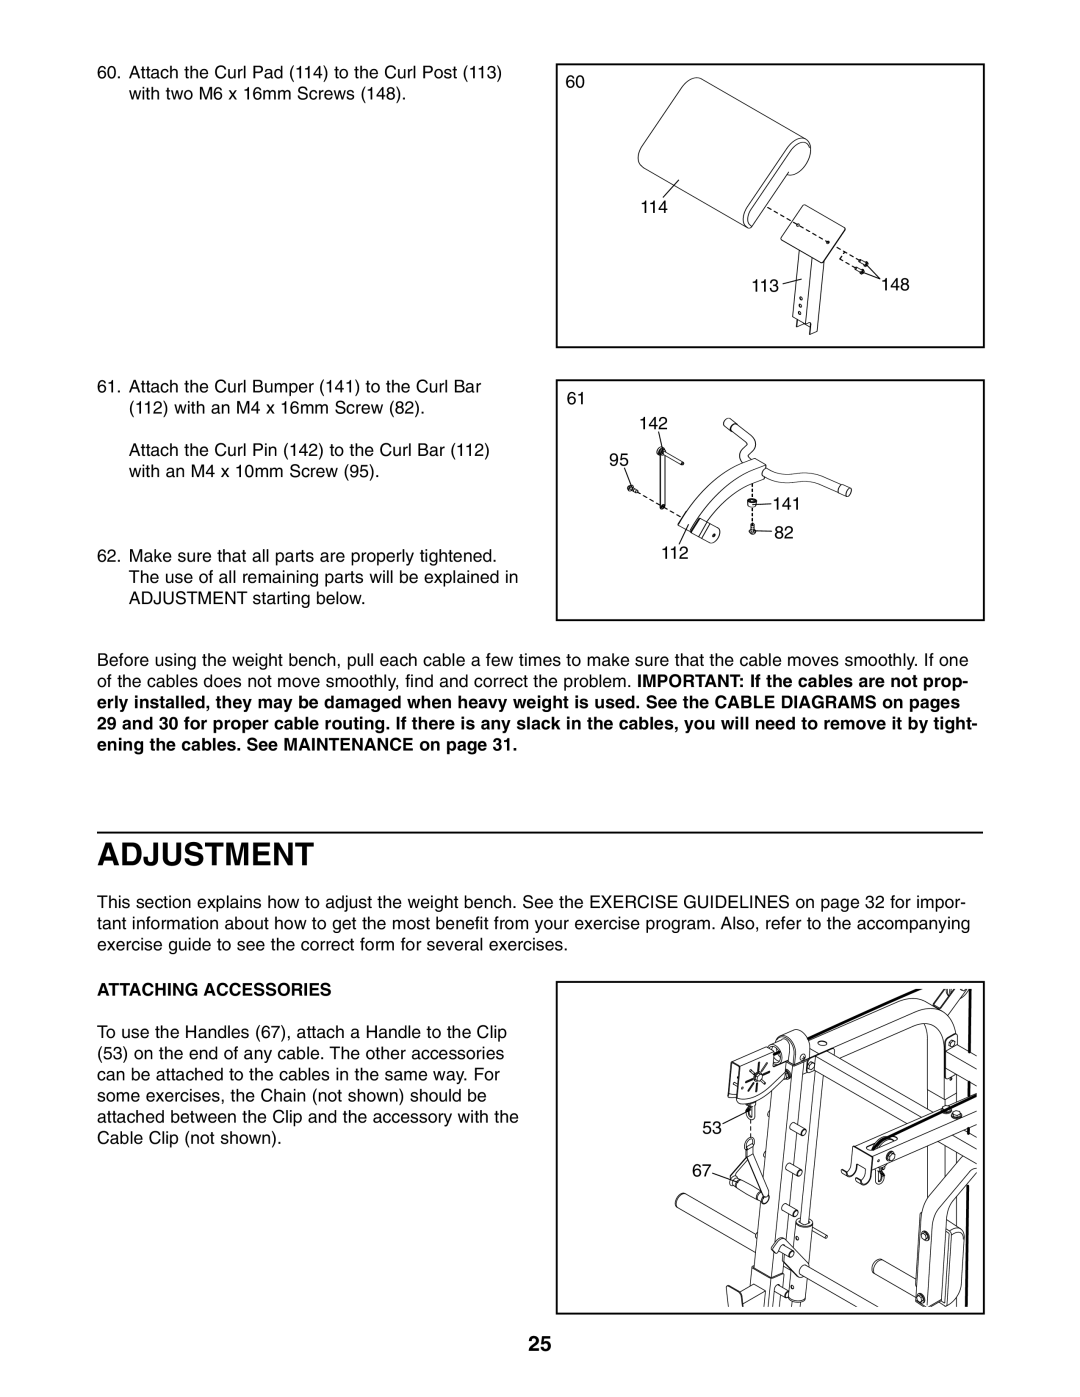
To use the Handles (67), attach a Handle to the Clip
(53)on the end of any cable. The other accessories can be attached to the cables in the same way. For some exercises, the Chain (not shown) should be attached between the Clip and the accessory with the Cable Clip (not shown).
53 |
67 |
25
