Follow these instructions to connect a Cable
Box to your DVD+VCR.
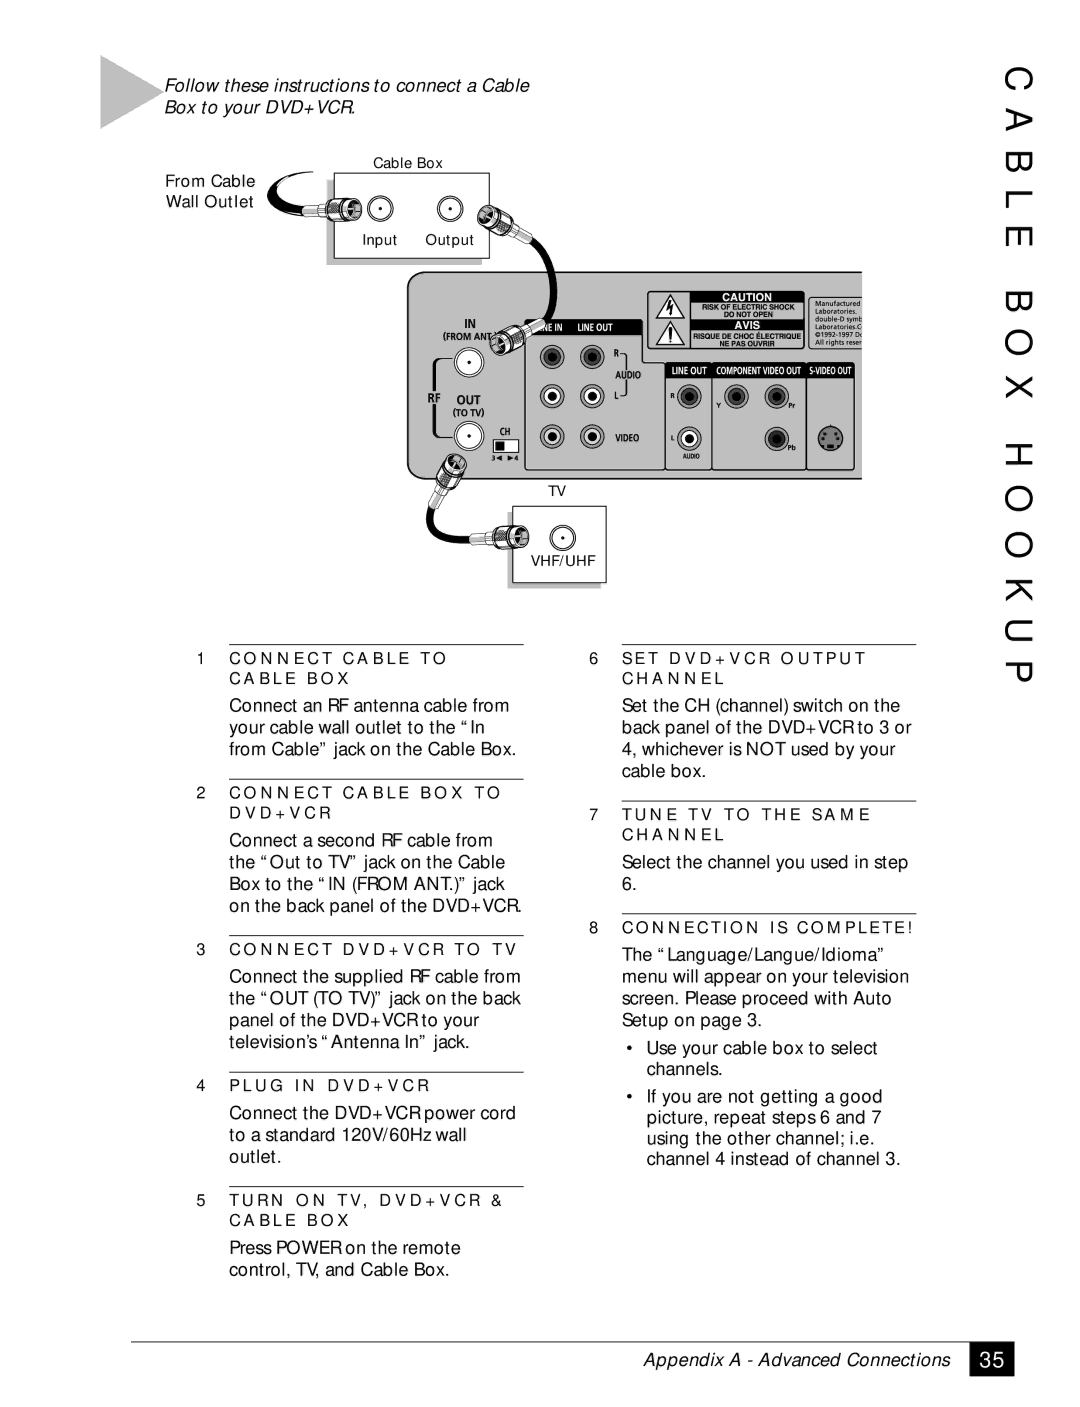
Cable Box
From Cable
Wall Outlet
Input Output
TV
VHF/UHF
1 C O N N E C T C A B L E T O | 6 S E T D V D + V C R O U T P U T |
C A B L E B O X | C H A N N E L |
C A B L E B O X H O O K U P
Connect an RF antenna cable from your cable wall outlet to the “In from Cable” jack on the Cable Box.
2C O N N E C T C A B L E B O X T O D V D + V C R
Connect a second RF cable from the “Out to TV” jack on the Cable Box to the “IN (FROM ANT.)” jack on the back panel of the DVD+VCR.
3C O N N E C T D V D + V C R T O T V
Connect the supplied RF cable from the “OUT (TO TV)” jack on the back panel of the DVD+VCR to your television’s “Antenna In” jack.
4P L U G I N D V D + V C R
Connect the DVD+VCR power cord to a standard 120V/60Hz wall outlet.
5 T U R N O N T V, D V D + V C R &
C A B L E B O X
Press POWER on the remote control, TV, and Cable Box.
Set the CH (channel) switch on the back panel of the DVD+VCR to 3 or 4, whichever is NOT used by your cable box.
7 T U N E T V T O T H E S A M E C H A N N E L
Select the channel you used in step 6.
8C O N N E C T I O N I S C O M P L E T E !
The “Language/Langue/Idioma” menu will appear on your television screen. Please proceed with Auto Setup on page 3.
•Use your cable box to select channels.
•If you are not getting a good picture, repeat steps 6 and 7 using the other channel; i.e. channel 4 instead of channel 3.
Appendix A - Advanced Connections
35