Priming and Calibration
Machine Priming
Before the machine can be properly calibrated with material, it will need to be primed.
Read all manufacturer’s warning and material MSDS to know the specific hazards of the material used.
From the Run Screen press ![]() then press
then press ![]() . The following screen will be displayed.
. The following screen will be displayed.
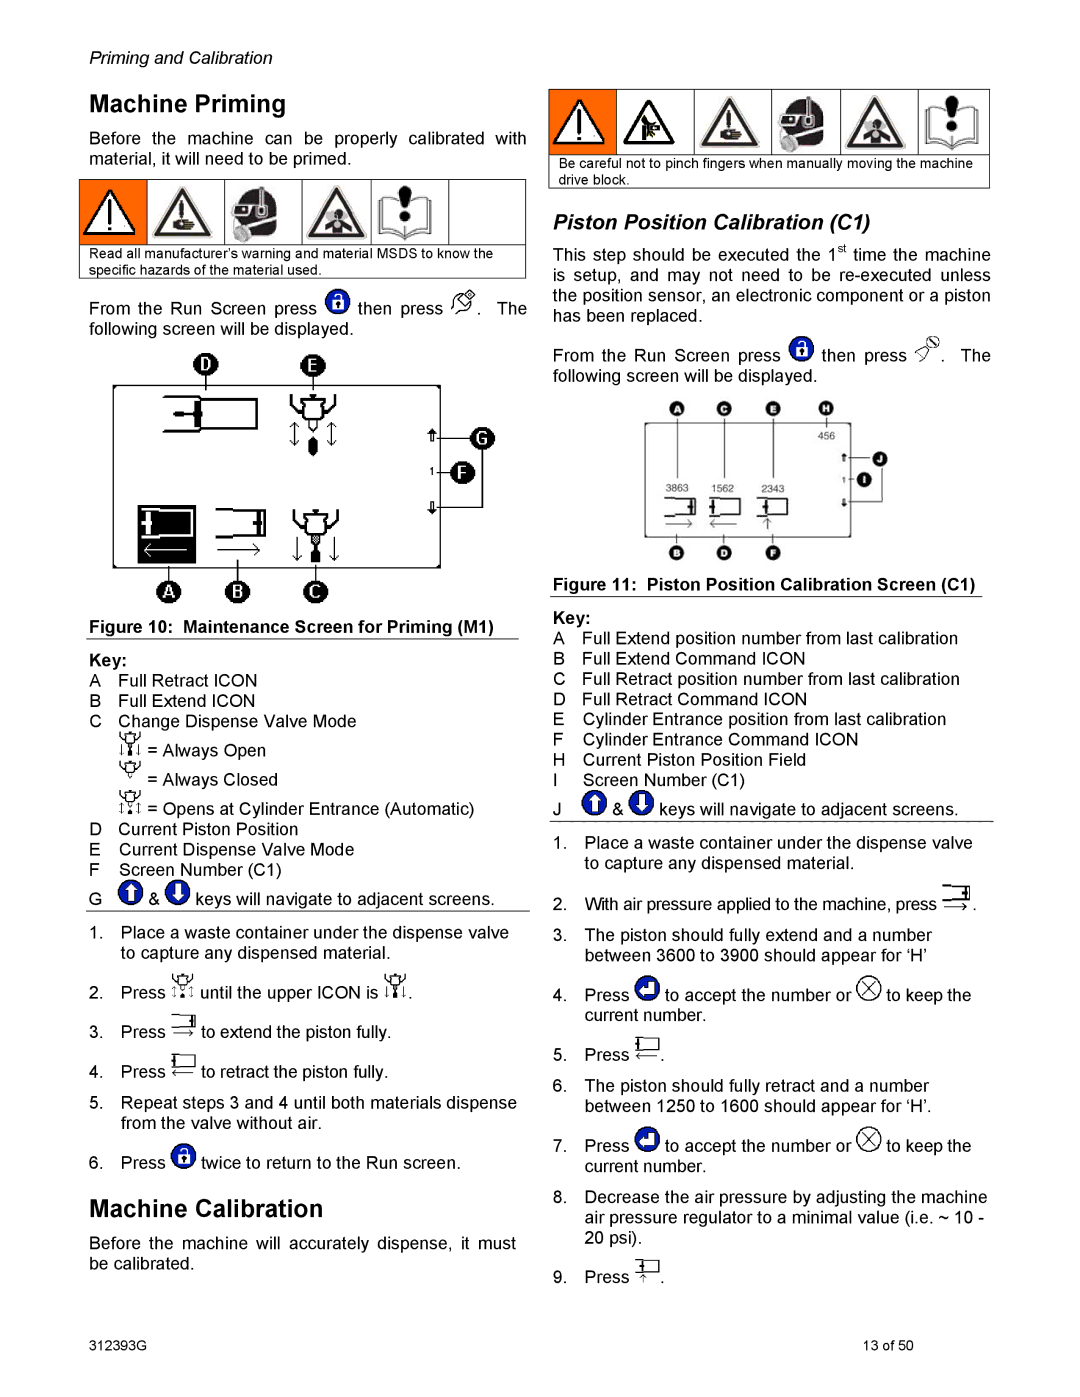
Figure 10: Maintenance Screen for Priming (M1)
Key:
AFull Retract ICON
BFull Extend ICON
CChange Dispense Valve Mode ![]() = Always Open
= Always Open
![]() = Always Closed
= Always Closed
![]() = Opens at Cylinder Entrance (Automatic)
= Opens at Cylinder Entrance (Automatic)
DCurrent Piston Position
ECurrent Dispense Valve Mode
FScreen Number (C1)
G![]() &
& ![]() keys will navigate to adjacent screens.
keys will navigate to adjacent screens.
1.Place a waste container under the dispense valve to capture any dispensed material.
2.Press ![]() until the upper ICON is
until the upper ICON is ![]() .
.
3.Press ![]() to extend the piston fully.
to extend the piston fully.
4.Press ![]() to retract the piston fully.
to retract the piston fully.
5.Repeat steps 3 and 4 until both materials dispense from the valve without air.
6.Press ![]() twice to return to the Run screen.
twice to return to the Run screen.
Machine Calibration
Before the machine will accurately dispense, it must be calibrated.
Be careful not to pinch fingers when manually moving the machine drive block.
Piston Position Calibration (C1)
This step should be executed the 1st time the machine is setup, and may not need to be
From the Run Screen press ![]() then press
then press ![]() . The following screen will be displayed.
. The following screen will be displayed.
Figure 11: Piston Position Calibration Screen (C1)
Key:
AFull Extend position number from last calibration
BFull Extend Command ICON
CFull Retract position number from last calibration
DFull Retract Command ICON
ECylinder Entrance position from last calibration
FCylinder Entrance Command ICON
HCurrent Piston Position Field
IScreen Number (C1)
J![]() &
& ![]() keys will navigate to adjacent screens.
keys will navigate to adjacent screens.
1.Place a waste container under the dispense valve to capture any dispensed material.
2.With air pressure applied to the machine, press ![]() .
.
3.The piston should fully extend and a number between 3600 to 3900 should appear for ‘H’
4.Press ![]() to accept the number or
to accept the number or ![]() to keep the current number.
to keep the current number.
5.Press ![]() .
.
6.The piston should fully retract and a number between 1250 to 1600 should appear for ‘H’.
7.Press ![]() to accept the number or
to accept the number or ![]() to keep the current number.
to keep the current number.
8.Decrease the air pressure by adjusting the machine air pressure regulator to a minimal value (i.e. ~ 10 - 20 psi).
9.Press ![]() .
.
312393G | 13 of 50 |