MAINTENANCE
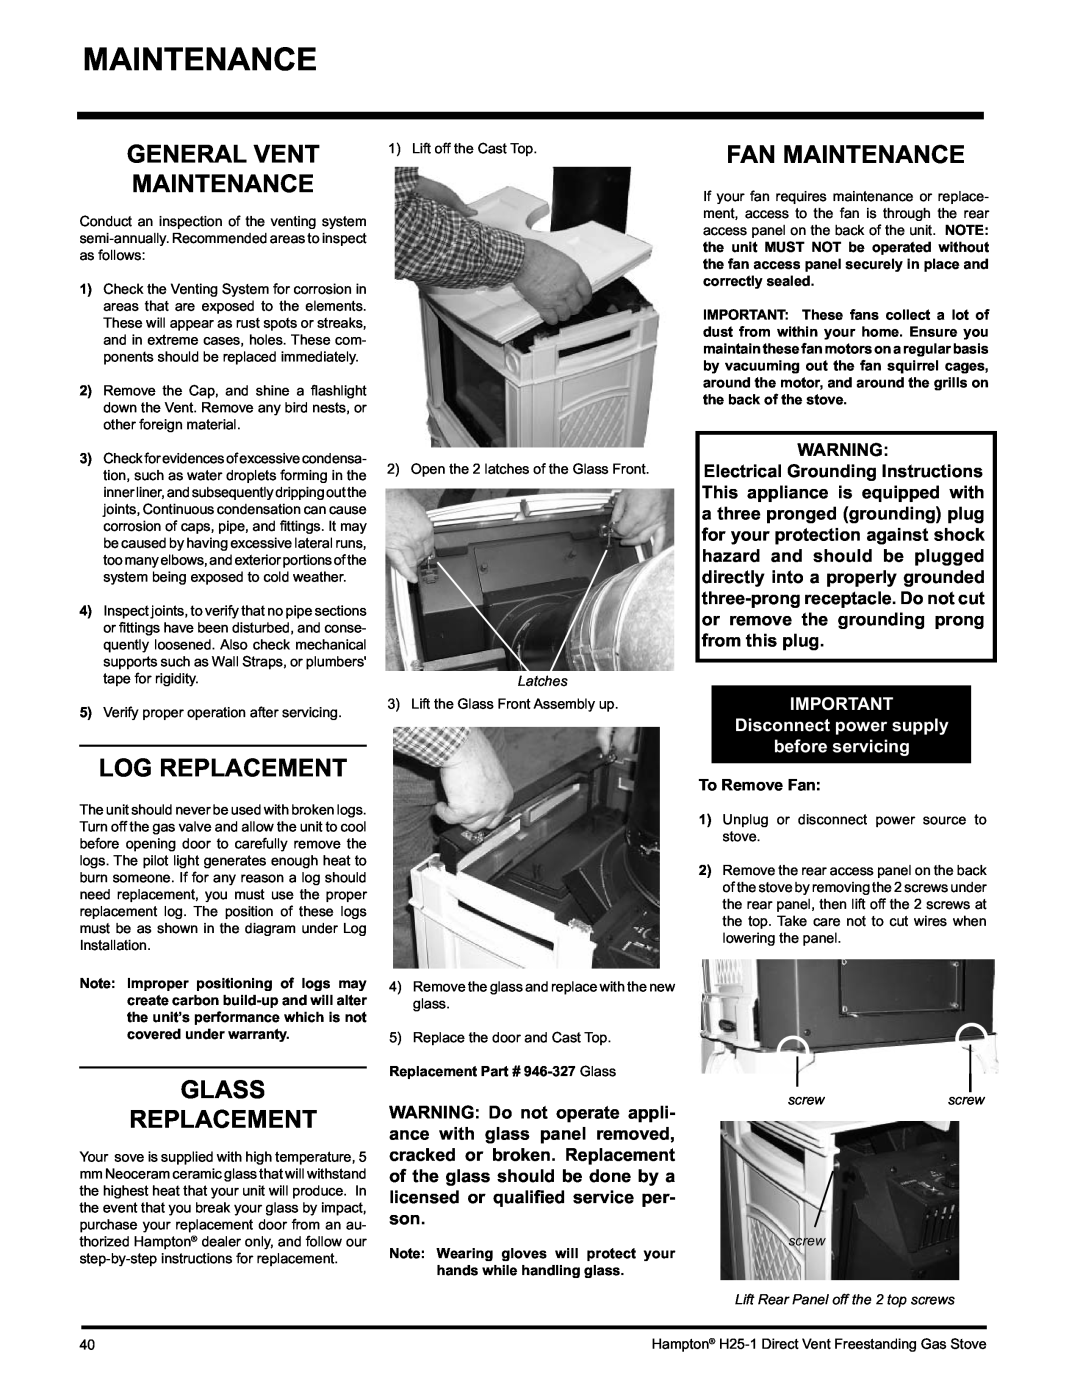
GENERAL VENT | 1) Lift off the Cast Top. |
| |
MAINTENANCE |
|
FAN MAINTENANCE
If your fan requires maintenance or replace- ment, access to the fan is through the rear
Conduct an inspection of the venting system
1)Check the Venting System for corrosion in areas that are exposed to the elements. These will appear as rust spots or streaks, and in extreme cases, holes. These com- ponents should be replaced immediately.
2)Remove the Cap, and shine a fl ashlight down the Vent. Remove any bird nests, or other foreign material.
3)Checkforevidencesofexcessivecondensa- tion, such as water droplets forming in the innerliner,andsubsequentlydrippingoutthe joints, Continuous condensation can cause corrosion of caps, pipe, and fi ttings. It may be caused by having excessive lateral runs, toomanyelbows,andexteriorportionsofthe system being exposed to cold weather.
4)Inspect joints, to verify that no pipe sections or fi ttings have been disturbed, and conse- quently loosened. Also check mechanical supports such as Wall Straps, or plumbers' tape for rigidity.
5)Verify proper operation after servicing.
2) Open the 2 latches of the Glass Front.
Latches
3) Lift the Glass Front Assembly up.
access panel on the back of the unit. NOTE: the unit MUST NOT be operated without the fan access panel securely in place and correctly sealed.
IMPORTANT: These fans collect a lot of dust from within your home. Ensure you maintain these fan motors on a regular basis by vacuuming out the fan squirrel cages, around the motor, and around the grills on the back of the stove.
WARNING:
Electrical Grounding Instructions This appliance is equipped with a three pronged (grounding) plug for your protection against shock hazard and should be plugged directly into a properly grounded
IMPORTANT
Disconnect power supply
before servicing
LOG REPLACEMENT
The unit should never be used with broken logs. Turn off the gas valve and allow the unit to cool before opening door to carefully remove the logs. The pilot light generates enough heat to burn someone. If for any reason a log should need replacement, you must use the proper replacement log. The position of these logs must be as shown in the diagram under Log Installation.
Note: Improper positioning of logs may create carbon
GLASS
REPLACEMENT
Your sove is supplied with high temperature, 5
mmNeoceram ceramic glass that will withstand the highest heat that your unit will produce. In the event that you break your glass by impact, purchase your replacement door from an au- thorized Hampton® dealer only, and follow our
4)Remove the glass and replace with the new glass.
5)Replace the door and Cast Top.
Replacement Part #
WARNING: Do not operate appli- ance with glass panel removed, cracked or broken. Replacement of the glass should be done by a licensed or qualified service per- son.
Note: Wearing gloves will protect your hands while handling glass.
To Remove Fan:
1)Unplug or disconnect power source to stove.
2)Remove the rear access panel on the back of the stove by removing the 2 screws under the rear panel, then lift off the 2 screws at the top. Take care not to cut wires when lowering the panel.
screwscrew
screw
Lift Rear Panel off the 2 top screws
40 | Hampton® |