N. Warming Shelves Installation
TOOLS REQUIRED: Phillips head screwdriver.
KIT CONTENTS: (2) Warming shelves, (2) brackets, and (4) 1/4 in. (Phillip head screws.
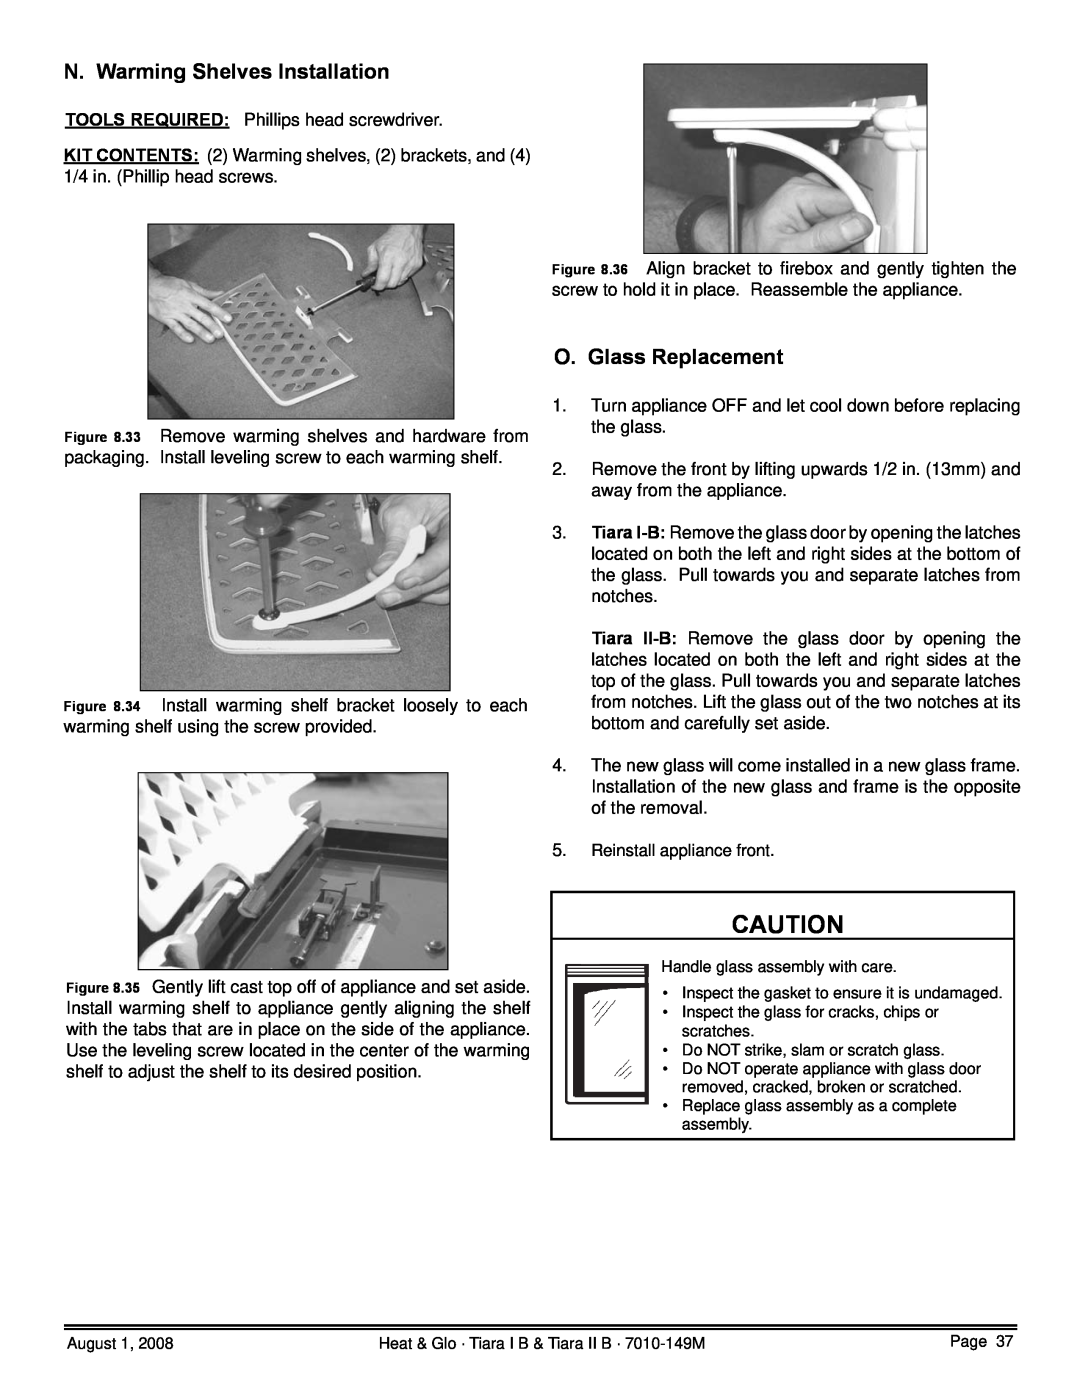
Figure 8.36 Align bracket to firebox and gently tighten the screw to hold it in place. Reassemble the appliance.
Figure 8.33 Remove warming shelves and hardware from packaging. Install leveling screw to each warming shelf.
Figure 8.34 Install warming shelf bracket loosely to each warming shelf using the screw provided.
O.Glass Replacement
1.Turn appliance OFF and let cool down before replacing the glass.
2.Remove the front by lifting upwards 1/2 in. (13mm) and away from the appliance.
3.Tiara
Tiara
4.The new glass will come installed in a new glass frame. Installation of the new glass and frame is the opposite of the removal.
5.Reinstall appliance front.
Figure 8.35 Gently lift cast top off of appliance and set aside. Install warming shelf to appliance gently aligning the shelf with the tabs that are in place on the side of the appliance. Use the leveling screw located in the center of the warming shelf to adjust the shelf to its desired position.
CAUTION
Handle glass assembly with care.
•Inspect the gasket to ensure it is undamaged.
•Inspect the glass for cracks, chips or scratches.
•Do NOT strike, slam or scratch glass.
•Do NOT operate appliance with glass door removed, cracked, broken or scratched.
•Replace glass assembly as a complete assembly.
August 1, 2008 | Heat & Glo · Tiara I B & Tiara II B · | Page 37 |