Multifunctional settings
NETWORK Menu (continued)
Item | Operation |
|
|
|
|
| ||
| Entering the DEFAULT GATEWAY : |
|
|
|
|
| ||
| Use the ▲/▼/◄/► buttons to enter the DEFAULT | 0. | 0. | 0. | 0 | |||
DEFAULT |
|
|
|
| ||||
GATEWAY (therouter or PC that forwardstraffic to a | DEFAULT GATEWAY | |||||||
GATEWAY | destination outside of the subnet of the transmitting |
|
|
|
| |||
| device) address.This function can only be used |
|
|
|
|
| ||
| when DHCP is set to “TURN OFF”. |
|
|
|
|
|
| |
| Entering DATE AND TIME : |
|
|
|
|
|
| |
| Use the ▲/▼/◄/► buttons to enter the Year (last two digits), |
| ||||||
| Month, Date, Hour and Minute. |
|
|
|
|
|
| |
DATE AND TIME | ~Note~ |
|
|
|
|
|
| |
The projector will override this setting and retrieve | DATE AND TIME | |||||||
| ||||||||
| information from the Timeserver when SNTP is enabled. See [Date/ | |||||||
| Time Settings] in [User’s Manual - Network Functions: Configuring | |||||||
| and Controlling the Projector via a Web Browser] for SNTP settings. | |||||||
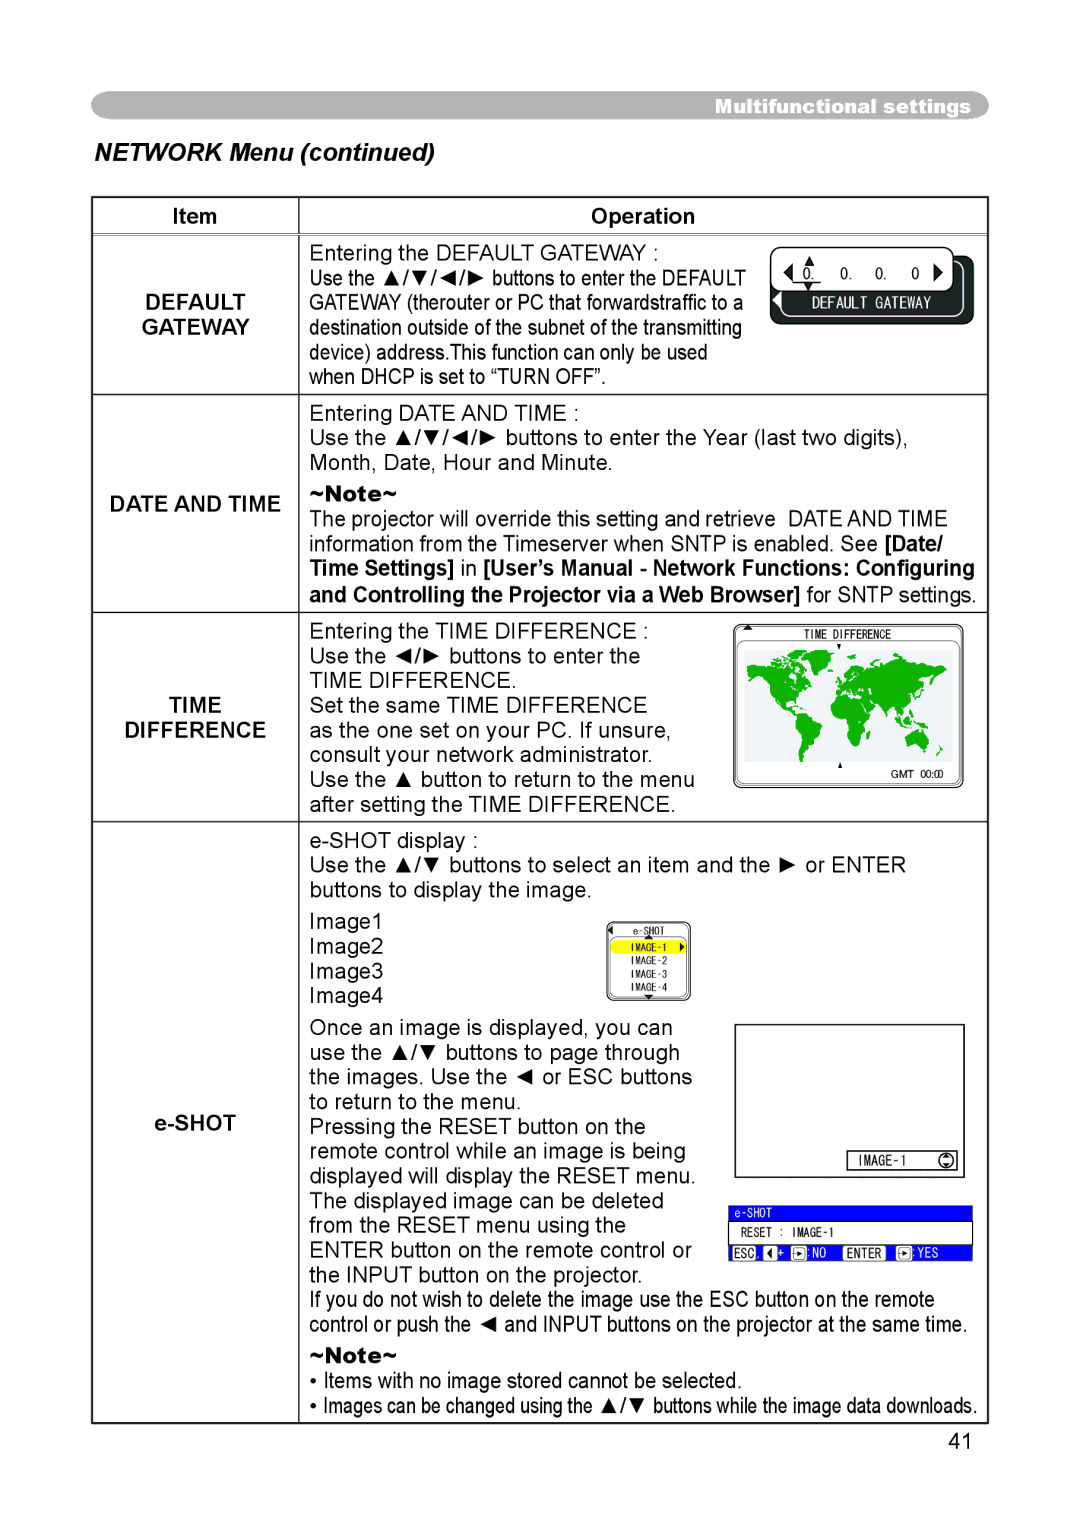
| Entering the TIME DIFFERENCE : |
| TIME DIFFERENCE |
| ||||
| Use the ◄/► buttons to enter the |
|
|
|
|
| ||
TIME | TIME DIFFERENCE. |
|
|
|
|
|
| |
Set the same TIME DIFFERENCE |
|
|
|
|
| |||
DIFFERENCE | as the one set on your PC. If unsure, |
|
|
|
|
| ||
| consult your network administrator. |
|
|
|
|
| ||
| Use the ▲ button to return to the menu |
|
|
| GMT 00:00 | |||
|
|
|
|
|
| |||
| after setting the TIME DIFFERENCE. |
|
|
|
|
| ||
|
|
|
|
|
|
| ||
| Use the ▲/▼ buttons to select an item and the ► or ENTER |
| ||||||
| buttons to display the image. |
|
|
|
|
|
| |
| Image1 | e‑SHOT |
|
|
|
|
| |
| Image2 | IMAGE‑1 |
|
|
|
|
| |
| IMAGE‑2 |
|
|
|
|
| ||
| Image3 |
|
|
|
|
| ||
| IMAGE‑3 |
|
|
|
|
| ||
|
|
|
|
|
|
| ||
| Image4 | IMAGE‑4 |
|
|
|
|
| |
|
|
|
|
|
|
| ||
| Once an image is displayed, you can |
|
|
|
|
| ||
| use the ▲/▼ buttons to page through |
|
|
|
|
| ||
| the images. Use the ◄ or ESC buttons |
|
|
|
|
| ||
| to return to the menu. |
|
|
|
|
|
| |
Pressing the RESET button on the |
|
|
|
|
| |||
| remote control while an image is being |
|
|
| IMAGE‑1 |
| ||
| displayed will display the RESET menu. |
|
|
|
|
| ||
| The displayed image can be deleted | e‑SHOT |
|
|
|
| ||
| from the RESET menu using the |
|
|
|
|
| ||
|
| RESET : IMAGE‑1 |
|
|
| |||
| ENTER button on the remote control or | ESC , + :NO | ENTER :YES | |||||
| the INPUT button on the projector. |
|
|
|
|
| ||
| If you do not wish to delete the image use the ESC button on the remote | |||||||
| control or push the ◄ and INPUT buttons on the projector at the same time. | |||||||
~Note~
•Items with no image stored cannot be selected.
•Images can be changed using the ▲/▼ buttons while the image data downloads.
41