H. Removal and Replacement of Thermistors and Thermostat
CAUTION
1.The thermistors are fragile; handle very carefully.
2.Do not shorten or cut the thermistor leads.
1.Cabinet Thermistor
1)Remove the refrigeration system cartridge. Perform steps 1 through 16 in "IV.B.2.
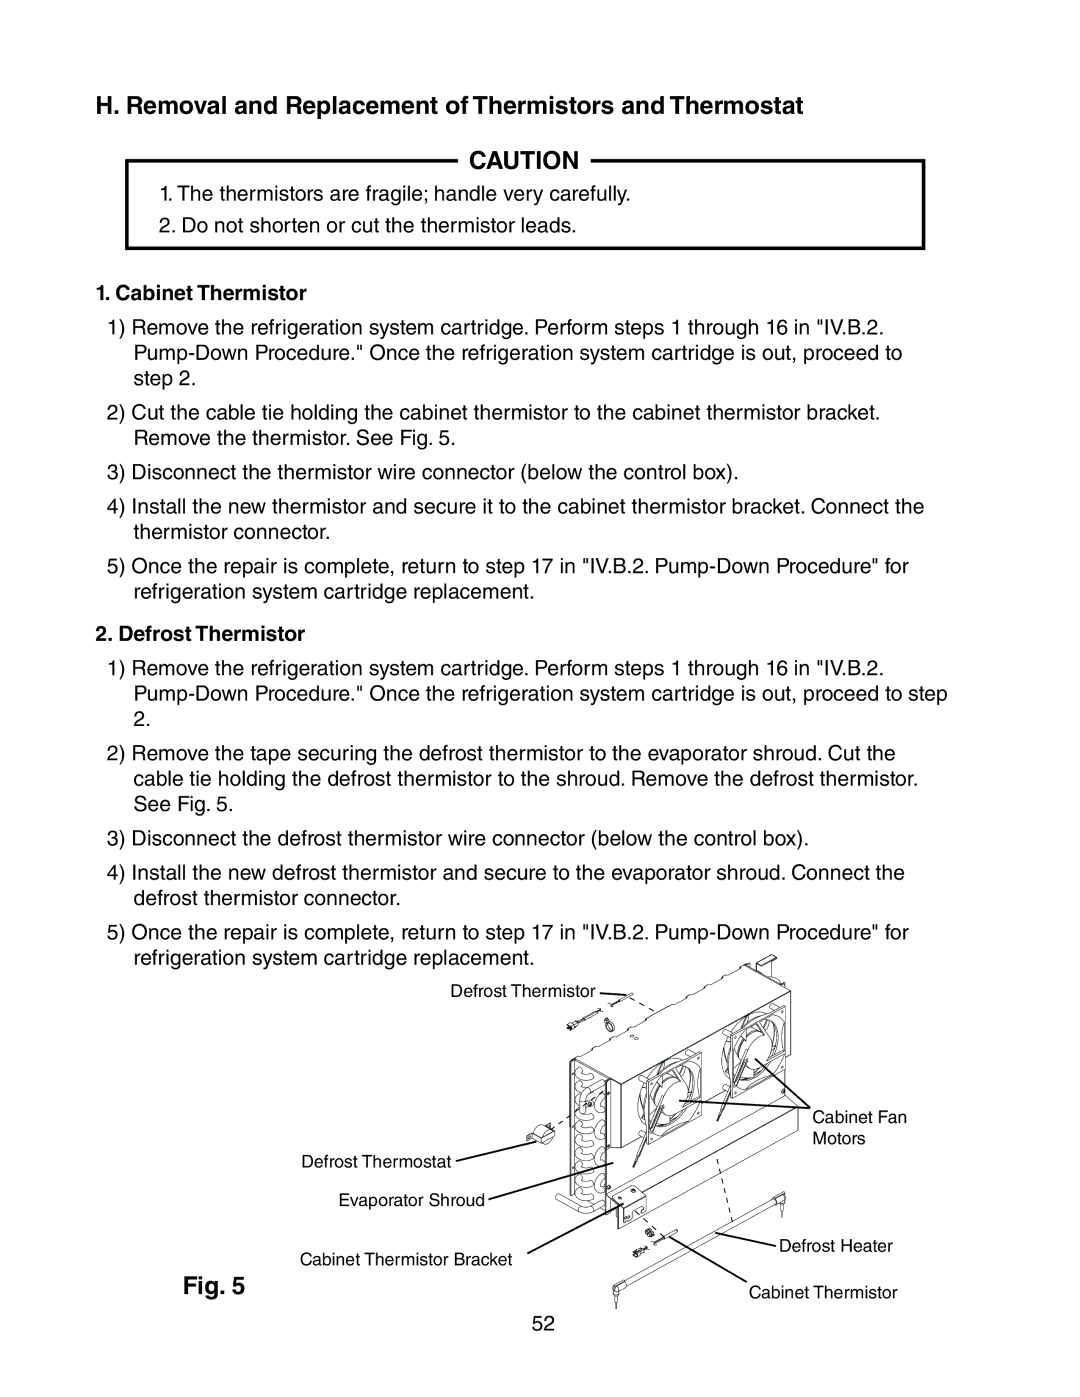
2)Cut the cable tie holding the cabinet thermistor to the cabinet thermistor bracket. Remove the thermistor. See Fig. 5.
3)Disconnect the thermistor wire connector (below the control box).
4)Install the new thermistor and secure it to the cabinet thermistor bracket. Connect the thermistor connector.
5)Once the repair is complete, return to step 17 in "IV.B.2.
2.Defrost Thermistor
1)Remove the refrigeration system cartridge. Perform steps 1 through 16 in "IV.B.2.
2.
2)Remove the tape securing the defrost thermistor to the evaporator shroud. Cut the cable tie holding the defrost thermistor to the shroud. Remove the defrost thermistor. See Fig. 5.
3)Disconnect the defrost thermistor wire connector (below the control box).
4)Install the new defrost thermistor and secure to the evaporator shroud. Connect the defrost thermistor connector.
5)Once the repair is complete, return to step 17 in "IV.B.2.
refrigeration system cartridge replacement.
Defrost Thermistor ![]()
![]()
Defrost Thermostat ![]()
Evaporator Shroud
Cabinet Thermistor Bracket
Fig. 5
Cabinet Fan
Motors
![]() Defrost Heater
Defrost Heater
Cabinet Thermistor
52