J. Removal and Replacement of Fan Motors
1. Cabinet Fan Motor
CAUTION
Be careful when handling the evaporator shroud assembly. This assembly includes a defrost heater sheathed in a glass tube. This sheathing can be easily damaged and may also cause cuts if broken. Heater will also be hot after a defrost. Use gloves when handling and avoid touching the glass directly. Also prevent heaters from touching other parts.
1)Remove the refrigeration system cartridge. Perform steps 1 through 16 in "IV.B.2.
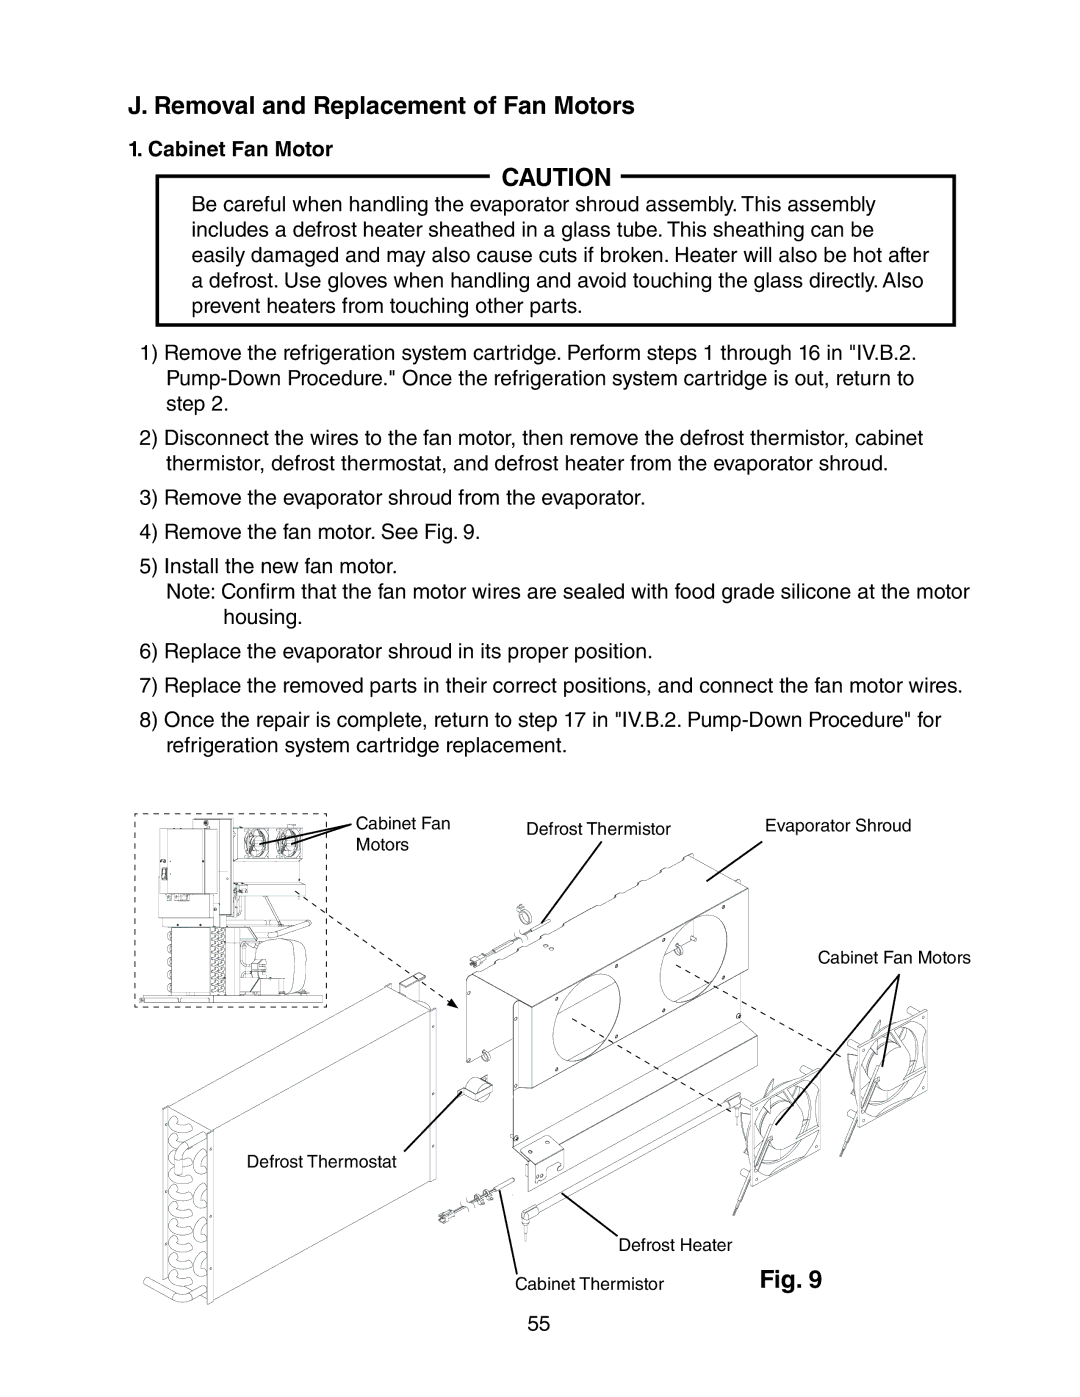
2)Disconnect the wires to the fan motor, then remove the defrost thermistor, cabinet thermistor, defrost thermostat, and defrost heater from the evaporator shroud.
3)Remove the evaporator shroud from the evaporator.
4)Remove the fan motor. See Fig. 9.
5)Install the new fan motor.
Note: Confirm that the fan motor wires are sealed with food grade silicone at the motor housing.
6)Replace the evaporator shroud in its proper position.
7)Replace the removed parts in their correct positions, and connect the fan motor wires.
8)Once the repair is complete, return to step 17 in "IV.B.2.
Cabinet Fan | Defrost Thermistor | Evaporator Shroud |
Motors |
|
|
Cabinet Fan Motors
Defrost Thermostat
| Defrost Heater | Fig. 9 |
| ||
Cabinet Thermistor | ||
55