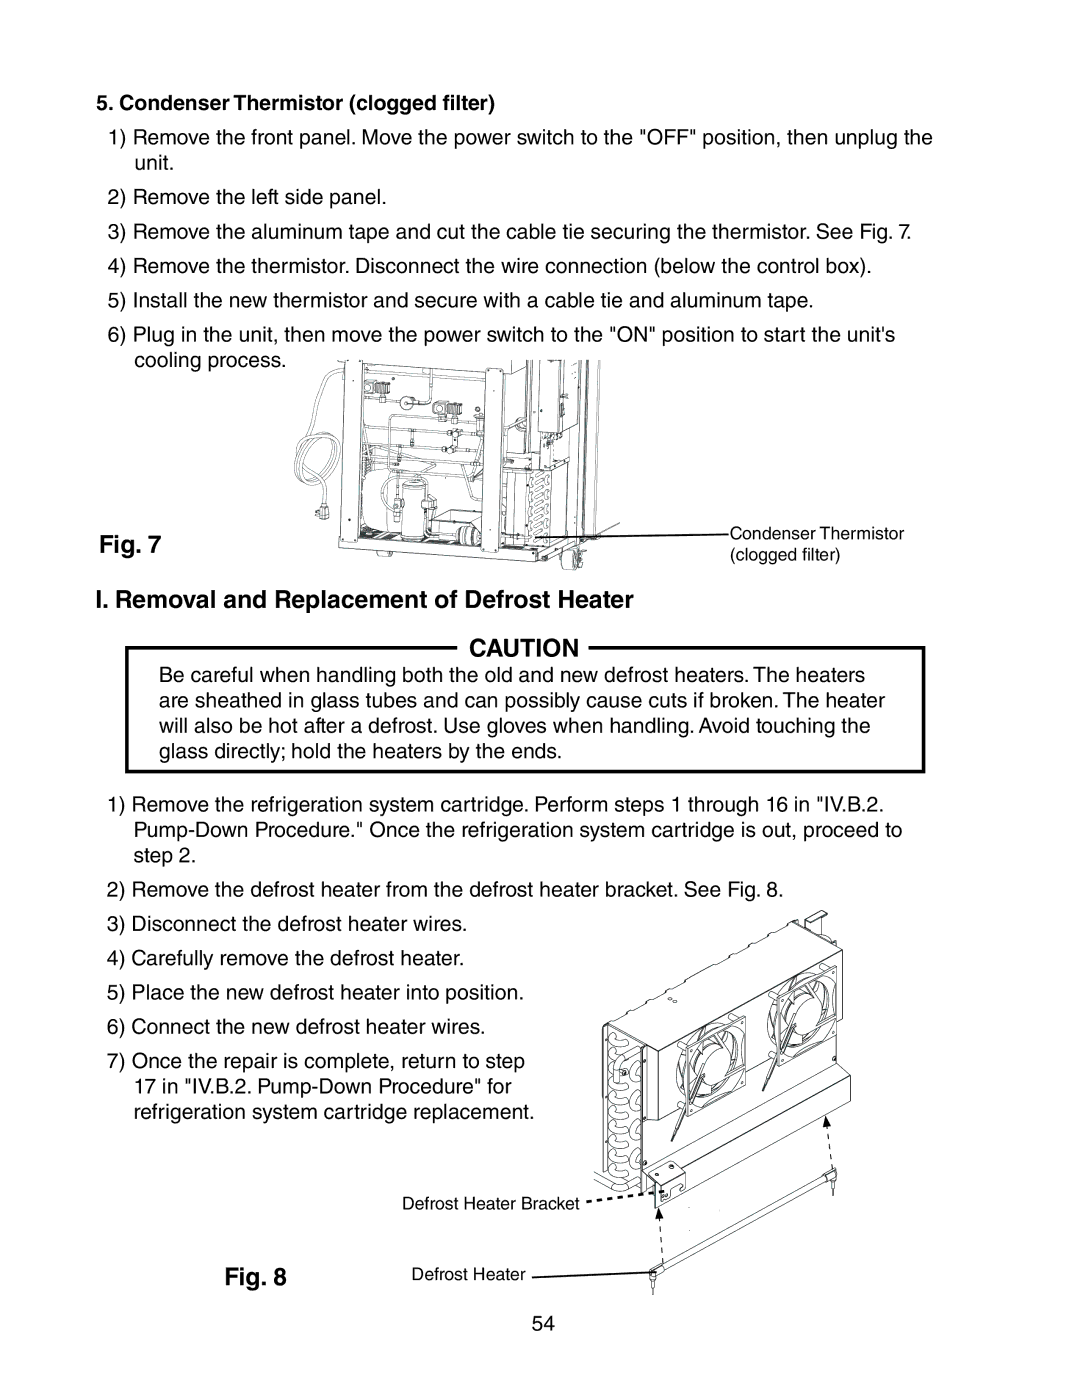
5.Condenser Thermistor (clogged filter)
1)Remove the front panel. Move the power switch to the "OFF" position, then unplug the unit.
2)Remove the left side panel.
3)Remove the aluminum tape and cut the cable tie securing the thermistor. See Fig. 7.
4)Remove the thermistor. Disconnect the wire connection (below the control box).
5)Install the new thermistor and secure with a cable tie and aluminum tape.
6)Plug in the unit, then move the power switch to the "ON" position to start the unit's
cooling process.
Fig. 7
I. Removal and Replacement of Defrost Heater
CAUTION
Condenser Thermistor (clogged filter)
Be careful when handling both the old and new defrost heaters. The heaters are sheathed in glass tubes and can possibly cause cuts if broken. The heater will also be hot after a defrost. Use gloves when handling. Avoid touching the glass directly; hold the heaters by the ends.
1)Remove the refrigeration system cartridge. Perform steps 1 through 16 in "IV.B.2.
2)Remove the defrost heater from the defrost heater bracket. See Fig. 8.
3) Disconnect the defrost heater wires.
4) Carefully remove the defrost heater.
5) Place the new defrost heater into position.
6) Connect the new defrost heater wires.
7) Once the repair is complete, return to step
17 in "IV.B.2.
Defrost Heater Bracket ![]()
![]()
![]()
Fig. 8 | Defrost Heater |
54