Control panel layout
LCD control panel
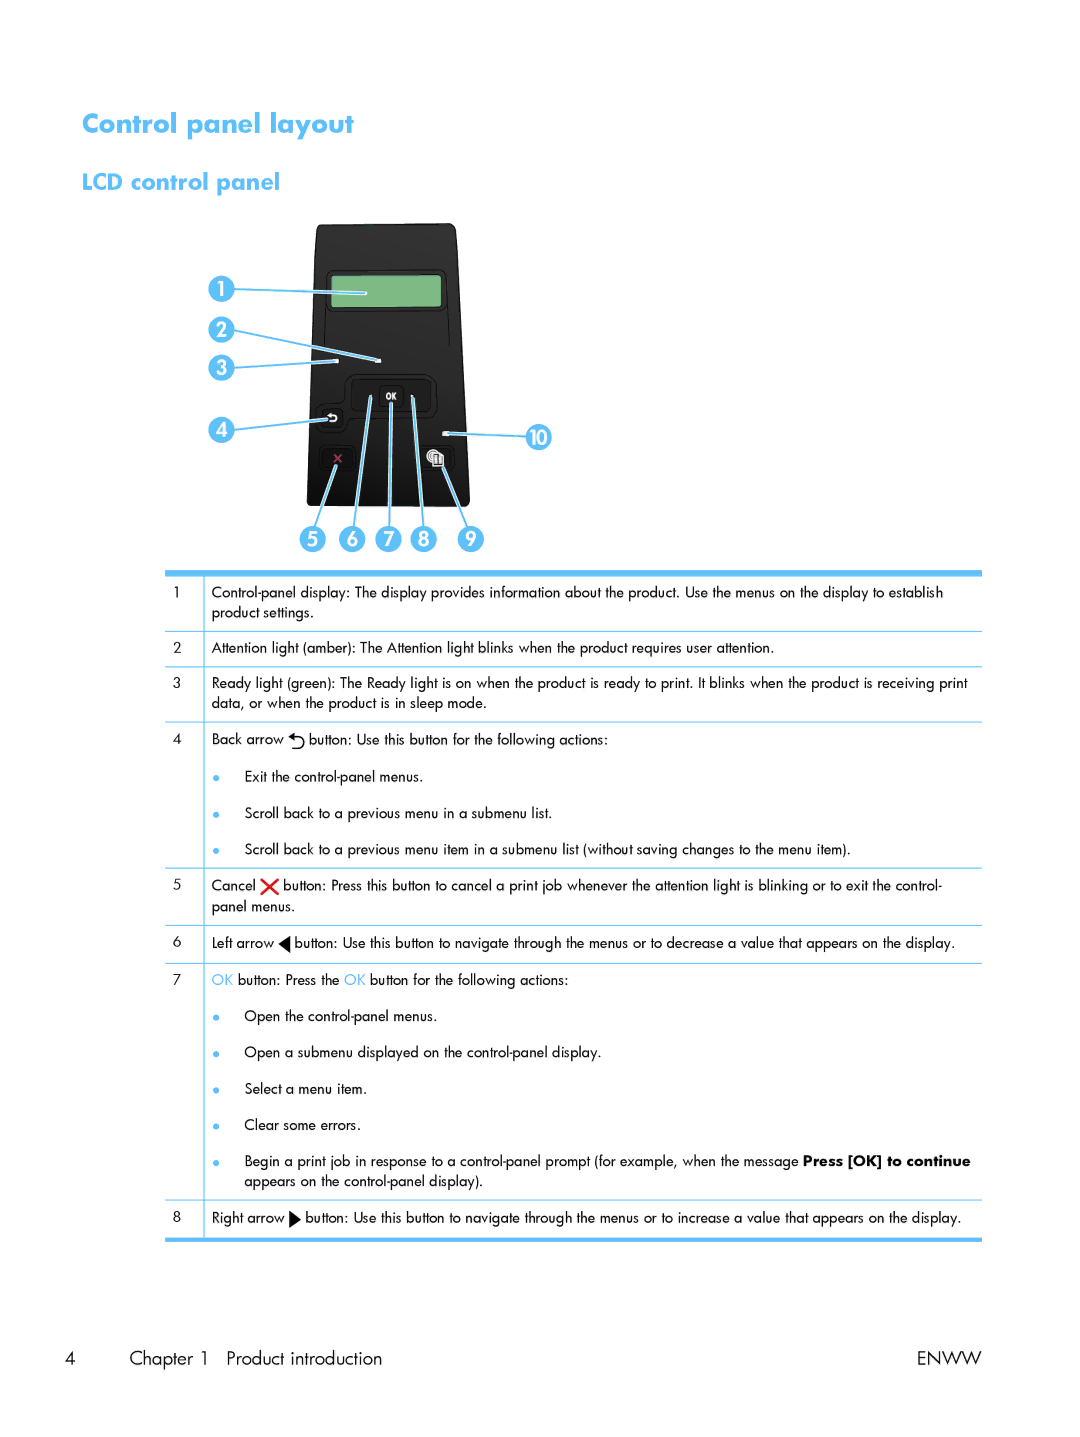
1
2Attention light (amber): The Attention light blinks when the product requires user attention.
3Ready light (green): The Ready light is on when the product is ready to print. It blinks when the product is receiving print data, or when the product is in sleep mode.
4Back arrow ![]() button: Use this button for the following actions:
button: Use this button for the following actions:
●Exit the
●Scroll back to a previous menu in a submenu list.
●Scroll back to a previous menu item in a submenu list (without saving changes to the menu item).
5Cancel ![]() button: Press this button to cancel a print job whenever the attention light is blinking or to exit the control- panel menus.
button: Press this button to cancel a print job whenever the attention light is blinking or to exit the control- panel menus.
6Left arrow ![]() button: Use this button to navigate through the menus or to decrease a value that appears on the display.
button: Use this button to navigate through the menus or to decrease a value that appears on the display.
7OK button: Press the OK button for the following actions:
●Open the
●Open a submenu displayed on the
●Select a menu item.
●Clear some errors.
●Begin a print job in response to a
8Right arrow ![]() button: Use this button to navigate through the menus or to increase a value that appears on the display.
button: Use this button to navigate through the menus or to increase a value that appears on the display.
4 | Chapter 1 Product introduction | ENWW |
