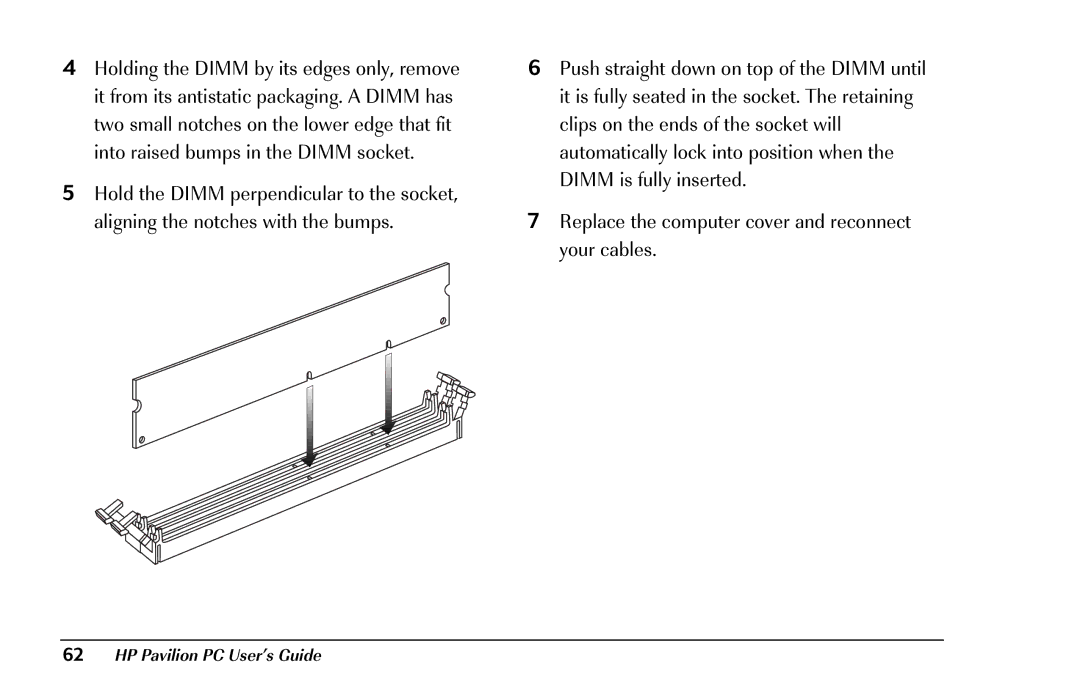
4Holding the DIMM by its edges only, remove it from its antistatic packaging. A DIMM has two small notches on the lower edge that fit into raised bumps in the DIMM socket.
5Hold the DIMM perpendicular to the socket, aligning the notches with the bumps.
6Push straight down on top of the DIMM until it is fully seated in the socket. The retaining clips on the ends of the socket will automatically lock into position when the DIMM is fully inserted.
7Replace the computer cover and reconnect your cables.
