Removal and replacement procedures
3.Turn the computer
4.Open the computer as far as possible.
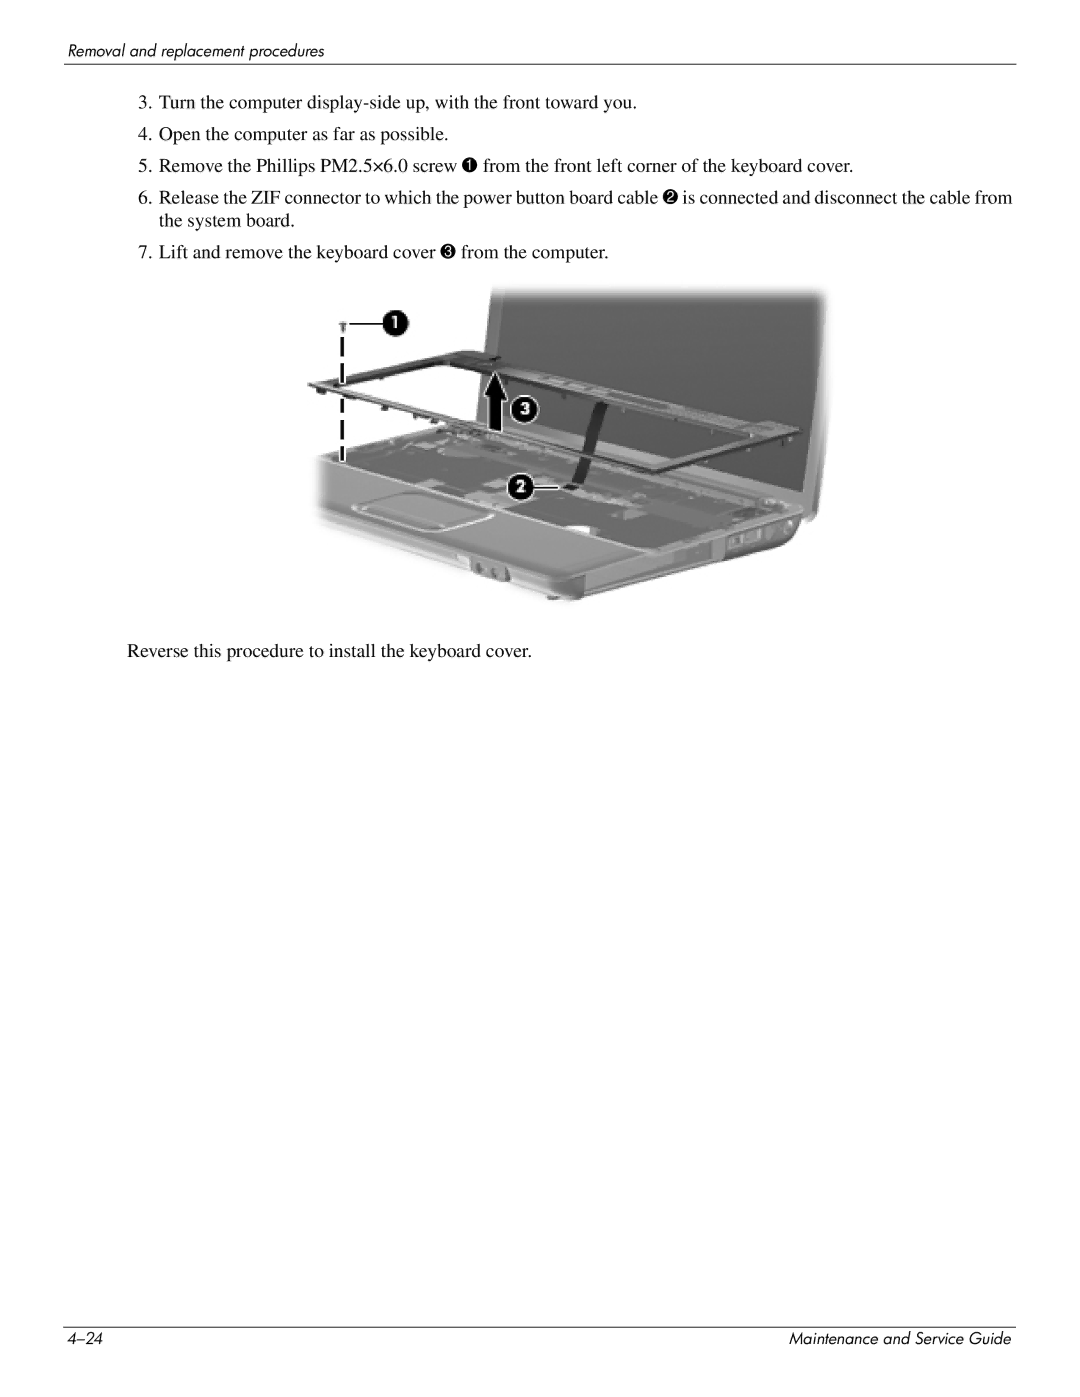
5.Remove the Phillips PM2.5×6.0 screw 1 from the front left corner of the keyboard cover.
6.Release the ZIF connector to which the power button board cable 2 is connected and disconnect the cable from the system board.
7.Lift and remove the keyboard cover 3 from the computer.
Reverse this procedure to install the keyboard cover.
Maintenance and Service Guide |
