HP CQ41-224TX, CQ41-205TX, CQ41-204TX, CQ41-207TX, CQ41-223TX Removal and replacement procedures

Models: CQ41-211TU CQ41-210TU CQ41-205TX CQ41-208TU CQ41-213TU CQ41-211TX CQ41-224TX CQ41-212TX CQ41-209TX CQ41-209TU CQ41-208TX CQ41-217TU CQ41-225TX CQ41-223TX CQ41-207TX CQ41-204TX

1 134
Download 134 pages 28.87 Kb
Page 83
Image 83

Removal and replacement procedures

Remove the power connector and cable:

1.Turn the computer right-side up.

2.Position the computer with the right side toward you.

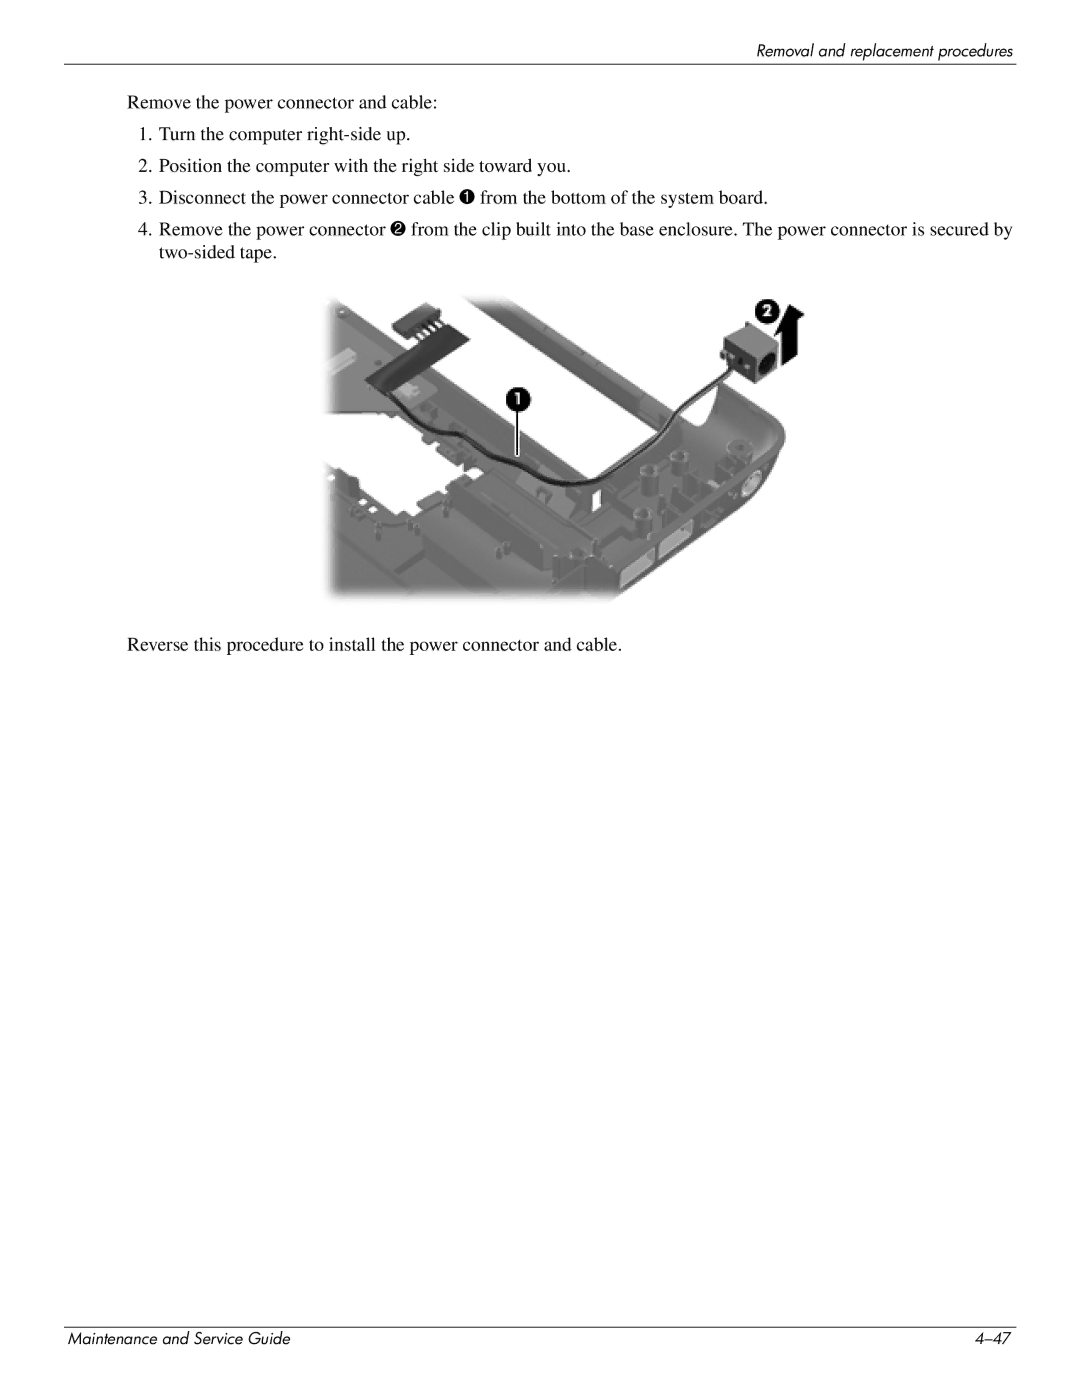
3.Disconnect the power connector cable 1 from the bottom of the system board.

4.Remove the power connector 2 from the clip built into the base enclosure. The power connector is secured by two-sided tape.

Reverse this procedure to install the power connector and cable.

Maintenance and Service Guide

4–47

Page 83
Image 83
HP CQ41-224TX, CQ41-205TX, CQ41-204TX, CQ41-207TX, CQ41-223TX, CQ41-213TU, CQ41-212TX manual Removal and replacement procedures