Operator´s manual
101
Rider Pro
IMPORTANT INFORMATION
CONTENTS Operator’s Manual for Rider Pro
II. Slope operation
SAFETY INSTRUCTIONS
Safe operation practices for ride-on mowers
I. General operation
Intended use
IV. Service
Travel and transport on public roads
Towing
Towing
INSTRUCTION
Dear customer
Driving and transport on public roads
Serial number
Good service
EXPLANATION OF SYMBOLS
Never carry passengers
General use
Read the instructions before starting the machine
Clear the area from stones etc. before cutting
Cut slopes upwards and downwards, not sideways
Be extra careful when driving on slopes
Driving on slopes
Do as follows
Never allow children to drive the machine
Maintenance
Children
Keep children away from the mowing area
Do not alter the setting of the governor and do not race the engine
Never smoke in the vicinity of the battery or the fuel
Clean the machine regularly from grass, leaves and other waste
Never drive the machine in an enclosed space
Location of the controls
PRESENTATION
Presentation
Speed limiter
Throttle control
Choke lever
Lifting of the cutting unit Lowering of the cutting unit
Cutting unit
Lift lever for cutting unit
Fuelling
Lever for adjustment of the cutting height
Parking brake
Seat
Starting the engine
DRIVING
Before starting
Driving the machine
Mowing pattern
Cutting tips
Release lever
Stopping the engine
Maintenance interval in
MAINTENANCE
Maintenance schedule
Maintenance
The cutting unit is disengaged
The engine is switched off
The parking brake is applied
The ignition key is removed
Right-hand fender
Removing of the machine hoods
Engine hood
Front hood
Transmission cover
Checking and adjustment of the steering wires
Poorly adjusted brakes can result in reduced braking power
Adjusting the brakes
Checking and adjustment of the throttle wire
Checking and adjusting the choke wire
Checking of the fuel pump’s air filter
Replacement of the fuel filter
Do not wash the paper filter Do not oil the paper filter
Do not use compressed air to clean the paper filter
Replacing the air filter
Muffler air intake
Cleaning the filter
Check the transmission’s air intake
Check the engine’s cooling air intake
Procedures on contact with acid
Check the level of the battery acid
Inspecting the safety system
The maximum tyre pressure is 80 kPa 0,8 kp/cm2
Checking the tyre pressure
The tyre pressure should be 60 kPa 0.6 kp/cm2 all round
Fitting the cutting unit
BioClip
Installing BioClip
Checking and adjustment of the cutting unit’s ground pressure
Checking the cutting unit’s parallelism
Adjusting the parallelism of the cutting unit
Removing the belt
Removing the cutting unit
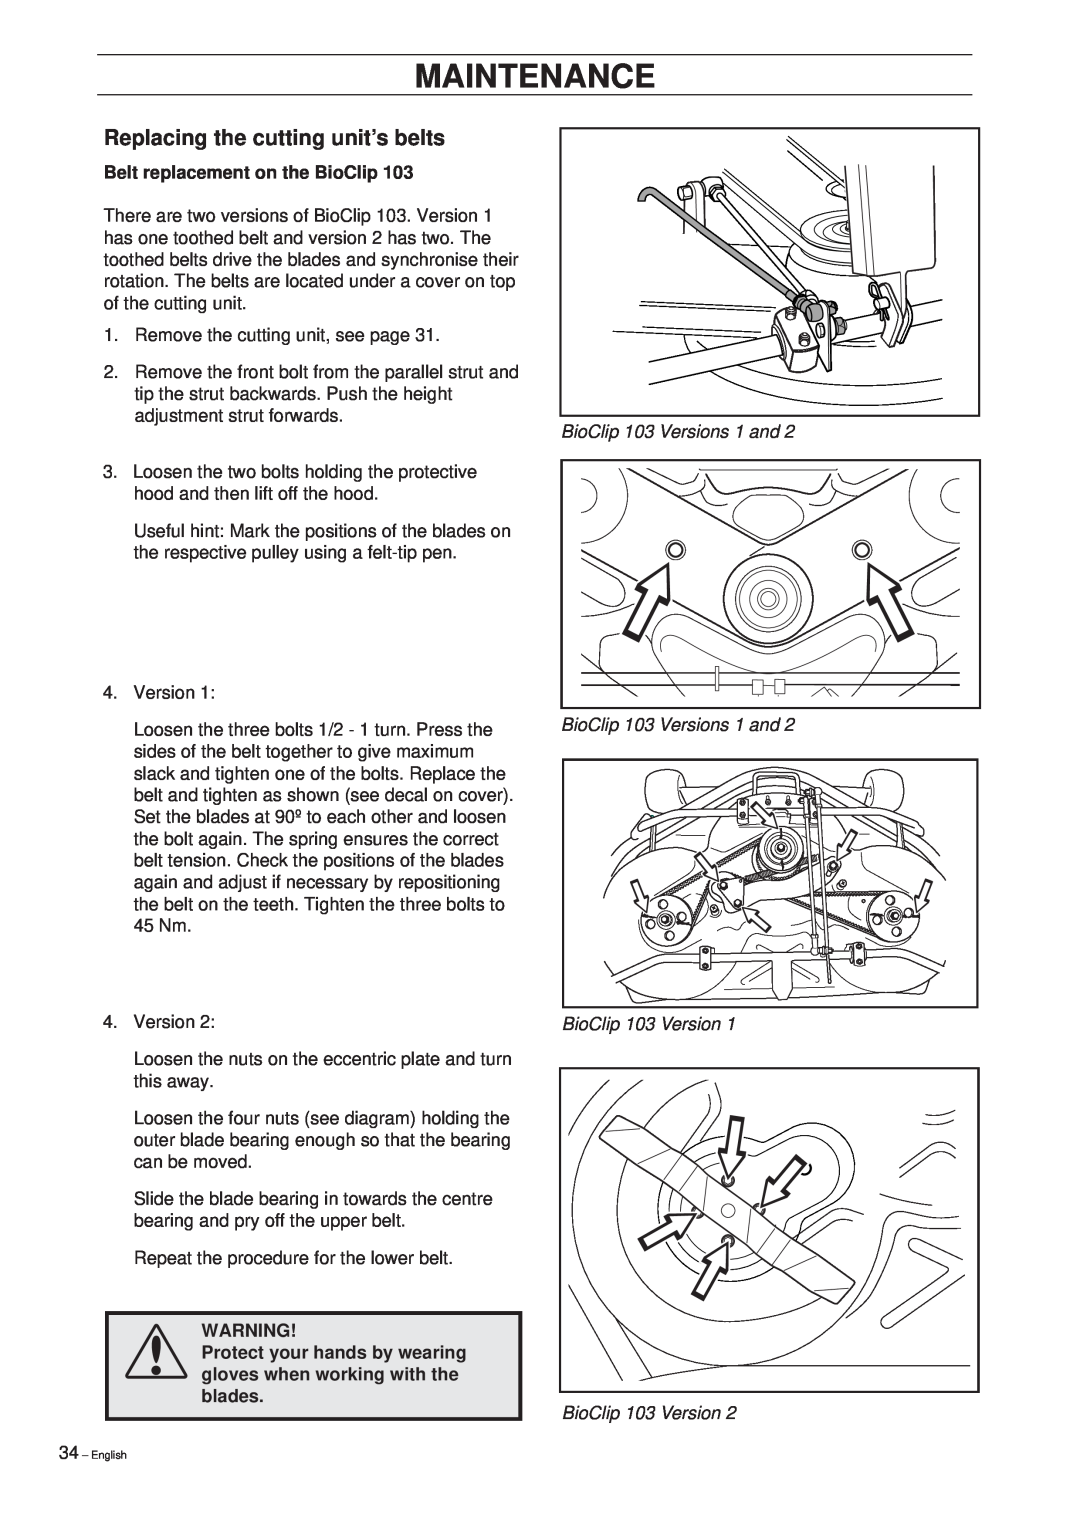
BioClip 103 Versions 1 and BioClip 103 Versions 1 and
Belt replacement on the BioClip
Protect your hands by wearing gloves when working with the blades
Replacing the cutting unit’s belts
Belt replacement on cutting unit’s with side or rear ejectors
Belt replacement on BioClip
Placing in service position
Service position for cutting unit
5. Disengage the spring from the drive belt tensioning wheel
Restoring from service position
BioClip103 BioClip
Checking the blades
Cutting units with rear ejection Cutting units with side ejection
Replacing the break-pin BioClip
1/52 1/365
Lubrication chart
LUBRICATION
12/12 1/12
1. Cutting unit
Lubricating wires
General
4. Triangular link and joints
2. Pedal mechanism in frame tunnel
3. Chains in frame tunnel
7. Belt tensioner
6. Throttle and choke wires, lever bearings
5. Driver’s seat
FULL
8. Engine oil
Changing the engine oil
11. Transmission oil level
10. Parking brake wire
9. Gear lever
Avoid skin contact, wash with soap and water in the event of spillage
12. Transmission
13. Replacing the oil filter
IMPORTANT INFORMATION Dispose of used filters at a recycling station
Procedure
TROUBLE SHOOTING SCHEDULE
Problem
Winter storage
Service
STORAGE
Explanation of colour abbreviations in wiring diagram
WIRING DIAGRAM
1. Microswitch, hydrostatic transmission 2. Microswitch, cutting unit
3. Microswitch, seat 4. Ignition lock 5. Counter 6. Start relay
Electrical system
TECHNICAL DATA
Rider Pro
Engine
Rear ejector
EU declaration of conformity Only applies to Europe
BioClip
Side ejector
Work done
SERVICEJOURNAL
Pre-delivery service
54 - English
25 hour service
50 hour service
56 - English
100/200 hour service
300 hour service
58 - English
At least once a season
Date, mileage, stamp, sign
60 - English
´*3-Q¶5w¨
Page
2001W02