Keeping Commerce Applications Updated
Page
International Technical Support Organization
First Edition July
Contents
6320TOC.fm
Part 2. Development environment
Part 3. Production environment
6320TOC.fm
Part 4. Appendixes
Abbreviations and acronyms
Index
6320TOC.fm
6320spec.fm
Trademarks
IBM
Preface
Team that wrote this redbook
6320pref.fm
Become a published author
Comments welcome
Redbook@us.ibm.com
Part 1 Introduction to WebSphere Commerce
6320p01.fm
Introduction
Overview
Structure of the book
Part 1, Introduction to WebSphere Commerce
Part 2, Development environment
Part 3, Production environment
Part 4, Appendixes
Commerce Application used during the migration
6320chintro.fm
WebSphere Commerce V5.6 Overview
Product overview
WebSphere Commerce V5.6 Overview
WebSphere Commerce software components
WebSphere Application Server
Web server
WebSphere Application Server
Database Server
WebSphere Commerce Server
Enablement software
WebSphere Commerce enablement software
WebSphere Commerce Payments Server
WebSphere enablement software
WebSphere Commerce Server subsystems
Member subsystem
User registration methods
User registration and update methods
Member security services
6320chsumofchanges.fm
Catalog subsystem
Single sign-on
Trading subsystem
Order subsystem
Merchandising subsystem
Marketing subsystem
Configuration Manager
WebSphere Commerce Tools
Messaging subsystem
WebSphere Commerce Accelerator
Organization Administration Console
Administration Console
Password Manager
WebSphere Commerce Business models
Direct Sales
Consumer direct
Value Chain
B2B direct
Demand chain
Hosting Ex-Sites
Supply chain
Hosting
What’s new in WebSphere Commerce
WebSphere Commerce Development Environment
Ex-Site
Configuration Manager
Password Manager
WebSphere Commerce Payments
Loader Package
Adaptor for CrossWorld
Catalog and product management
SKU generation
Accounts Business Edition
Access Control
Business Models
Collaboration
Product Management tooling
Campaigns and Promotions
Order and inventory Management
Analytics
Security
Caching
Dynacache
Https//hostname8002/cachemonitor
Product Advisor
6320chsumofchanges.fm
Migration Strategy and Planning
Migration Strategy considerations
Add or replace functionality
Take advantage of DynaCache
Optimization
External product and user management
How does custom code impact the process?
Prepare a detailed Plan
Migration Planning
Skill requirements
Hardware and software prerequisites
Production Environment
Software prerequisites
Development Environment
Hardware prerequisites for development environment
Product versions mapping
Migration approach for development environment
Product versions mapping, production environment
Product versions mapping, development environment
Migration approaches for runtime environment
Switch-Over migration scenario
Firewall
Co-existence migration scenario
In-place migration scenario
Approach used for this migration
Detailed overview of development migration steps
Detailed overview of production environment migration
6320chplanning.fm
6320chplanning.fm
6320chplanning.fm
Commerce Application used during the migration
Hardware Configuration
Commerce application
Application environment
Application Server Tier
Commerce customization
Shopping flow
Database Server Tier
Account Creation
Payment Processing
Offline Orders
Billing/Shipping Selection
InFashion default shopping flow
Commands
Customized shopping flow
1provides a summary of the custom commands used with
Application
Catalog
Database tables
Database
6320chapplicationused.fm
Part 2 Development environment
6320p03.fm
Installing WebSphere Commerce Development Environment
Pre-installation requirements
Development environment overview
Installing WebSphere Studio Application Developer
Pre-installation steps
VisualAge for Java V4.0 prerequisites
Installing WebSphere Studio Application Developer
Apply fixes to the test environment
Prepare for fixpack installation
Install WebSphere Application Server V5.0.2 cumulative fix
Select Install fixpacks and click Next
Click Next
Install interim fixes
CD-ROM drive\BASE\fixes
Installing WebSphere Commerce V5.6 Toolkit
Installing WebSphere Commerce V5.6 Toolkit
Installation verification
Installing DB2 Universal Database
Backup development databases
Installation requirements
Preparing a Windows user for DB2
Select Action New User
Installing DB2 Universal Database
Output from this command should be as follows
6320chDEVinstallation.fm
6320chDEVinstallation.fm
Installing DB2 Universal Database fixpack
6320chDEVinstallation.fm
Configuring the development environment for DB2
Our example, we entered the following commands
Migrate databases to DB2 Universal Database V8.1 level
Wctoolkithome\bin
Installing VisualAge for Java
Installing VisualAge for Java
Time spent installing and configuring VisualAge for Java
\WebSphere\VAJ40
Configuring VisualAge for Java
Install features and fixes for VisualAge for Java
Select Administrator and click OK
Install the DeployTool fix
Install IBM WebSphere Test Environment fix
Click Finish
Prepare the VisualAge for Java V4.0 workspace
Packages to delete from workspace
Import WebSphere Commerce Studio V5.1 repository
Select Local repository
6320chDEVinstallation.fm
Pre-migration steps
Preparation overview
Instance preparation
Updating the product information file
To the following directory
Example 6-1 Example product.xml file
Choosing the value for editionname
Prepare resources
Choosing the value for mod
Choosing the value for fixpack
Merge EJB groups
Export code from VisualAge for Java
Overview
Exporting the Java code
Update database configuration values
Database preparation
DB2 configuration set by the updateDBConfiguration script
Our example we called the as follows
Change the order status to X Cancelled
Unsent messages
Order status
Catalog
Members
Master catalog
Product-item relationship
Organizational structure
Profile types
Administrators
Role changes
Refer to WebSphere Commerce
Roles that are not included in WebSphere Commerce
Add Store Administrator as role for our users
Custom message types
Dropping foreign key references
Erroneous data in encrypted fields
Tables and fields to check for erroneous leading spaces
6320chDEVbeforemigration.fm
Migrating the development environment
Current development environment
Development environment migrated
Migrating the development instance
Overview
Running the tool
Our example, we used the following directory
Run the Wcim tool as follows
Example 7-1 Sample output from the Wcim tool
File name of the log will be in the following format
Migrating the development database
Migrating unencrypted data
Run the migration script as follows
We used the following command
Migrating encrypted data
For example, we used
Run the script as follows
Migrating custom EJBs
Summary
119
Export the EJB project from VisualAge for Java
Process for converting from EJBs from version 1.0 to
Import the EJB projects into VisualAge for Java
Regenerate the deployed code for the EJBs
Export EJBs as EJB 1.1 JAR files
Import the EJBs into WebSphere Studio Application Developer
6320chDEVmigration.fm
Post-migration steps
Setting up aliases
Lightweight test environment
Example 8-1 Excerpt from the looseconfig.xmi file
Example 8-2 Excerpt from the deployment.xml file
Example 8-3 Excerpt from the application.xml file
Migrating custom code
Command parameter validation
User registration
Logon command
Calculation usage framework
Background
Mapping between WebSphere Commerce commands
Migration
Example 8-4 Sample MyApplyShippingCmd
Example 8-5 Sample MyApplyShippingCmdImpl
6320chDEVpostmigration.fm
137
Example 8-6 Registering calculation method
WebSphere Commerce V5.6 command interfaces
Interface changes
WebSphere Commerce Suite V5.1 interfaces for the commands
ApplyOrderAdjustmentsCmd contain the following methods
Refer to Example 8-5 on page 135 for an sample of this
Accessing the order items
Accessing OrderItemAccessBean Accessing Item
Then this could be migrated into the following line
143
Configuration and code changes for migrated EJBs
Access bean string converters
145
Change the access isolation level
Example 8-7 Example ibm-ejb-access-bean.xmi file
147
Add the WCSecurity role
Change the container transaction type
Remove serialVersionUID constants
Ensure that ejbCreate returns primary key object
Delete this line and save your source by pressing Ctrl + S
Remove java.rmi.RemoteException from remote methods
Match ejbPostCreate and ejbCreate methods
Remove FinderHelper interface
Following method would be added to the home interface
7 J2EE Connector Architecture
Regenerating the deploy code
New task commands
Changed price task commands
Pricing
New data bean methods
Package name change
Rule server administration commands
JSP and property file changes
Changes to myAccount.jsp
Our example
Example 8-8 The content of the modified myAccount.jsp file
Changes to Register.jsp
Example 8-9 The content of the modified register.jsp file
@ include file=getResource.jsp%
Example 8-10 Error texts for file Register.jsp
Example 8-11 Error texts for file myAccount.jsp
Changes to property files
159
6320chDEVpostmigration.fm
Part 3 Production environment
6320p02.fm
Installing WebSphere Commerce
Single-node runtime overview
Hardware
Software
Installation
Install WebSphere Commerce
IBM Http Server D\WebSphere\HTTPServer
Configuring IBM Http Server
Enabling for SSL
Enabling Cache accelerator
Verifying the installation
Verify installation log files
WebSphere Commerce installation logs
DB2 Universal Database installation logs
WebSphere Application Server installation logs
Examine the following log files
Washome\logs\WASFixPack.log
IBM Http Server installation logs
Create test instance
Create a WebSphere Commerce instance
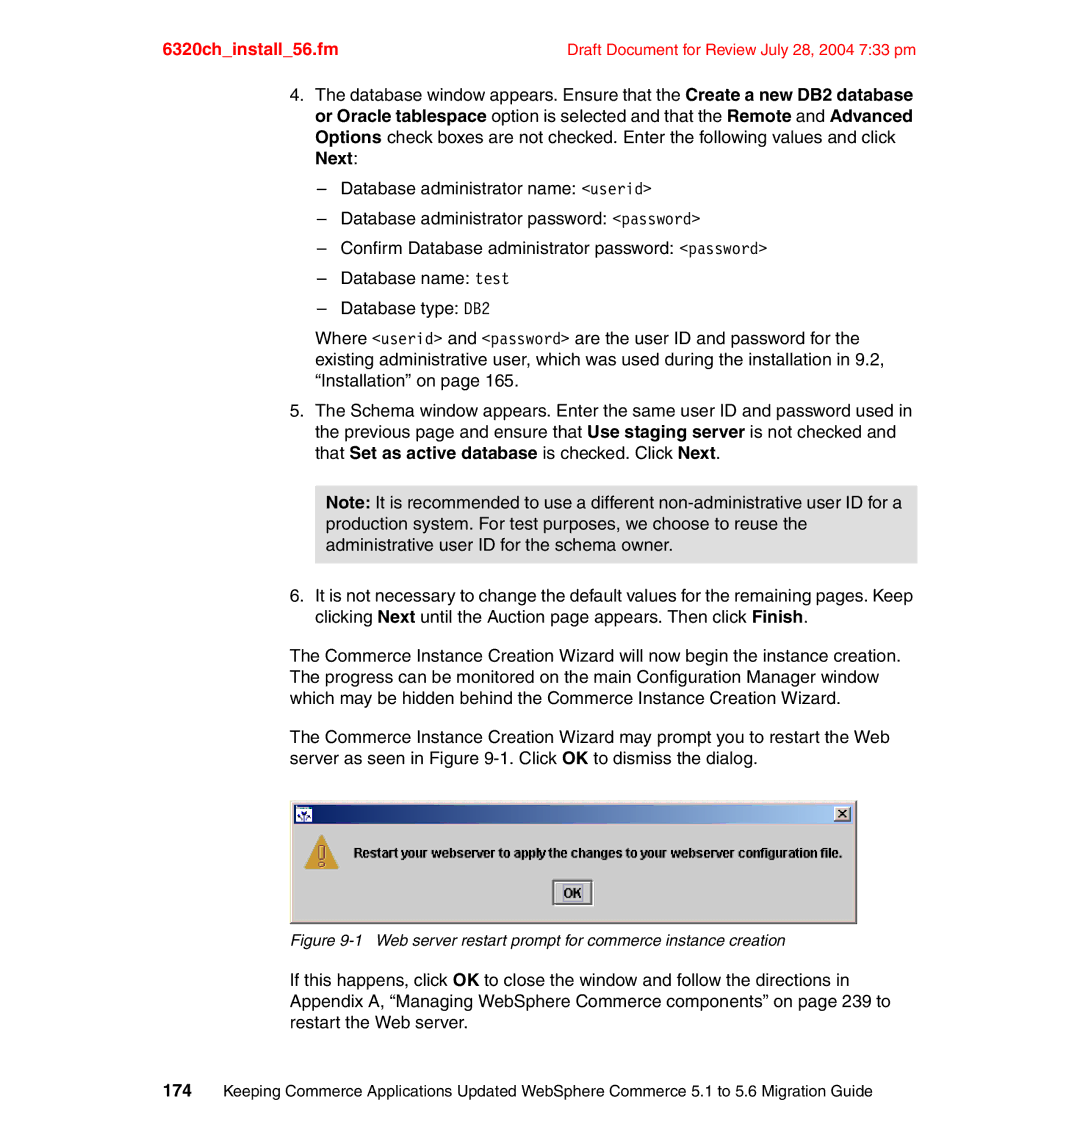
Web server restart prompt for commerce instance creation
Create a WebSphere Commerce Payments instance
Commerce instance creation confirmation
6320chinstall56.fm
Removing test instances
Removing WebSphere Commerce instance
RmCommerceServer instancename
Removing WebSphere Commerce Payments instance
Example 9-1 Sample rmPaymentServer.bat script
6320chinstall56.fm
Draft Document for Review July 28, 2004 733 pm
6320chbeforemigration.fm
Preparation overview
185
Example 10-1 product.xml file content
Our example the product.xml file looked like this
WebSphere Commerce Suite Choosing the value for fixpack
Example 10-2 Our product.xml file
Disable security on WebSphere Application Server
189
Copying the database from Commerce V5.1 to Commerce
Restore the configuration values to the original values
Migrate the database
Updating database configuration values
Script is invoked as follows
Changes are done by executing the following SQL commands
Orders status
Example of a master catalog
Update keys for catalog
Update keys for category
Create catalog description
Create category catalog group
Members
Update the users profile type
Our example this command retrieved 6 records
199
Erroneous data in encrypted fields
Migrating WebSphere Commerce components
Migrating commerce instance configuration
Migration overview
Migrating the instance
Unpack backupwcim.zip
This will generate the following file
Running the above command will produce the following file
From the following directory
Enter the previous IBM Http Server home directory
Wc56home\temp
Migrating commerce database
Enter the new IBM Http Server home directory
Migrating the database
Script receives the following parameters
Mandatory migration script parameters
Parameter name Parameter value
Our example
Example 11-2 a small extract of the migration log file
Error SQL0605W
Error SQL0601N
Sample of this error in the log
Example 11-3 The content of the modified choosemc.sql file
Choosing the master catalog
Migrating the encrypted data
Merchant key and encrypted data
Script must have the following mandatory parameters
Optional parameters are
Encrypted data migration script parameters
Parameter
Encrypted data migration script parameters and behavior
Migrating Payment Manager
Install Fixpack for WebSphere Payment Manager
Install WebSphere Commerce Payments remote node
Ensure that none of these files contain any error messages
Our example, we used
Next
Package and transfer the Wcim tool
Backup the WebSphere Payment Manager instance
Backup the WebSphere Payment Manager database
Backup the payment database
Restore WebSphere Payment Manager database
Transfer assets to WebSphere Commerce Payments node
Migrate the WebSphere Payment Manager instance
Our example we typed
Click on OK
Click Apply Click OK on the following confirmation window
Restart the Web server
Migrate the WebSphere Payment Manager database
Delete the obsolete payment methods
Disconnect from the commerce database
Disconnect from the payments database
This concludes the payments database migration
6320chpostmigration.fm
Migrating static content
Updating configuration
Post migration steps for IBM Http Server
Document root is added as described below
Deploying
Deploying EJBs
Example 12-1 WebSphere Commerce section of httpd.conf
Configure and export the JAR file
Applying the JAR file to the production environment
Deploying commands and databeans
Export the JAR file
Deploying store assets
Exporting store assets
To export store assets perform the following steps
Applying the store assets to the production environment
Select Create directory structure for files
6320chpostmigration.fm
Part 4 Appendixes
6320p04.fm
Appendix A. Managing WebSphere Commerce components
Run the following command from the washome\bin directory
WebSphere Commerce instance management
Checking instance status
Starting the instance
WebSphere Commerce Payments instance management
Stopping the instance
Start the Configuration Manager
Follow these steps to start the Configuration Manager
Db2start
Output should be similar to what is shown in Example A-1
Restarting IBM Http Server
Modifying trace strings for a running server
Example A-1 Restarting the IBM Http Server
Our example, we issued the following command
Resulting in the following messages
Quit
Tracing for Lightweight WebSphere Test Environment
Tracing with WebSphere Commerce V5.6 Toolkit
Tracing for Full WebSphere Test Environment
Example A-2 Excerpt from Logging.properties file
Create missing password scripts
Create wcspassword script
Create wcspmpassword script
6320ax04.fm
Appendix B. Backup WebSphere Commerce Suite
Default directories
File system
Custom directories
Database backup
Db2 backup database dbname to backupdirectory
Appendix C. Migration scripts
Here is an excerpt of the configuration file
WebSphere Commerce V5.6 migration scripts behavior
Migratedb.bat behavior
Example C-1 Excerpt of DataMigrationPlan51.xml file
MigrateEncryptedInfo.bat behavior
Wcim.bat behavior
Tables used by migrateEncryptedInfo script file
6320ax02.fm
Custom database migration scripts behavior
Sequence diagram of the batch files
Database preparation batch script
Example C-2 Content of the pre.migration.bat file
Example C-3 Content of the pre.migration.sql file
Database preparation SQL script
Database migration batch script
Create NEW Master Catalogue
Example C-4 Content of the migration.bat file
Database post migration batch script
Example C-5 Content of post.migration.sql file
Database post migration SQL script
Appendix D. Moving from single to multi-node environment
Installing and configuring the database node
Single-node environment
Create a Windows user for DB2
Installing DB2
Connecting to the remote database
Backup the current production database
Moving the database
Stop all connections to the database
Verify connectivity
Create a local alias for the remote database
6320ax01.fm
Using the Web material
Locating the Web material
How to use the Web material
Zipped containing the rmPaymentsServer.bat script and a
Copy of the product.xml.51.sample file
Abbreviations and acronyms
6320abrv.fm
IBM Redbooks
Other publications
Online resources
How to get IBM Redbooks
IBM Support and downloads IBM Global Services
Help from IBM
Index
EJB
Migration scenario in-place
6320IX.fm
6320IX.fm
Security
Keeping Commerce Applications Updated
Keeping Commerce Applications Updated WebSphere Commerce
Page
Keeping Commerce Applications Updated WebSphere Commerce