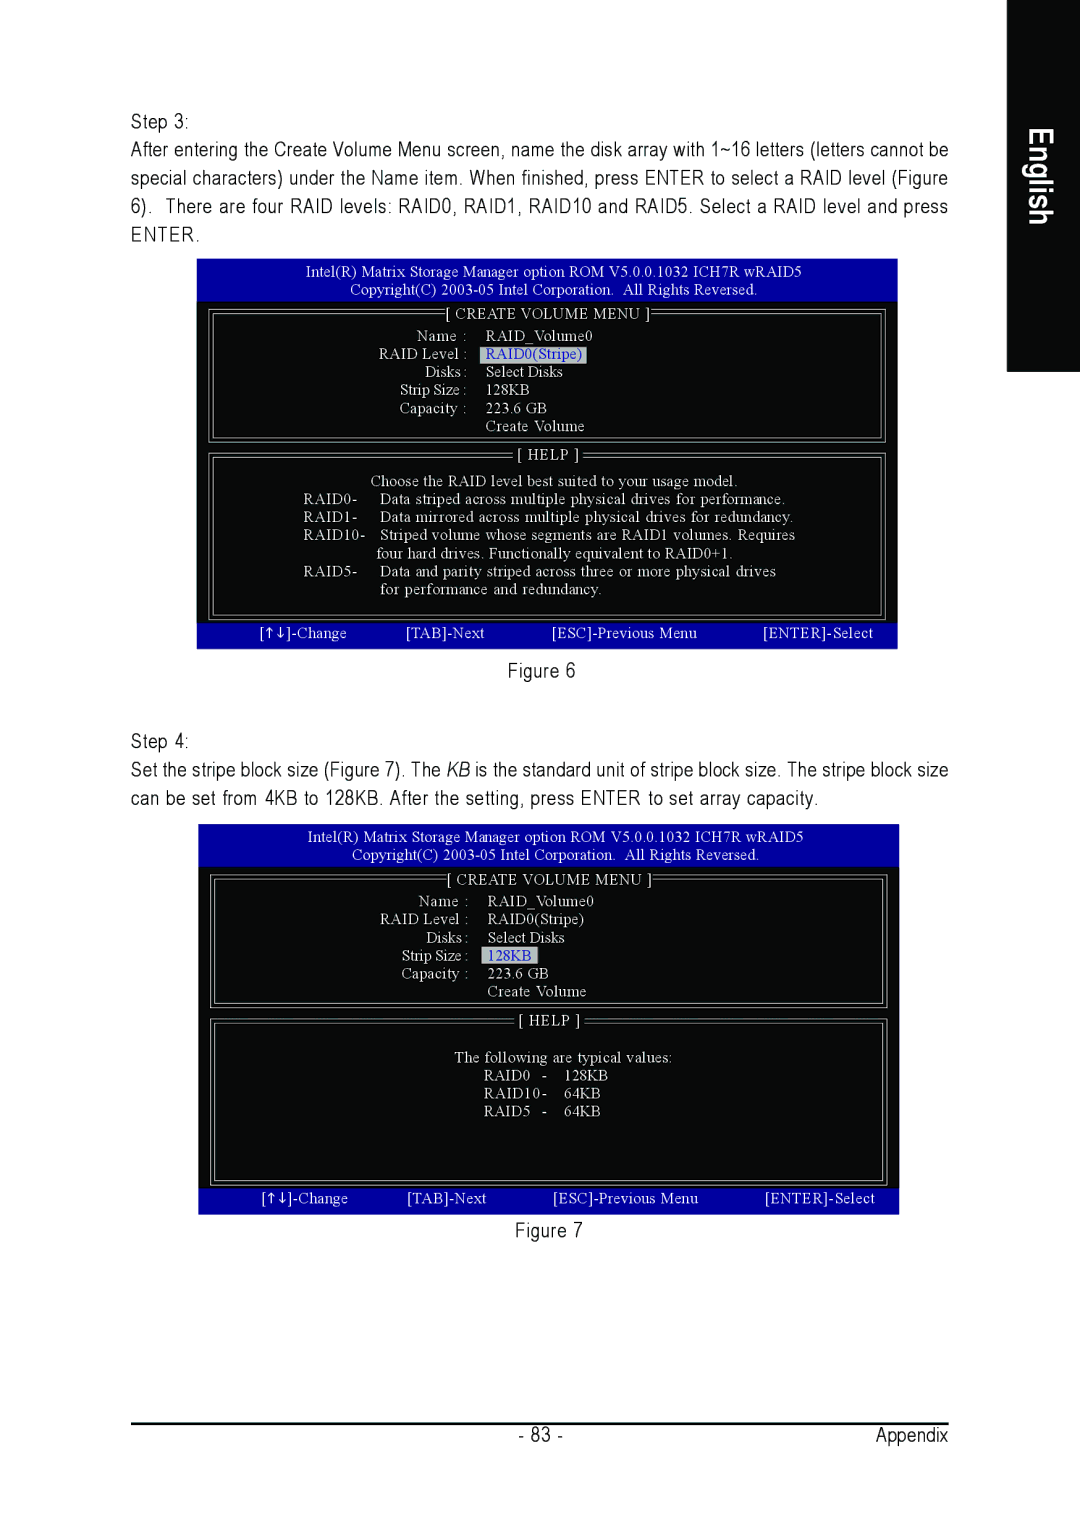
Step 3:
After entering the Create Volume Menu screen, name the disk array with 1~16 letters (letters cannot be special characters) under the Name item. When finished, press ENTER to select a RAID level (Figure
6). There are four RAID levels: RAID0, RAID1, RAID10 and RAID5. Select a RAID level and press
ENTER.
Intel(R) Matrix Storage Manager option ROM V5.0.0.1032 ICH7R wRAID5
Copyright(C)
[ CREATE VOLUME MENU ]
Name : RAID_Volume0
RAID Level : RAID0(Stripe)
Disks : Select Disks
Strip Size : 128KB
Capacity : 223.6 GB
Create Volume
[ HELP ]
Choose the RAID level best suited to your usage model. RAID0- Data striped across multiple physical drives for performance. RAID1- Data mirrored across multiple physical drives for redundancy. RAID10- Striped volume whose segments are RAID1 volumes. Requires
four hard drives. Functionally equivalent to RAID0+1. RAID5- Data and parity striped across three or more physical drives
for performance and redundancy.
[ |
Figure 6
Step 4:
Set the stripe block size (Figure 7). The KB is the standard unit of stripe block size. The stripe block size can be set from 4KB to 128KB. After the setting, press ENTER to set array capacity.
Intel(R) Matrix Storage Manager option ROM V5.0.0.1032 ICH7R wRAID5
Copyright(C)
[ CREATE VOLUME MENU ]
Name : RAID_Volume0
RAID Level : RAID0(Stripe)
Disks : Select Disks
Strip Size : 128KB
Capacity : 223.6 GB
Create Volume
[ HELP ]
The following are typical values:
RAID0 - 128KB
RAID10 - 64KB
RAID5 - 64KB
[ |
Figure 7
English
- 83 - | Appendix |