S E A T
PROCEDURE 4 |
| SEAT | |
Hex Bolt |
| ||
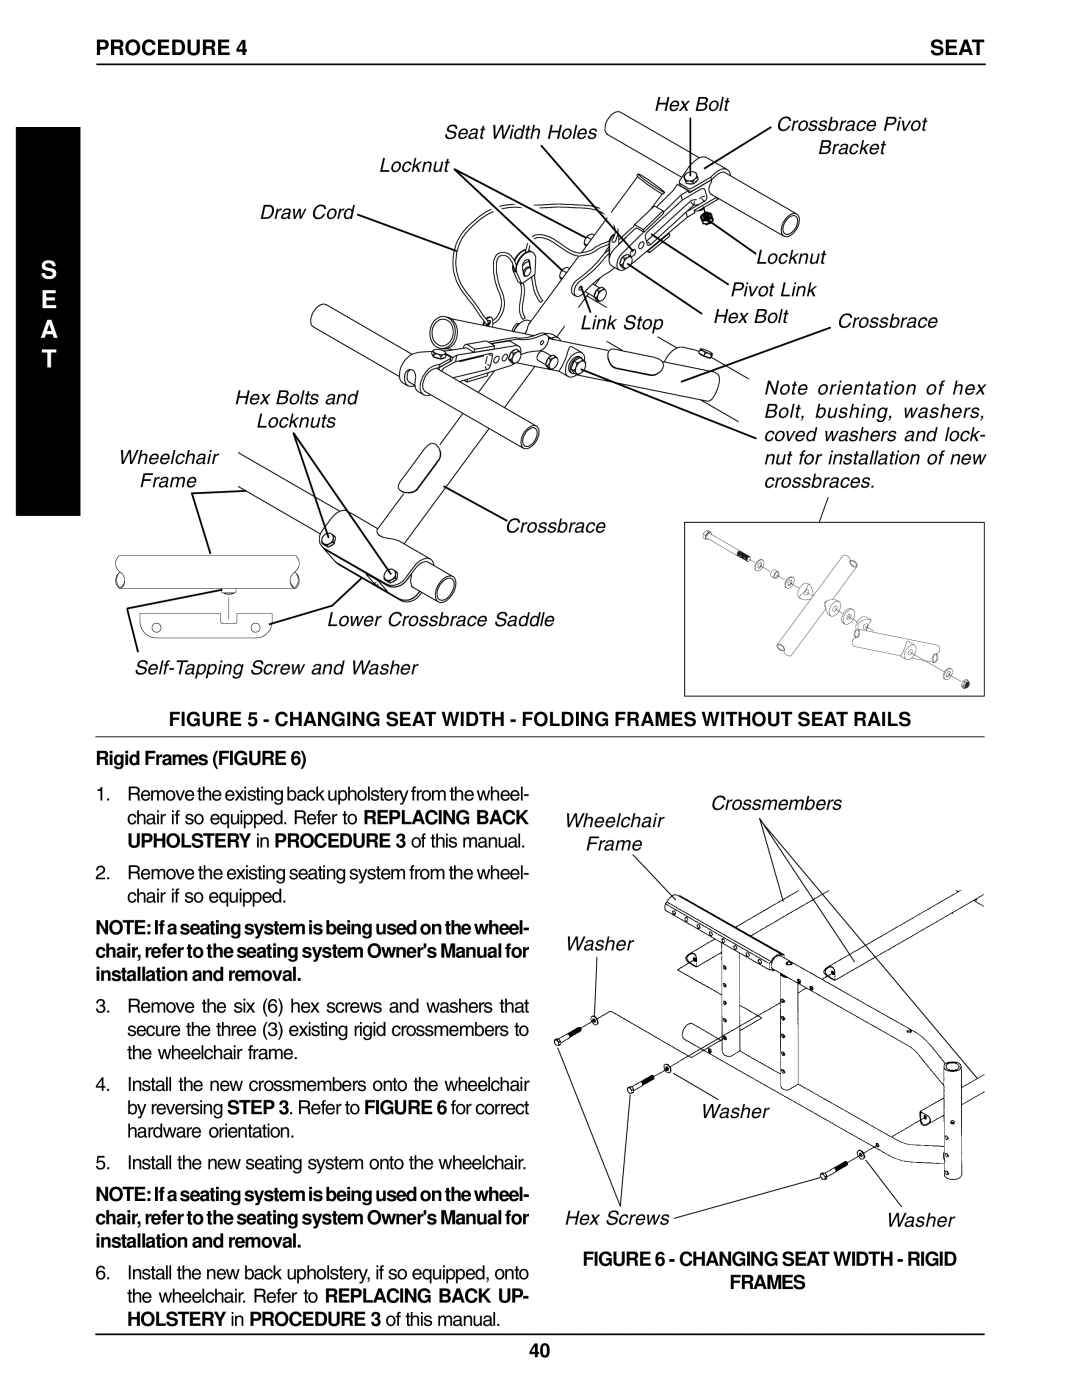
Seat Width Holes | Crossbrace Pivot | ||
| Bracket | ||
Locknut |
| ||
|
| ||
Draw Cord |
|
| |
| Locknut | ||
| Pivot Link |
| |
Link Stop | Hex Bolt | Crossbrace | |
Hex Bolts and | Note orientation of hex | ||
Bolt, bushing, washers, | |||
Locknuts | |||
coved washers and lock- | |||
| |||
Wheelchair | nut for installation of new | ||
Frame | crossbraces. | ||
Crossbrace
Lower Crossbrace Saddle
FIGURE 5 - CHANGING SEAT WIDTH - FOLDING FRAMES WITHOUT SEAT RAILS
Rigid Frames (FIGURE 6)
1.Remove the existing back upholstery from the wheel- chair if so equipped. Refer to REPLACING BACK UPHOLSTERY in PROCEDURE 3 of this manual.
2.Remove the existing seating system from the wheel- chair if so equipped.
NOTE: If a seating system is being used on the wheel- chair, refer to the seating system Owner's Manual for installation and removal.
3.Remove the six (6) hex screws and washers that secure the three (3) existing rigid crossmembers to the wheelchair frame.
4.Install the new crossmembers onto the wheelchair by reversing STEP 3. Refer to FIGURE 6 for correct hardware orientation.
5.Install the new seating system onto the wheelchair.
NOTE: If a seating system is being used on the wheel- chair, refer to the seating system Owner's Manual for installation and removal.
6.Install the new back upholstery, if so equipped, onto the wheelchair. Refer to REPLACING BACK UP- HOLSTERY in PROCEDURE 3 of this manual.
Crossmembers
Wheelchair
Frame
Washer
Washer
Hex Screws | Washer |
FIGURE 6 - CHANGING SEAT WIDTH - RIGID
FRAMES
40