RECLINER | PROCEDURE 8 |
This Procedure Includes the Following:
Recliner Operation
Adjusting the Recliner Cables
Replacing the Recliner Cables
Replacing the Gas Cylinders
Adjusting the Gas Cylinders
NOTE: refer to the procedure indicated if any of the following procedures are required:
WARNING
The seat height, seat depth, back angle, seating sys- tem, size and position of the rear wheels, as well as the user condition directly relate to the stability of the wheelchair. Any change to one (1) or any com- bination of the seven (7) may cause the wheelchair to decrease in stability. These adjustments MUST be performed by an authorized dealer or qualified technician.
REPLACEMENT/ADJUSTMENT | PROCEDURE | |
K Folding/Unfolding the Wheelchair | Safety/Handling | |
K Replacing Back/Headrest Upholstery | 3 | |
K Adjusting the Back Height |
| 3 |
K Repositioning the Back |
|
|
(Changing Seat Depth) |
| 3 |
K Repositioning Back For 2 or |
|
|
Seat Cushion |
| 3 |
K Replacing Folding Push Handle |
| 3 |
K Replacing the Seat Upholstery |
| 4 |
K Changing/Repositioning Seat Rails |
| 4 |
K Repositioning the Crossbraces |
| 4 |
K Changing Seat Width |
| 4 |
RECLINER OPERATION (FIGURES 1 AND 2)
WARNING
Both gas cylinders MUST be operational and ad- justed properly BEFORE using recliner. DO NOT operate the recliner option if only one (1) of the gas cylinders is operational or adjusted properly.
ALWAYS make sure that the wheelchair is stable in the FULL RECLINED (back at 170o) position AND the FULL UPRIGHT (back at 90o) position BEFORE using the recliner option.
Make sure the patient is properly positioned in the wheelchair before reclining or inclining (reverse re- cline) to maintain maximum stability and safety. Re- fer to the SAFETY/HANDLING section of this manual.
ALWAYS use the seat restraint.
WARNING
ALWAYS engage both wheel locks while reclining or inclining (reverse recline) the wheelchair.
When returning the occupant of the wheelchair to the full upright position, more body strength will be required for approximately the last twenty (20) de- grees of incline (reverse recline). Make sure to use proper body mechanics (use your legs) or seek as- sistance to avoid injury.
Before using the recliner option, make sure the
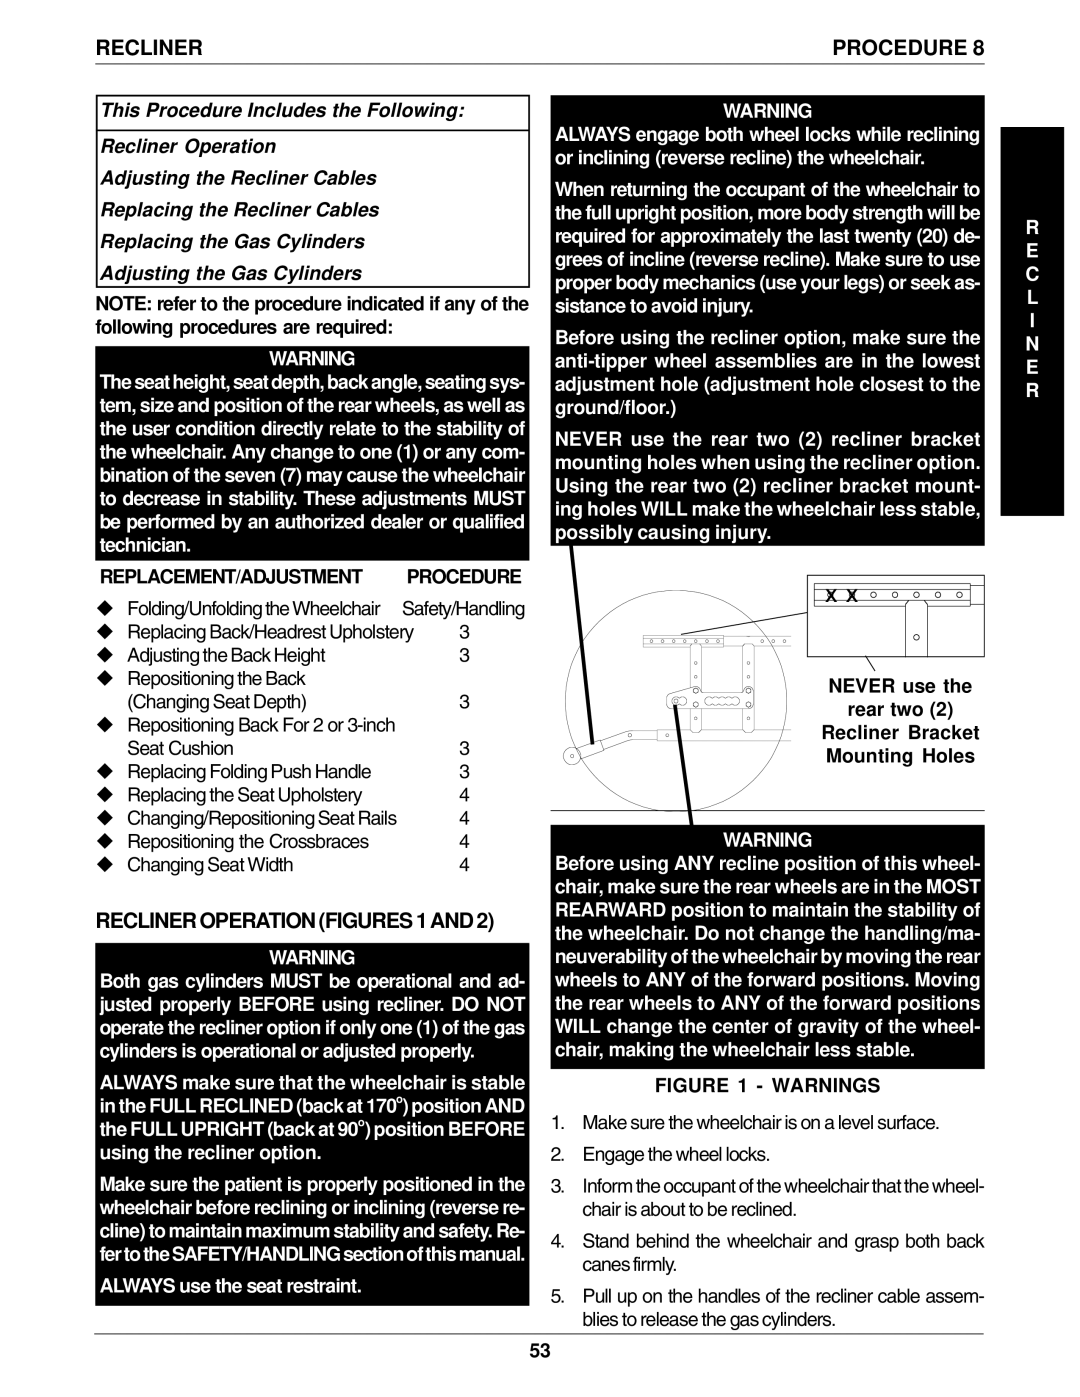
NEVER use the rear two (2) recliner bracket mounting holes when using the recliner option. Using the rear two (2) recliner bracket mount- ing holes WILL make the wheelchair less stable, possibly causing injury.
x x |
NEVER use the
rear two (2)
Recliner Bracket Mounting Holes
WARNING
Before using ANY recline position of this wheel- chair, make sure the rear wheels are in the MOST REARWARD position to maintain the stability of the wheelchair. Do not change the handling/ma- neuverability of the wheelchair by moving the rear wheels to ANY of the forward positions. Moving the rear wheels to ANY of the forward positions WILL change the center of gravity of the wheel- chair, making the wheelchair less stable.
FIGURE 1 - WARNINGS
1.Make sure the wheelchair is on a level surface.
2.Engage the wheel locks.
3.Inform the occupant of the wheelchair that the wheel- chair is about to be reclined.
4.Stand behind the wheelchair and grasp both back canes firmly.
5.Pull up on the handles of the recliner cable assem- blies to release the gas cylinders.
R E C L I N E R
53
