SECTION 9—FRONT RIGGINGS
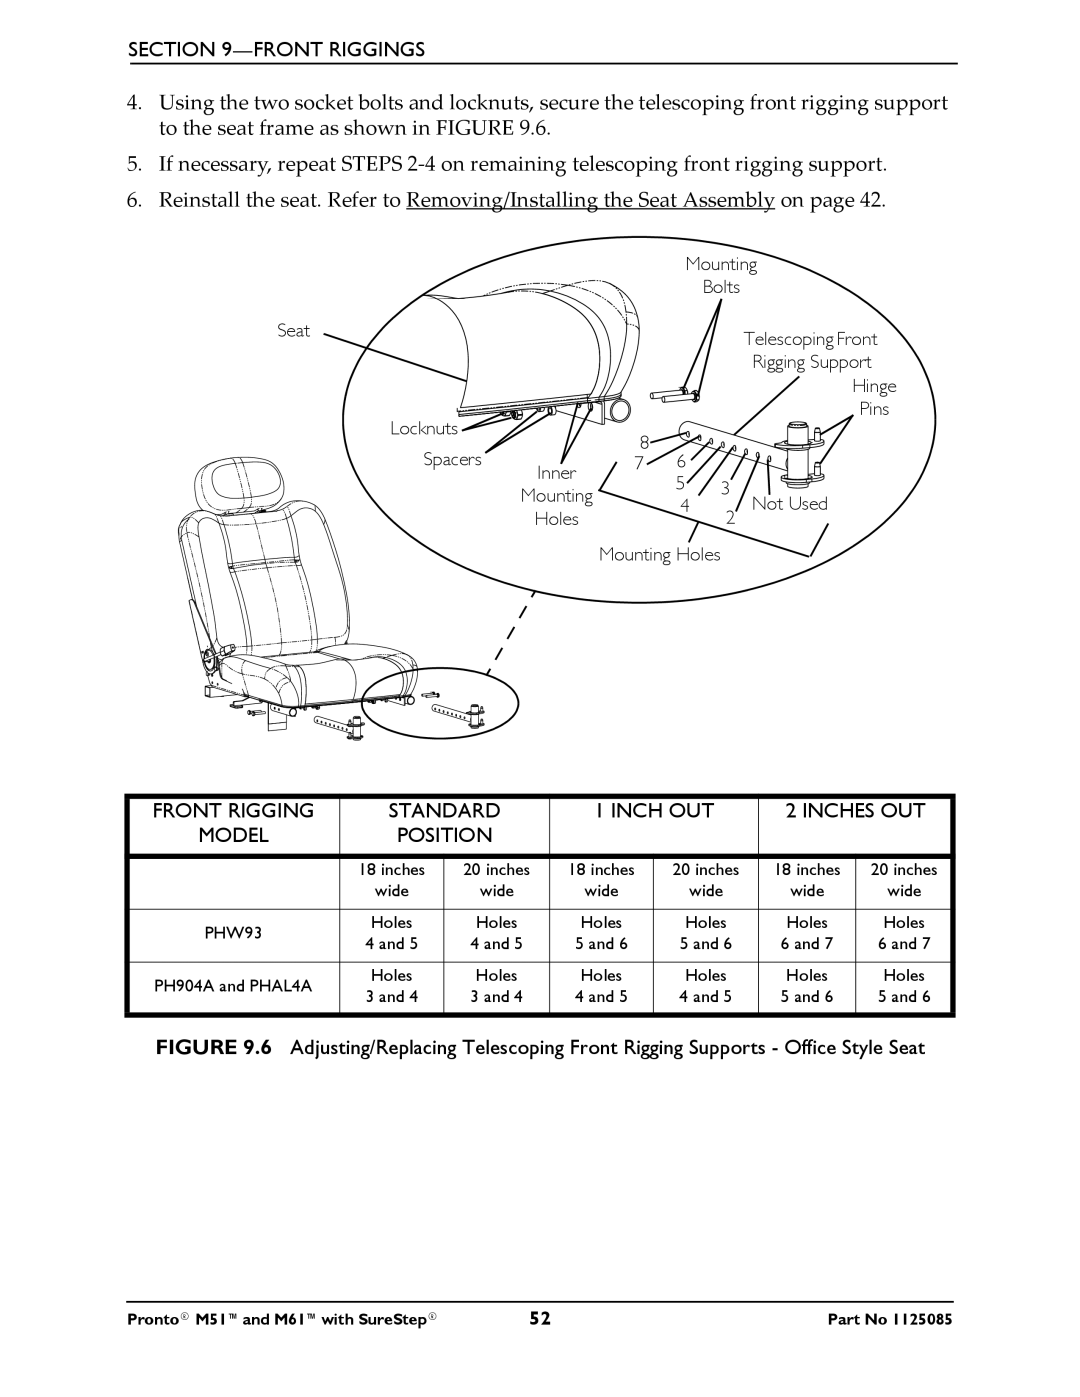
4.Using the two socket bolts and locknuts, secure the telescoping front rigging support to the seat frame as shown in FIGURE 9.6.
5.If necessary, repeat STEPS 2‐4 on remaining telescoping front rigging support.
6.Reinstall the seat. Refer to Removing/Installing the Seat Assembly on page 42.
|
| Mounting | ||
|
|
| Bolts |
|
Seat |
|
|
| Telescoping Front |
|
|
|
| |
|
|
|
| Rigging Support |
|
|
|
| Hinge |
Locknuts |
|
|
| Pins |
| 8 |
|
| |
Spacers |
|
|
| |
Inner | 7 |
|
| |
| 5 | 3 |
| |
| Mounting | Not Used | ||
| 4 | 2 | ||
| Holes | |||
|
|
| ||
Mounting Holes
FRONT RIGGING | STANDARD | 1 INCH OUT | 2 INCHES OUT | ||||
MODEL | POSITION |
|
|
|
| ||
|
|
|
|
|
|
| |
| 18 inches | 20 inches | 18 inches | 20 inches | 18 inches | 20 inches | |
| wide | wide | wide | wide | wide | wide | |
|
|
|
|
|
|
| |
PHW93 | Holes | Holes | Holes | Holes | Holes | Holes | |
4 and 5 | 4 and 5 | 5 and 6 | 5 and 6 | 6 and 7 | 6 and 7 | ||
| |||||||
|
|
|
|
|
|
| |
PH904A and PHAL4A | Holes | Holes | Holes | Holes | Holes | Holes | |
3 and 4 | 3 and 4 | 4 and 5 | 4 and 5 | 5 and 6 | 5 and 6 | ||
| |||||||
|
|
|
|
|
|
| |
FIGURE 9.6 Adjusting/Replacing Telescoping Front Rigging Supports - Office Style Seat
Pronto® M51™and M61™with SureStep® | 52 | Part No 1125085 |
