SECTION 5—WHEELCHAIR OPERATION
Repositioning the Joystick
Adjustable ASBA Seat
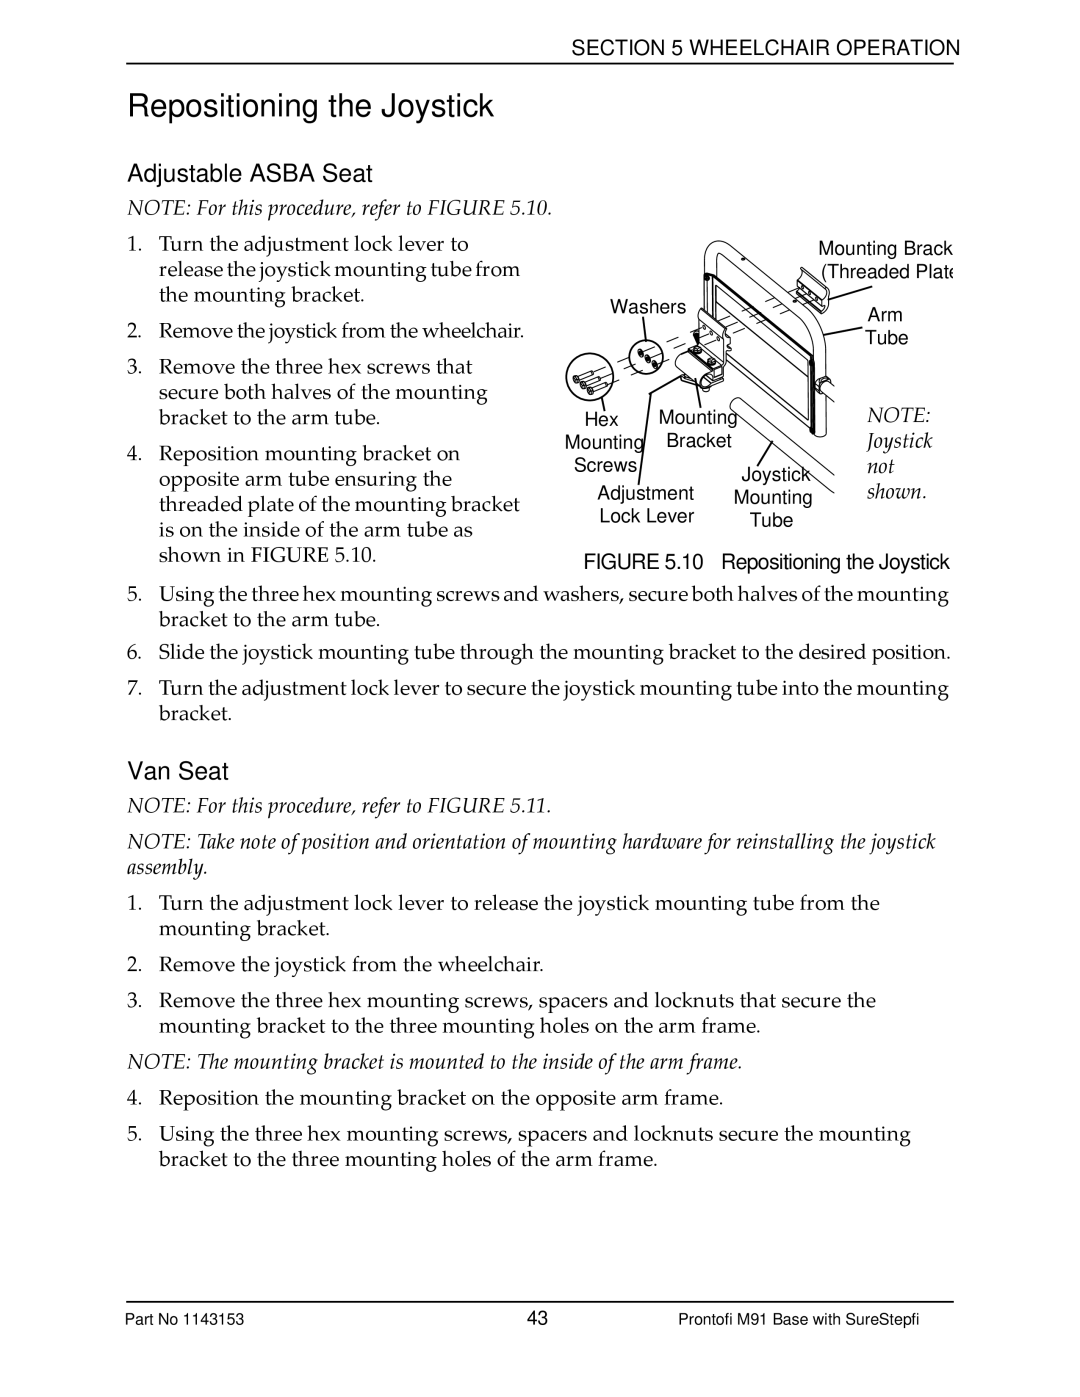
NOTE: For this procedure, refer to FIGURE 5.10.
1.Turn the adjustment lock lever to release the joystick mounting tube from the mounting bracket.
2.Remove the joystick from the wheelchair.
3.Remove the three hex screws that secure both halves of the mounting bracket to the arm tube.
4.Reposition mounting bracket on opposite arm tube ensuring the threaded plate of the mounting bracket is on the inside of the arm tube as shown in FIGURE 5.10.
|
|
| Mounting Bracket | |
|
|
| (Threaded Plate) | |
Washers |
| Arm | ||
|
|
| ||
|
|
| Tube | |
Hex | Mounting |
| NOTE: | |
Mounting | Bracket |
| Joystick | |
Screws |
| Joystick | not | |
Adjustment | shown. | |||
Mounting | ||||
Lock Lever | Tube |
| ||
FIGURE 5.10 Repositioning the Joystick
5.Using the three hex mounting screws and washers, secure both halves of the mounting bracket to the arm tube.
6.Slide the joystick mounting tube through the mounting bracket to the desired position.
7.Turn the adjustment lock lever to secure the joystick mounting tube into the mounting bracket.
Van Seat
NOTE: For this procedure, refer to FIGURE 5.11.
NOTE: Take note of position and orientation of mounting hardware for reinstalling the joystick assembly.
1.Turn the adjustment lock lever to release the joystick mounting tube from the mounting bracket.
2.Remove the joystick from the wheelchair.
3.Remove the three hex mounting screws, spacers and locknuts that secure the mounting bracket to the three mounting holes on the arm frame.
NOTE: The mounting bracket is mounted to the inside of the arm frame.
4.Reposition the mounting bracket on the opposite arm frame.
5.Using the three hex mounting screws, spacers and locknuts secure the mounting bracket to the three mounting holes of the arm frame.
Part No 1143153 | 43 | Pronto® M91™Base with SureStep® |