EDITING EN 65

L-2 Select Setting

F-1Input Setting

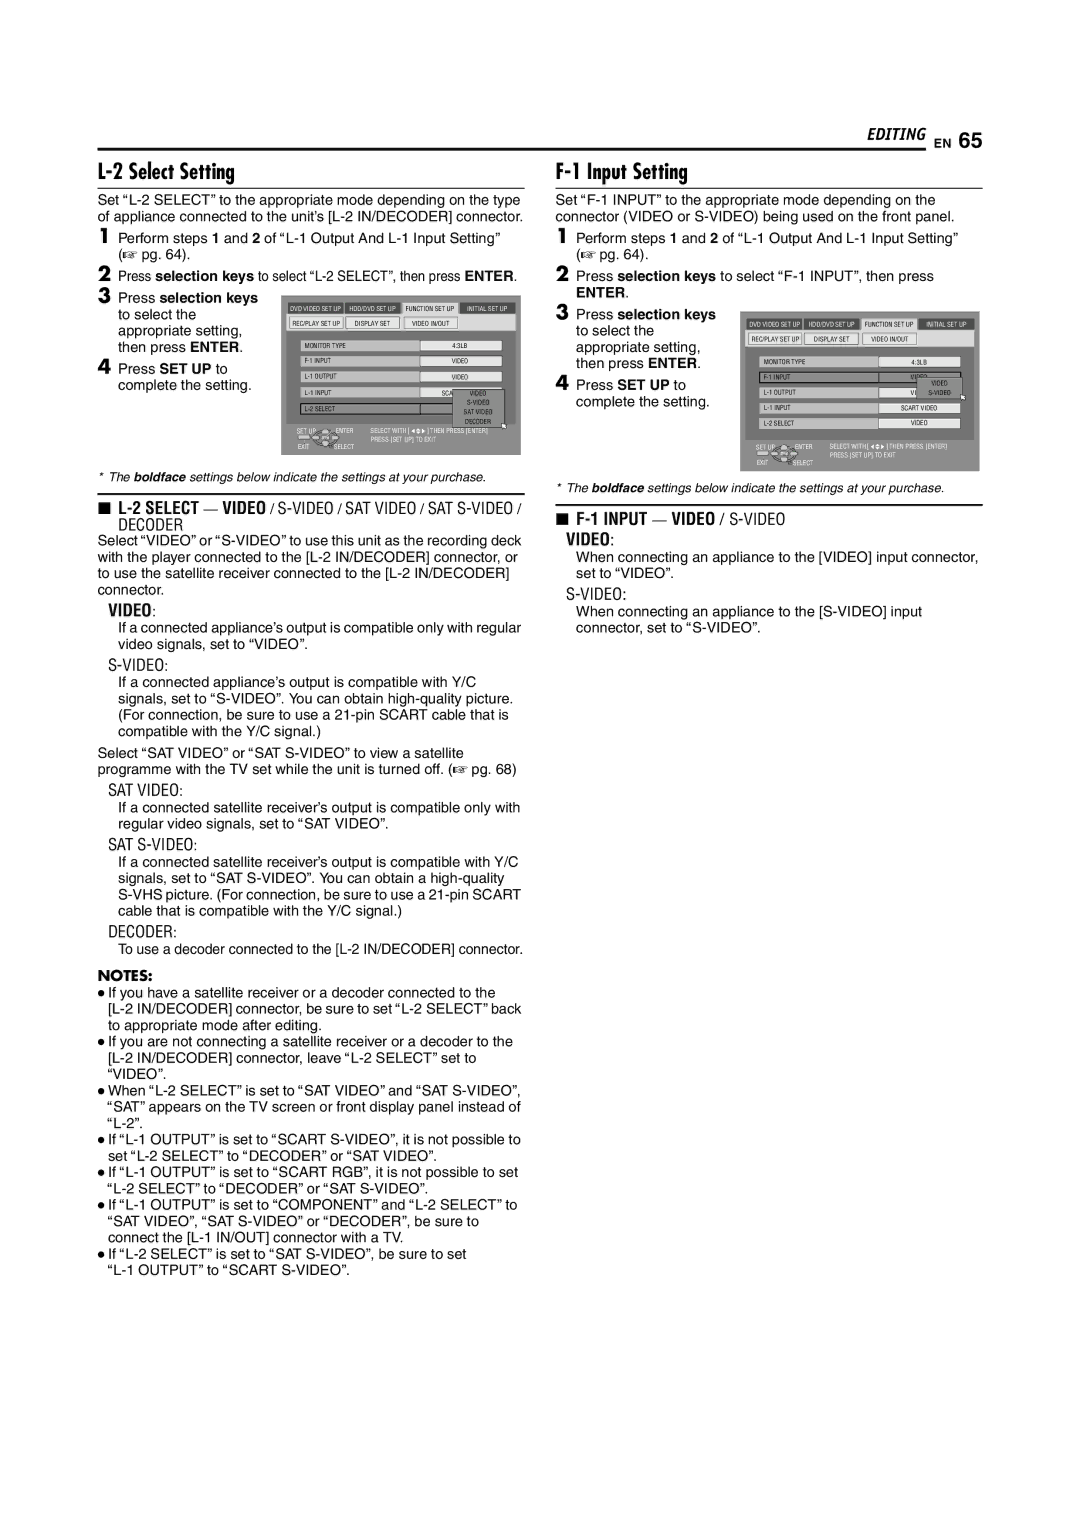
Set AL-2 SELECTB to the appropriate mode depending on the type of appliance connected to the unit’s [L-2 IN/DECODER] connector.

1Perform steps 1 and 2 of AL-1Output And L-1 Input SettingB (A pg. 64).

2Press selection keys to select AL-2 SELECTB, then press ENTER.

3Press selection keys


to select the

DVD VIDEO SET UP

HDD/DVD SET UP

FUNCTION SET UP

INITIAL SET UP


appropriate setting,

REC/PLAY SET UP


DISPLAY SET

VIDEO IN/OUT


then press ENTER.


MONITOR TYPE


4:3LB


4


Press SET UP to


F-1 INPUT


VIDEO


L-1 OUTPUT


VIDEO


complete the setting.


L-1 INPUT


SCART VIDEOVIDEO


S-VIDEO


L-2 SELECT


VIDEO


SAT VIDEO


DECODER


SET UP

ENTER


SELECT WITH @ THEN PRESS [ENTER]


SELECT

PRESS [SET UP] TO EXIT


EXIT


* The boldface settings below indicate the settings at your purchase.

8L-2 SELECT ^ VIDEO / S-VIDEO /SAT VIDEO / SAT S-VIDEO /

DECODER

Select AVIDEOB or AS-VIDEOBto use this unit as the recording deck with the player connected to the [L-2 IN/DECODER] connector, or to use the satellite receiver connected to the [L-2 IN/DECODER] connector.

VIDEO:

If a connected appliance’s output is compatible only with regular video signals, set to AVIDEOB.

S-VIDEO:

If a connected appliance’s output is compatible with Y/C signals, set to AS-VIDEOB. You can obtain high-quality picture. (For connection, be sure to use a 21-pin SCART cable that is compatible with the Y/C signal.)

Select ASAT VIDEOB or ASAT S-VIDEOBto view a satellite programme with the TV set while the unit is turned off. (A pg. 68)

SAT VIDEO:

If a connected satellite receiver’s output is compatible only with regular video signals, set to ASAT VIDEOB.

SAT S-VIDEO:

If a connected satellite receiver’s output is compatible with Y/C signals, set to ASAT S-VIDEOB. You can obtain a high-quality S-VHS picture. (For connection, be sure to use a 21-pin SCART cable that is compatible with the Y/C signal.)

DECODER:

To use a decoder connected to the [L-2 IN/DECODER] connector.

NOTES:

If you have a satellite receiver or a decoder connected to the [L-2 IN/DECODER] connector, be sure to set AL-2 SELECTB back to appropriate mode after editing.

If you are not connecting a satellite receiver or a decoder to the [L-2 IN/DECODER] connector, leave AL-2SELECTB set to

AVIDEOB.

When AL-2 SELECTB is set to ASAT VIDEOB and ASAT S-VIDEOB, ASATB appears on the TV screen or front display panel instead of AL-2B.

If AL-1 OUTPUTB is set to ASCART S-VIDEOB, it is not possible to set AL-2 SELECTB to ADECODERB or ASAT VIDEOB.

If AL-1 OUTPUTB is set to ASCART RGBB, it is not possible to set AL-2 SELECTB to ADECODERB or ASAT S-VIDEOB.

If AL-1 OUTPUTB is set to ACOMPONENTB and AL-2 SELECTB to ASAT VIDEOB, ASAT S-VIDEOBor ADECODERB, be sure to connect the [L-1 IN/OUT] connector with a TV.

If AL-2 SELECTB is set to ASAT S-VIDEOB, be sure to set AL-1 OUTPUTB to ASCART S-VIDEOB.

Set AF-1 INPUTB to the appropriate mode depending on the connector (VIDEO or S-VIDEO) being used on the front panel.

1Perform steps 1 and 2 of AL-1 Output And L-1 Input SettingB (A pg. 64).

2Press selection keys to select AF-1 INPUTB, then press

ENTER.

3Press selection keys

to select the

DVD VIDEO SET UP


HDD/DVD SET UP

FUNCTION SET UP

INITIAL SET UP

REC/PLAY SET UP


DISPLAY SET

VIDEO IN/OUT


appropriate setting,


then press ENTER.


MONITOR TYPE


4:3LB


4 Press SET UP to


F-1 INPUT


VIDEO


L-1 OUTPUT


S-VIDEO


complete the setting.


VIDEO


L-1 INPUT


SCART VIDEO


L-2 SELECT


VIDEO


SET UP

ENTER

SELECT WITH @ THEN PRESS [ENTER]


PRESS [SET UP] TO EXIT

EXIT

SELECT


* The boldface settings below indicate the settings at your purchase.

8F-1 INPUT ^ VIDEO / S-VIDEO VIDEO:

When connecting an appliance to the [VIDEO] input connector, set to AVIDEOB.

S-VIDEO:

When connecting an appliance to the [S-VIDEO] input connector, set to AS-VIDEOB.

Page 65
Image 65
JVC DR-MH200SE manual Select Setting, Input Setting, Press SET UP to, Appropriate setting Then press Enter

DR-MH200SE specifications

The JVC DR-MH200SE is a versatile DVD recorder and hard disk drive (HDD) unit that was designed to meet the recording and playback needs of both casual and avid users. It combines advanced recording technology with user-friendly features, making it an ideal choice for those who want to easily capture their favorite television shows, movies, and home videos.

One of the standout features of the DR-MH200SE is its generous storage capacity. The device is equipped with a 160 GB hard drive, allowing users to store a significant amount of content without the need to constantly swap out discs. The HDD enables users to record television programs, making it convenient for managing libraries of their favorite shows. This built-in storage can hold up to approximately 500 hours of standard quality recordings or around 67 hours in high definition, thus offering ample space for varied content preferences.

The DR-MH200SE supports multiple recording formats, including DVD-R, DVD-RW, DVD+R, and DVD+RW, giving users the flexibility to choose their preferred medium for playback. The recorder also features a user-friendly interface, which simplifies the recording process and makes it easy to navigate through settings and options. The device can capture programs in both SP and LP modes, allowing users to balance between the quality of the recordings and the amount of storage space utilized.

Additional technologies incorporated into the JVC DR-MH200SE include a built-in digital tuner, which enables users to access digital broadcast channels without needing an external box. This functionality enhances the overall versatility of the recorder, enabling direct recording from digital TV channels. The unit also features high-quality video processing capabilities, ensuring that recorded content retains its clarity and detail.

Moreover, the DR-MH200SE's compatibility with various video formats makes it easy to playback recorded video on various devices. The unit supports JPEG photo viewing, allowing users to showcase their photographs on a television screen, further enhancing its appeal as a multimedia device.

In summary, the JVC DR-MH200SE represents a solid choice for anyone seeking a reliable DVD recorder with integrated hard drive capabilities. With ample storage, flexible format support, a user-friendly design, and advanced recording features, it caters to diverse recording and playback needs, making it a valuable addition to any home entertainment setup.