Filename |
|
Masterpage:Left+ | |
|
60 EN EDITING
8 Locate the point from where you want to start dubbing, then
DV Dubbingstop or pause playback by pressing the following buttons on the remote control: 4, 5, 3, 8, 9
You can dub programs from a camcorder or DV equipment | ● To play back in slow speed (1/10 of the normal speed), press 9 to |
connected to the unit with a DV cable. The unit’s remote control | pause playback, then press 3 or 5. |
allows you the limited control of the connected camcorder or DV | ● To play back |
equipment functions during dubbing. | 9 repeatedly. Each press of 9 advances a frame. |
| ● To change the playback direction, press 3 or 5. |
NOTES:
●Use the DV cable
●When you connect a PC to the DV IN connector, we do not assure the normal operation of this unit.
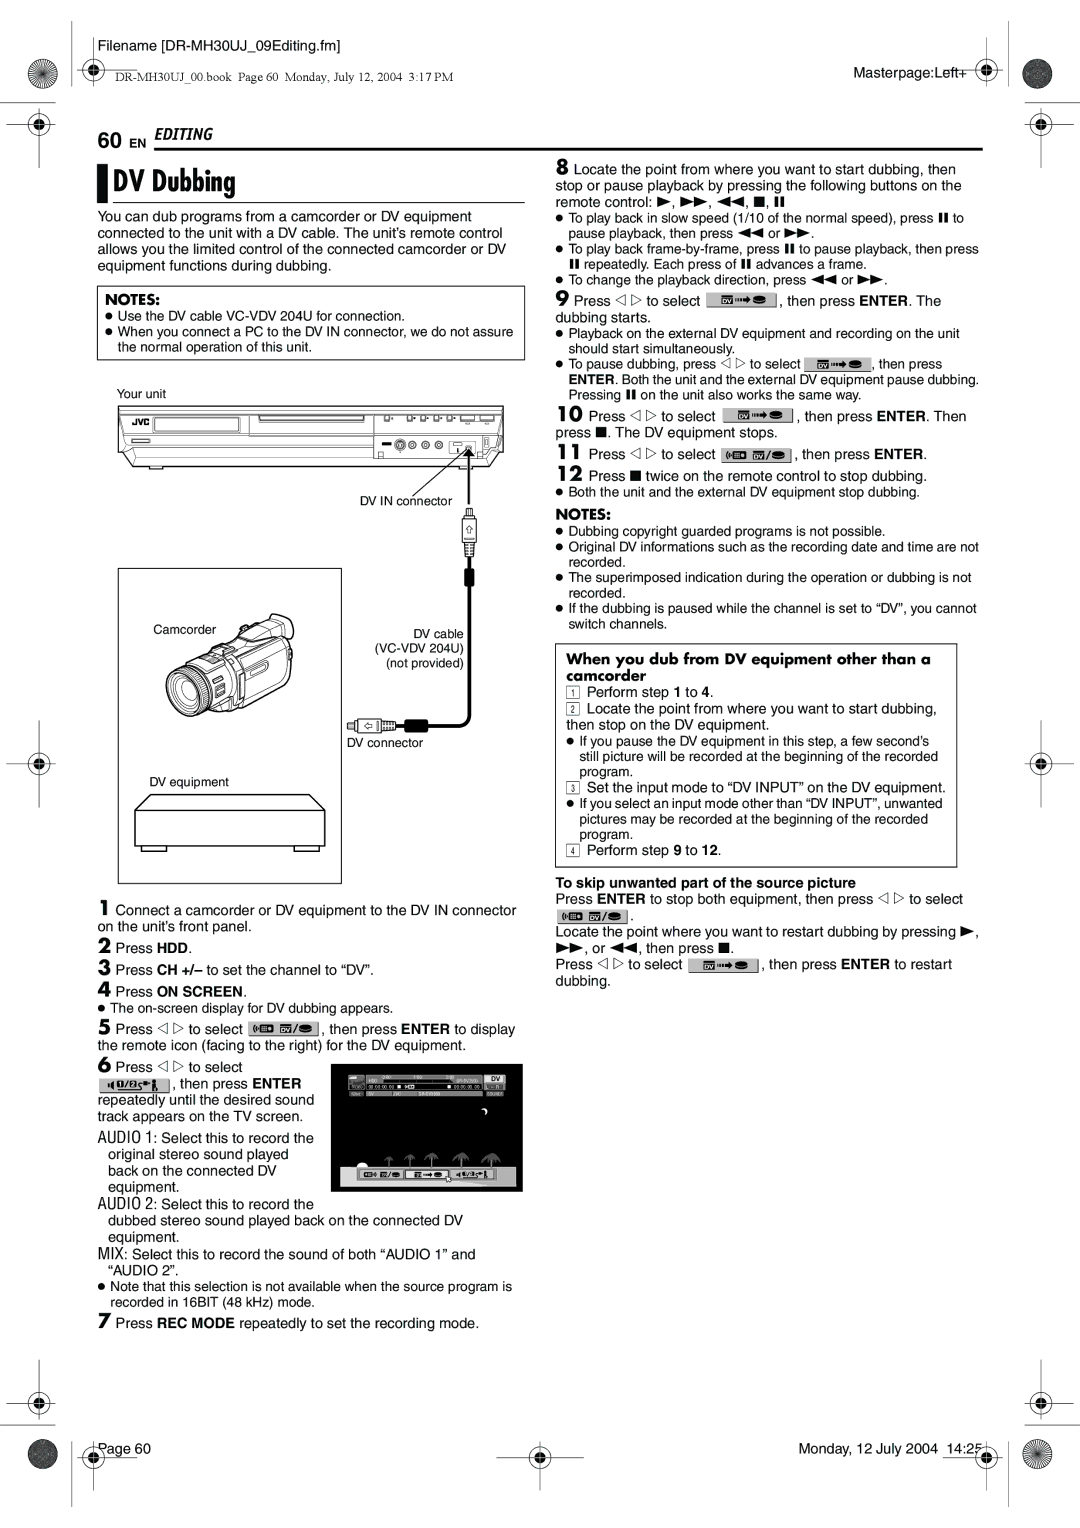
Your unit
DV IN connector
9 Press w e to select  , then press ENTER. The dubbing starts.
●Playback on the external DV equipment and recording on the unit should start simultaneously.
●To pause dubbing, press w e to select ![]() , then press ENTER. Both the unit and the external DV equipment pause dubbing. Pressing 9 on the unit also works the same way.
, then press ENTER. Both the unit and the external DV equipment pause dubbing. Pressing 9 on the unit also works the same way.
10Press w e to select ![]() , then press ENTER. Then press 8. The DV equipment stops.
, then press ENTER. Then press 8. The DV equipment stops.
11Press w e to select ![]() , then press ENTER.
, then press ENTER.
12Press 8 twice on the remote control to stop dubbing.
●Both the unit and the external DV equipment stop dubbing.
NOTES:
Camcorder |
DV equipment |
DV cable
(not provided)
DV connector
●Dubbing copyright guarded programs is not possible.
●Original DV informations such as the recording date and time are not recorded.
●The superimposed indication during the operation or dubbing is not recorded.
●If the dubbing is paused while the channel is set to “DV”, you cannot switch channels.
When you dub from DV equipment other than a camcorder
APerform step 1 to 4.
BLocate the point from where you want to start dubbing, then stop on the DV equipment.
● If you pause the DV equipment in this step, a few second’s still picture will be recorded at the beginning of the recorded program.
C Set the input mode to “DV INPUT” on the DV equipment.
● If you select an input mode other than “DV INPUT”, unwanted pictures may be recorded at the beginning of the recorded program.
D Perform step 9 to 12.
To skip unwanted part of the source picture
1 Connect a camcorder or DV equipment to the DV IN connector on the unit’s front panel.
2Press HDD.
3Press CH +/– to set the channel to “DV”.
4Press ON SCREEN.
●The
5 Press w e to select ![]() , then press ENTER to display the remote icon (facing to the right) for the DV equipment.
, then press ENTER to display the remote icon (facing to the right) for the DV equipment.
Press ENTER to stop both equipment, then press w e to select
![]() .
.
Locate the point where you want to restart dubbing by pressing 4, 5, or 3, then press 8.
Press w e to select ![]() , then press ENTER to restart dubbing.
, then press ENTER to restart dubbing.
6 Press w e to select
![]() , then press ENTER repeatedly until the desired sound track appears on the TV screen.
, then press ENTER repeatedly until the desired sound track appears on the TV screen.
AUDIO 1: Select this to record the original stereo sound played back on the connected DV equipment.
| HDD | 0:00 | 1:00 | 2:00 | DV |
|
|
| |||
FR360 | 00:00:00. 00 |
| 00:00:00. 00 | L – R | |
12bit | DV | JVC |
| SOUND1 | |
DV | DV | 1 | 2 |
AUDIO 2: Select this to record the
dubbed stereo sound played back on the connected DV equipment.
MIX: Select this to record the sound of both “AUDIO 1” and “AUDIO 2”.
●Note that this selection is not available when the source program is recorded in 16BIT (48 kHz) mode.
7 Press REC MODE repeatedly to set the recording mode.
Page 60 |
Monday, 12 July 2004 14:25 |