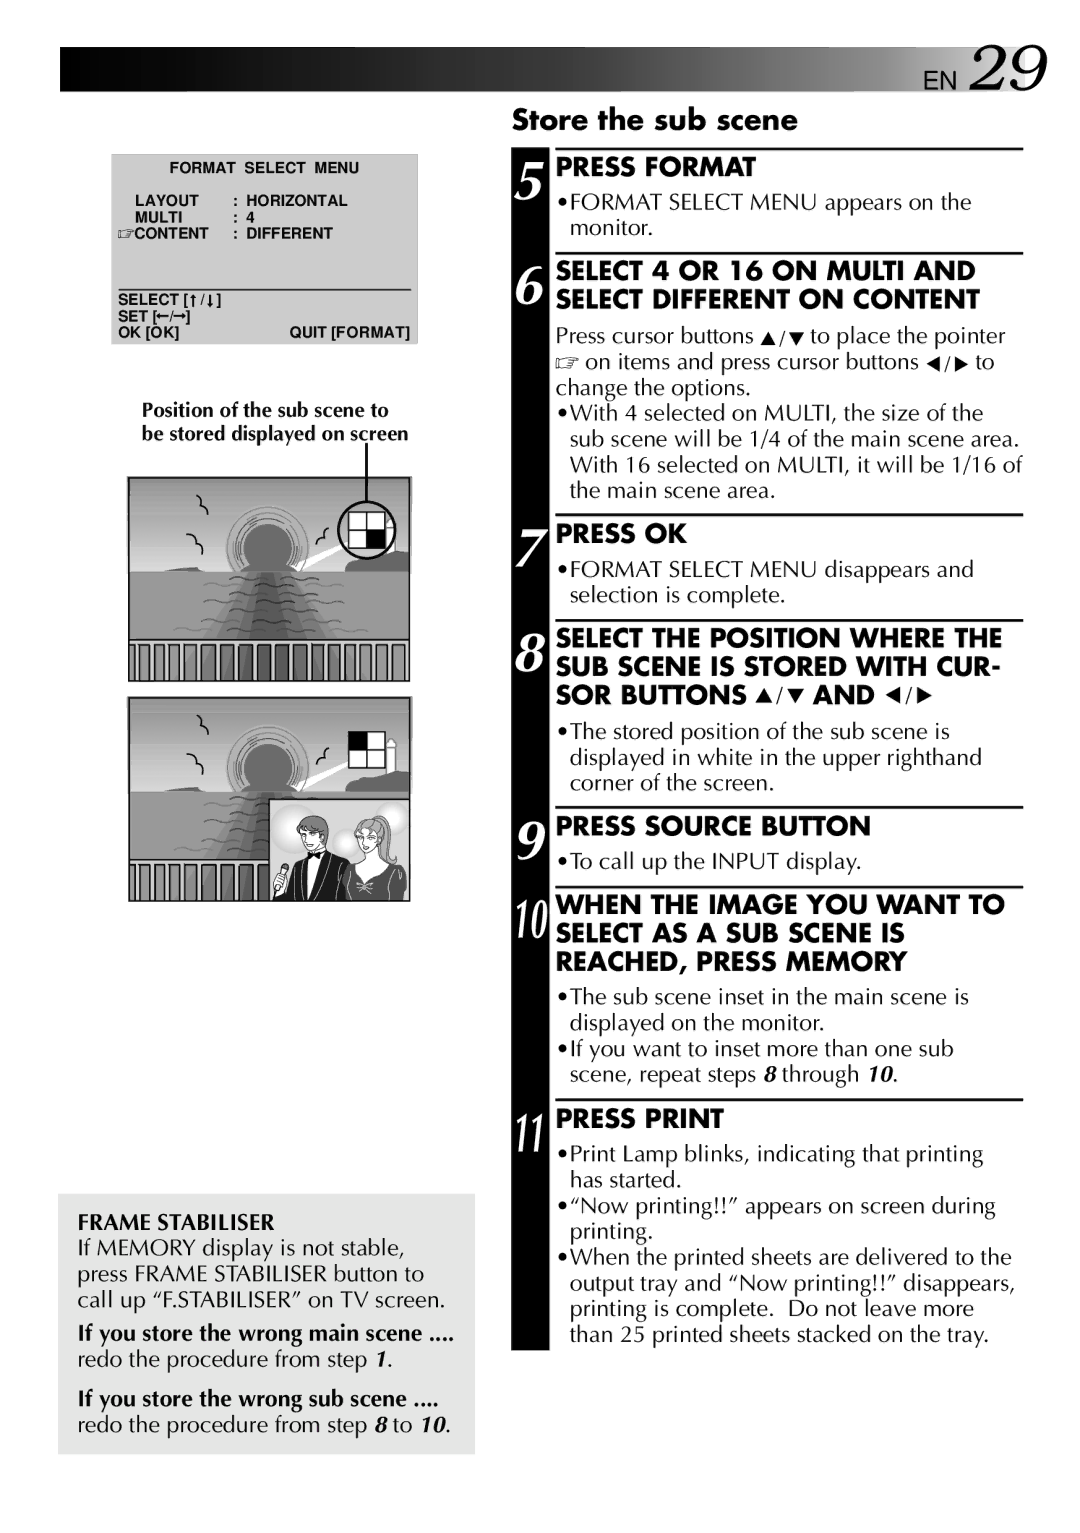
FORMAT SELECT MENU
LAYOUT : HORIZONTAL
MULTI : 4
☞CONTENT : DIFFERENT
SELECT [ / | ] |
SET [ / ] |
|
OK [OK] | QUIT [FORMAT] |
Position of the sub scene to be stored displayed on screen
FRAME STABILISER
If MEMORY display is not stable, press FRAME STABILISER button to call up “F.STABILISER” on TV screen.
If you store the wrong main scene ....
redo the procedure from step 1.
If you store the wrong sub scene ....
redo the procedure from step 8 to 10.
EN 29
Store the sub scene
5 PRESS FORMAT
•FORMAT SELECT MENU appears on the monitor.
6 SELECT 4 OR 16 ON MULTI AND SELECT DIFFERENT ON CONTENT
Press cursor buttons ![]() /
/![]() to place the pointer
to place the pointer
☞on items and press cursor buttons ![]() /
/ ![]() to change the options.
to change the options.
•With 4 selected on MULTI, the size of the sub scene will be 1/4 of the main scene area. With 16 selected on MULTI, it will be 1/16 of the main scene area.
7 PRESS OK
•FORMAT SELECT MENU disappears and selection is complete.
8 SELECT THE POSITION WHERE THE SUB SCENE IS STORED WITH CUR- SOR BUTTONS ![]() /
/![]() AND
AND ![]() /
/ ![]()
11
