30


 TIMER
TIMER
 RECORDING
 (cont.)


On-Screen
Timer
Programming
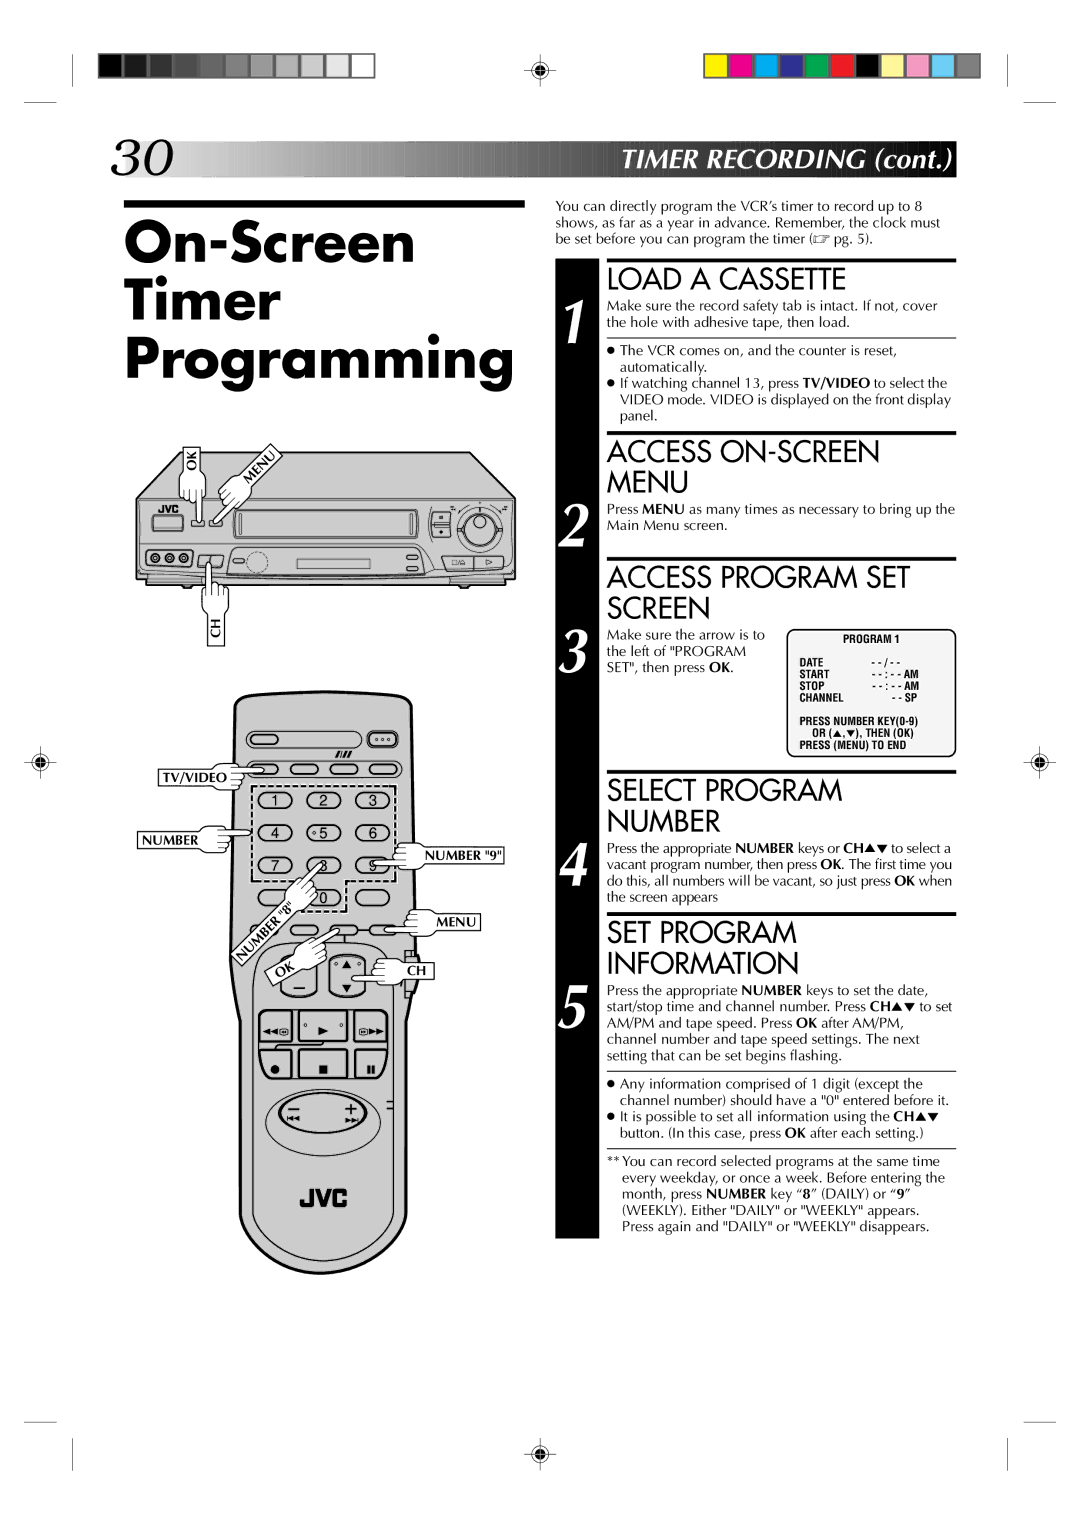
OK | MENU |
|
6
q
CH
You can directly program the VCR’s timer to record up to 8 shows, as far as a year in advance. Remember, the clock must be set before you can program the timer (☞ pg. 5).
LOAD A CASSETTE
1 Make sure the record safety tab is intact. If not, cover the hole with adhesive tape, then load.
●The VCR comes on, and the counter is reset, automatically.
●If watching channel 13, press TV/VIDEO to select the VIDEO mode. VIDEO is displayed on the front display panel.
| ACCESS | |||
2 | MENU |
|
| |
Press MENU as many times as necessary to bring up the | ||||
Main Menu screen. |
|
| ||
| ACCESS PROGRAM SET | |||
3 | SCREEN |
|
| |
Make sure the arrow is to | PROGRAM 1 | |||
the left of "PROGRAM | DATE | - | ||
SET", then press OK. | ||||
START | - | |||
|
| STOP - | ||
|
| CHANNEL | - - SP | |
|
| PRESS NUMBER | ||
|
| OR (5,°), THEN (OK) | ||
|
| PRESS (MENU) TO END | ||
TV/VIDEO |
|
|
|
| 1 |
| 2 |
NUMBER | 4 |
| 5 |
|
|
| |
| 7 |
| 8 |
|
| "8" | 0 |
| NUMBER |
| |
|
|
| |
| OK |
| |
3
6
NUMBER "9"
9
MENU
CH |
| SELECT PROGRAM |
| NUMBER |
| Press the appropriate NUMBER keys or CH5°to select a |
| vacant program number, then press OK. The first time you |
4 do this, all numbers will be vacant, so just press OK when | |
| the screen appears |
| SET PROGRAM |
5 | INFORMATION |
Press the appropriate NUMBER keys to set the date, | |
start/stop time and channel number. Press CH5° to set | |
AM/PM and tape speed. Press OK after AM/PM, | |
| channel number and tape speed settings. The next |
| setting that can be set begins flashing. |
●Any information comprised of 1 digit (except the channel number) should have a "0" entered before it.
●It is possible to set all information using the CH5° button. (In this case, press OK after each setting.)
**You can record selected programs at the same time every weekday, or once a week. Before entering the month, press NUMBER key “8” (DAILY) or “9” (WEEKLY). Either "DAILY" or "WEEKLY" appears. Press again and "DAILY" or "WEEKLY" disappears.