16![]()
![]()
![]() EN
EN![]()
![]()
![]()
![]()
![]()
![]()
![]()
![]()
![]()
![]()
![]()
![]()
![]()
![]()
![]()
![]()
![]()
![]()
![]()
![]()
![]()
![]()
![]()
![]()
![]()
![]()
![]()
![]()
![]()
![]()
![]()
![]()
![]()
![]()
![]()
![]()
![]()
![]()
![]()
![]()
![]()
![]()
![]()
![]()
![]()
![]()
|
|
|
| PLAY |
| EW |
|
|
|
SPATIALIZER |
|
| DIGITAL | |
|
|
|
| TBC/NR |
1 | 2 |
| 3 | AUDIO |
|
| |||
|
|
|
| 2 |
4 | 5 |
| 6 |
|
7 | 8 |
| 9 |
|
| 0 |
|
| 4 |
1 |
|
|
|
|
|
|
|
| PLAY |
REW |
|
|
|
|
STOP |
|
|
|
|
|
| 3 |
| OK |
MENU
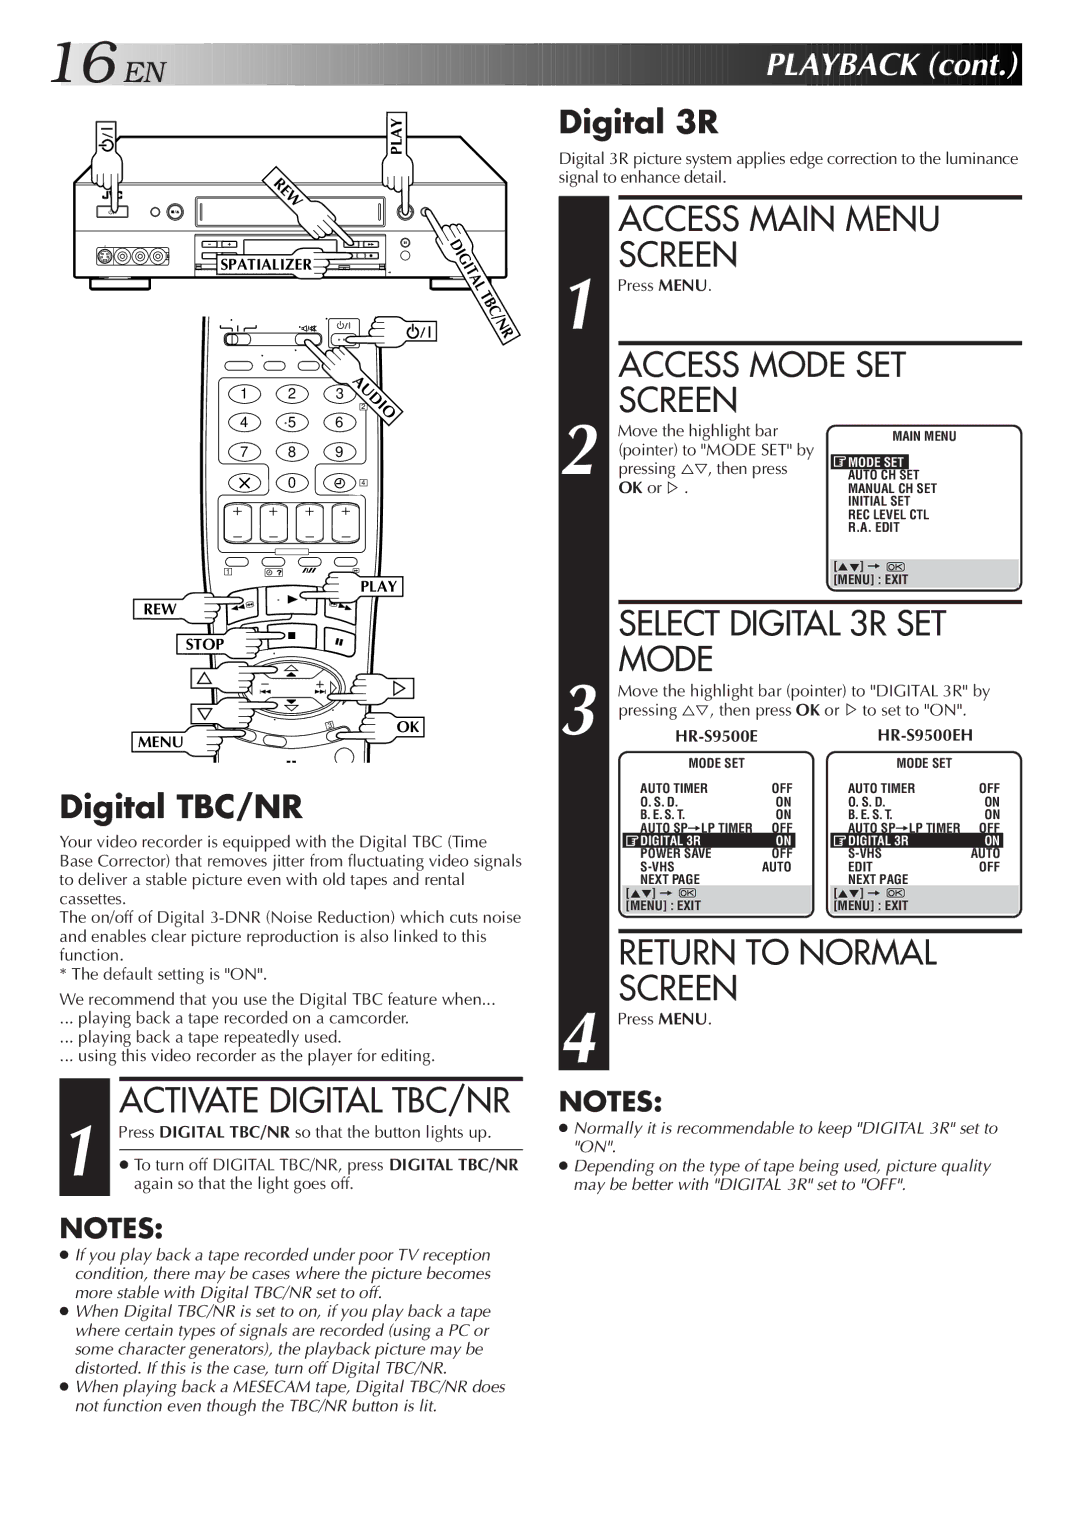
Digital TBC/NR
Your video recorder is equipped with the Digital TBC (Time Base Corrector) that removes jitter from fluctuating video signals to deliver a stable picture even with old tapes and rental cassettes.
The on/off of Digital
* The default setting is "ON".
We recommend that you use the Digital TBC feature when...
... playing back a tape recorded on a camcorder.
... playing back a tape repeatedly used.
... using this video recorder as the player for editing.
1 |
| ACTIVATE DIGITAL TBC/NR |
Press DIGITAL TBC/NR so that the button lights up. | ||
|
| |
| ● To turn off DIGITAL TBC/NR, press DIGITAL TBC/NR | |
| again so that the light goes off. | |
NOTES:
●If you play back a tape recorded under poor TV reception condition, there may be cases where the picture becomes more stable with Digital TBC/NR set to off.
●When Digital TBC/NR is set to on, if you play back a tape where certain types of signals are recorded (using a PC or some character generators), the playback picture may be distorted. If this is the case, turn off Digital TBC/NR.
●When playing back a MESECAM tape, Digital TBC/NR does
not function even though the TBC/NR button is lit.
![]()
![]()
![]()
![]()
![]() PLAYBACK
PLAYBACK![]() (cont.)
(cont.)![]()
![]()
![]()
Digital 3R
Digital 3R picture system applies edge correction to the luminance signal to enhance detail.
|
|
| ACCESS MAIN MENU |
|
|
| ||||||
| 1 |
| SCREEN |
|
|
|
|
|
|
|
| |
| Press MENU. |
|
|
|
|
|
|
|
| |||
|
|
| ACCESS MODE SET |
|
|
| ||||||
| 2 |
| SCREEN |
|
|
|
|
|
|
|
| |
| Move the highlight bar | MAIN MENU |
|
|
| |||||||
|
| (pointer) to "MODE SET" by |
|
|
|
|
| |||||
|
| MODE SET |
|
|
|
| ||||||
|
| pressing %Þ, then press |
|
|
|
| ||||||
|
| AUTO CH SET |
|
|
| |||||||
|
|
| OK or%. |
|
|
| MANUAL CH SET |
|
|
| ||
|
|
|
|
|
|
|
| INITIAL SET |
|
|
| |
|
|
|
|
|
|
|
| REC LEVEL CTL |
|
|
| |
|
|
|
|
|
|
|
| R.A. EDITT |
|
|
| |
|
|
|
|
|
|
|
|
|
|
|
|
|
|
|
|
|
|
|
|
| [5°] = |
|
|
|
|
|
|
|
|
|
|
|
| [MENU] : EXIT |
|
|
| |
|
|
|
|
|
|
|
|
|
|
|
|
|
|
|
| SELECT DIGITAL 3R SET |
|
|
| ||||||
| 3 |
| MODE |
|
|
|
|
|
|
|
| |
| Move the highlight bar (pointer) to "DIGITAL 3R" by | |||||||||||
|
| pressing %Þ, then press OK or%to set to "ON". |
|
|
| |||||||
|
|
|
|
|
| |||||||
|
|
|
| MODE SET |
|
|
| MODE SET |
|
|
| |
|
|
|
| AUTO TIMER | OFF | AUTO TIMER | OFF | |||||
|
|
|
| O. S. D. | ON | O. S. D. | ON | |||||
|
|
|
| B. E. S. T. | ON | B. E. S. T. | ON | |||||
|
|
|
| AUTO SP=LP TIMER | OFF | AUTO SP=LP TIMER | OFF | |||||
|
|
|
| DIGITAL 3R | ON |
| DIGITAL 3R | ON |
| |||
|
|
|
| POWER SAVE | OFF |
| AUTO |
| ||||
|
|
|
| AUTO | EDIT | OFF | ||||||
|
|
|
| NEXT PAGE |
|
|
| NEXT PAGE |
|
|
| |
|
|
| [5°] = |
|
|
| [5°] = |
|
|
|
| |
|
|
|
| [MENU] : EXIT |
|
|
| [MENU] : EXIT |
|
|
| |
|
|
|
|
|
|
|
|
|
|
|
|
|
|
|
| RETURN TO NORMAL |
|
|
| ||||||
| 4 |
| SCREEN |
|
|
|
|
|
|
|
| |
| Press MENU. |
|
|
|
|
|
|
|
| |||
NOTES:
●Normally it is recommendable to keep "DIGITAL 3R" set to "ON".
●Depending on the type of tape being used, picture quality may be better with "DIGITAL 3R" set to "OFF".