Installation
Example
Satellite speaker | Center speaker |
(front left stpeker) |
TV
Powered
Center unit
To attach non-slip rubbers to the center speaker
Attach the supplied
The
Attach
Attach two rubbers at left and right at the front of the speaker, and one in the middle at the rear.
Non-slip rubber
Satellite speaker (rear left speaker)
The rear speakers are placed behind the listening position.
Satellite speaker (rear right speaker)
Satellite speaker (front right speaker)
CAUTIONS:
• For safety reasons, always ensure that there is sufficient place behind the powered
• If the front and rear speakers are placed on the floor, always ensure that they are level.
1 cm (7/16”) 5 cm (2”)
Front side
Bottom
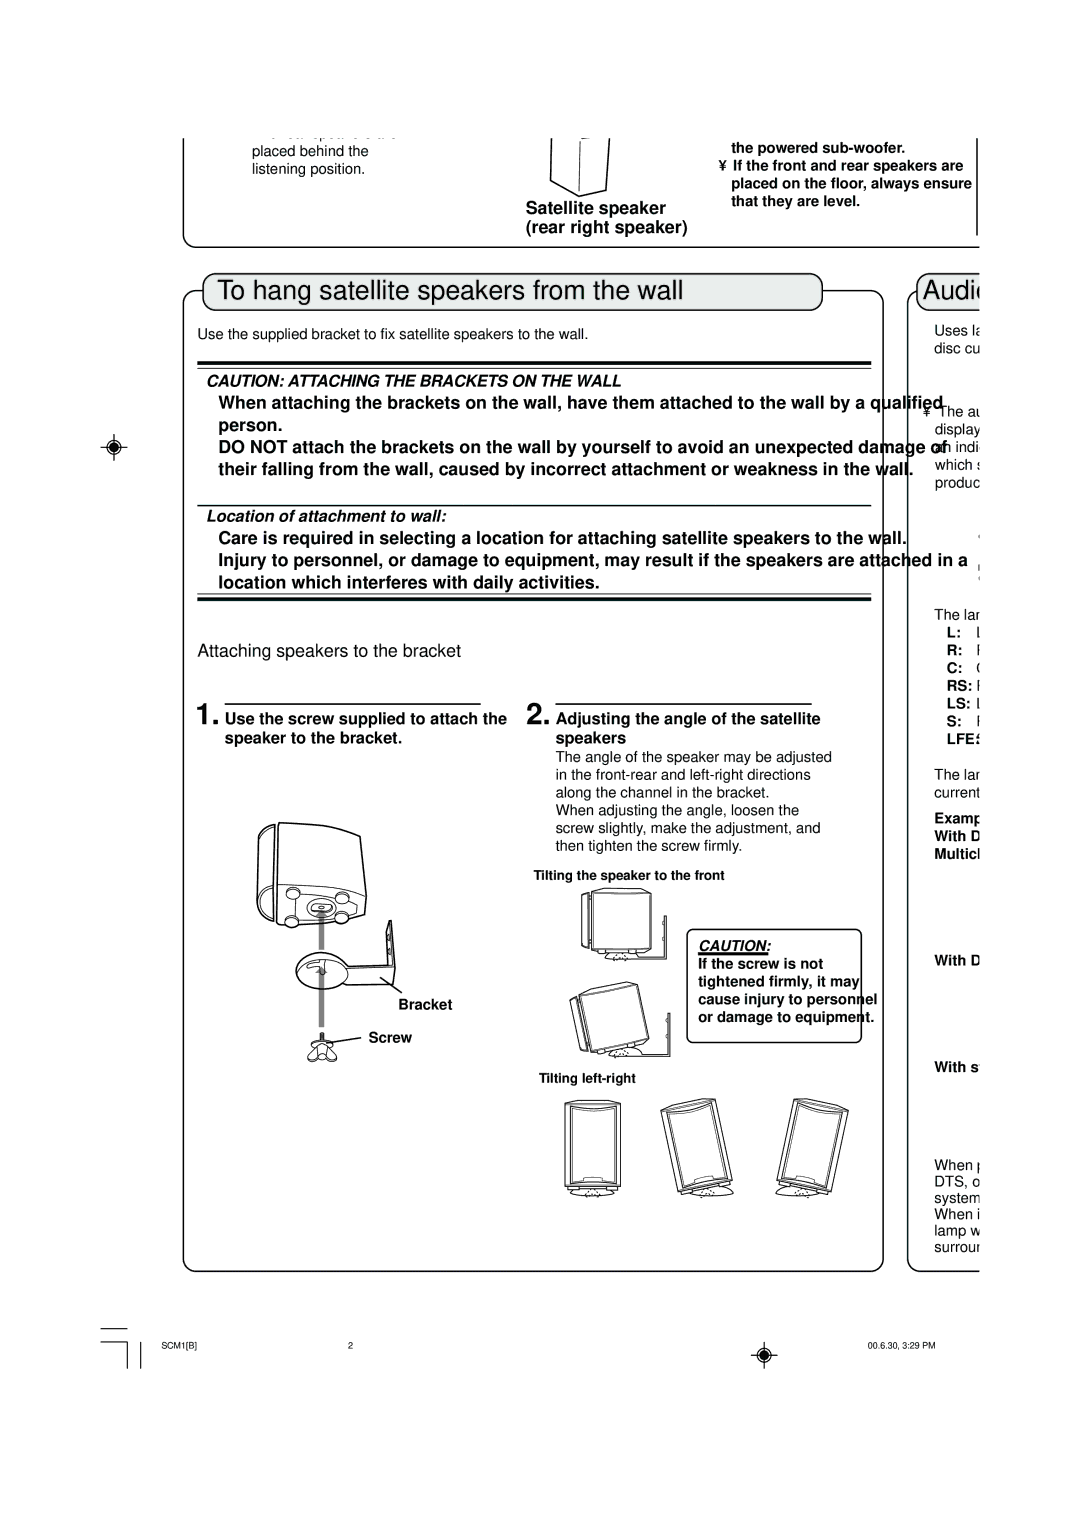
To hang satellite speakers from the wall
Use the supplied bracket to fix satellite speakers to the wall.
CAUTION: ATTACHING THE BRACKETS ON THE WALL
When attaching the brackets on the wall, have them attached to the wall by a qualified person.
DO NOT attach the brackets on the wall by yourself to avoid an unexpected damage of their falling from the wall, caused by incorrect attachment or weakness in the wall.
Location of attachment to wall:
Care is required in selecting a location for attaching satellite speakers to the wall. Injury to personnel, or damage to equipment, may result if the speakers are attached in a location which interferes with daily activities.
Audio channel display lamp
Uses lamps to display the audio channel configuration for the disc currently playing.
• The audio channel display lamp is not an indicator of which speakers are producing sound.
The lamps refer to the speaker channel as follows.
L:Left front speaker channnel
Attaching speakers to the bracket
1. Use the screw supplied to attach the speaker to the bracket.
Bracket
Screw
2. Adjusting the angle of the satellite speakers
The angle of the speaker may be adjusted in the
When adjusting the angle, loosen the screw slightly, make the adjustment, and then tighten the screw firmly.
Tilting the speaker to the front
CAUTION:
If the screw is not tightened firmly, it may cause injury to personnel or damage to equipment.
R:Right front speaker channel
C:Center speaker channel
RS: Right surround speaker channel
LS: Left surround speaker channel
S:Rear speaker channel (monaural) LFE:
The lamp display indicates the type of disc (DVD or CD) currently playing as follows.
Example:
With Dolby digital 5.1 ch, DTS digital 5.1 ch, or MPEG Multichannel 5.1 ch surround
With Dolby digital (Lt/Rt)
With stereo sound (eg Audio CD)
Tilting left-right
When playing DVD recorded in Dolby Digital, Dolby Pro Logic, DTS, or MPEG Multichannnel Surround Sound, set the main system surround mode to “SURROUND ON.”
When it is set to “SURROUND OFF” the audio channel display lamp will not change. However, sound will be played without surround effects (see page 21).
JVC 0600TNMNATJSC