MAIN MENU
RECORD
ALARM
CLOCK / TIMER
COMMUNICATION
DISK
SYSTEM
GOTO CLOCK / TIMER PAGE
MAIN MENU
RECORD
ALARM
CLOCK / TIMER
COMMUNICATION
DISK
SYSTEM
GOTO CLOCK / TIMER PAGE
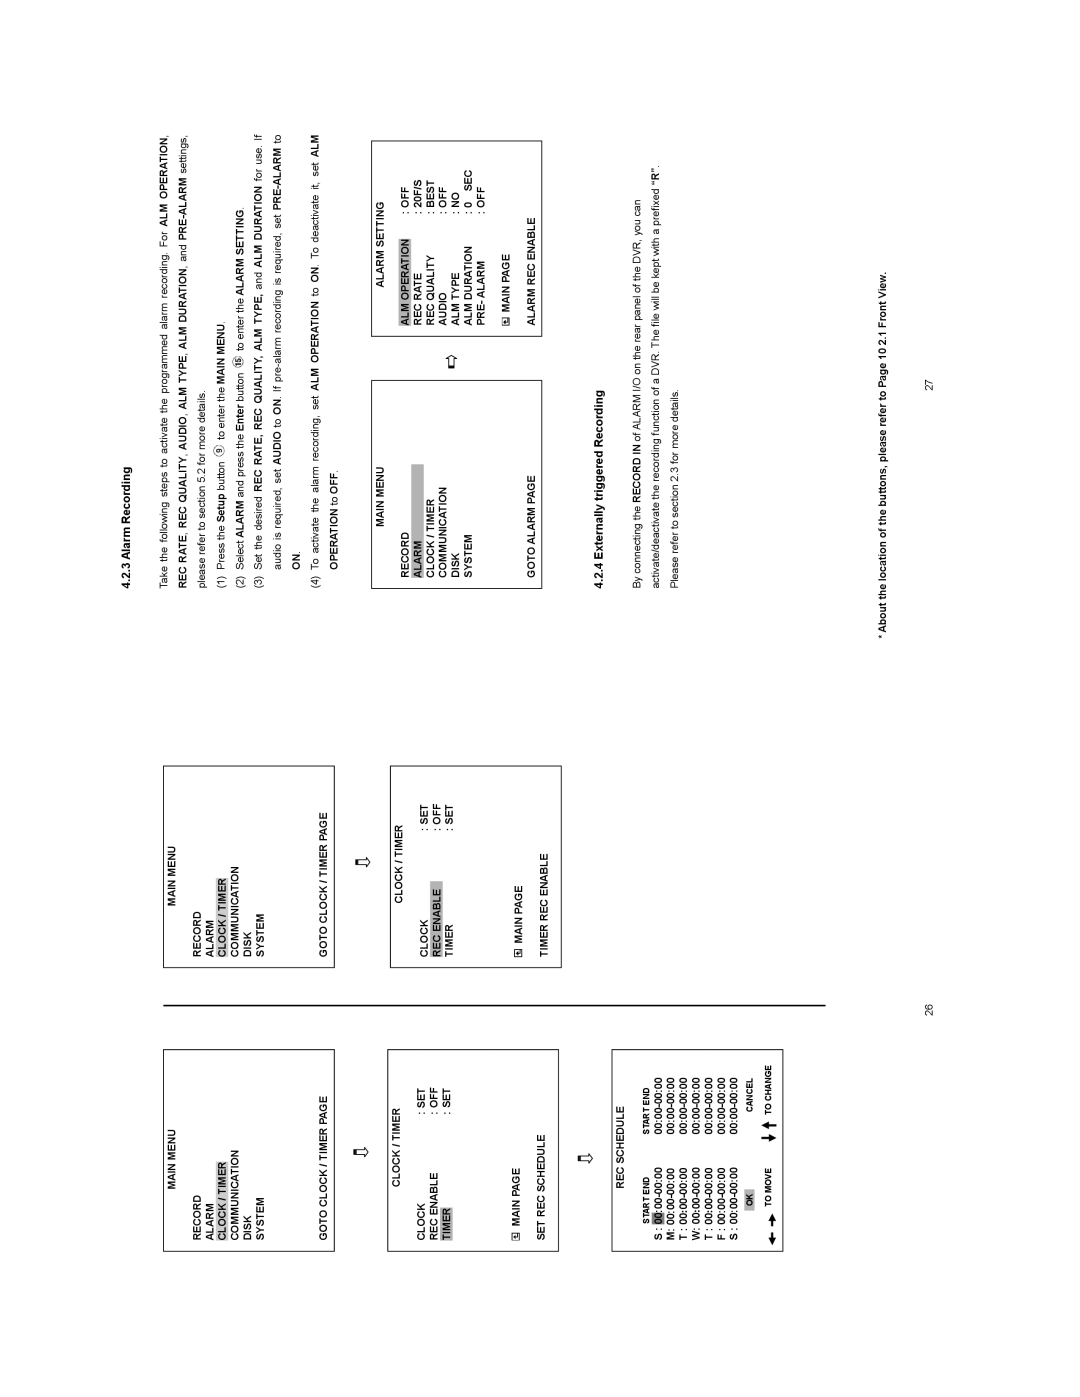
4.2.3 Alarm Recording
Take the following steps to activate the programmed alarm recording. For ALM OPERATION, REC RATE, REC QUALITY, AUDIO, ALM TYPE, ALM DURATION, and
(1)Press the Setup button ![]() to enter the MAIN MENU.
to enter the MAIN MENU.
(2)Select ALARM and press the Enter button ![]() to enter the ALARM SETTING.
to enter the ALARM SETTING.
(3)Set the desired REC RATE, REC QUALITY, ALM TYPE, and ALM DURATION for use. If audio is required, set AUDIO to ON. If
(4)To activate the alarm recording, set ALM OPERATION to ON. To deactivate it, set ALM OPERATION to OFF.
CLOCK / TIMER
CLOCK | : SET | |
REC ENABLE | : OFF | |
|
| : SET |
TIMER | ||
MAIN PAGE
SET REC SCHEDULE
CLOCK / TIMER
CLOCK | : SET | |
|
| : OFF |
REC ENABLE | ||
| TIMER | : SET |
![]() MAIN PAGE
MAIN PAGE
TIMER REC ENABLE
MAIN MENU
RECORD
ALARM CLOCK / TIMER COMMUNICATION DISK
SYSTEM
GOTO ALARM PAGE
ALARM SETTING
ALM OPERATION |
| : OFF |
REC RATE |
| : 20F/S |
REC QUALITY | : BEST | |
AUDIO | : OFF | |
ALM TYPE | : NO | |
ALM DURATION | : 0 SEC | |
PRE- ALARM | : OFF | |
MAIN PAGE |
| |
ALARM REC ENABLE |
| |
REC SCHEDULE
|
|
|
| START END |
| START END | |||||
S : | |||||||||||
M: | |||||||||||
T : | |||||||||||
W: | |||||||||||
T : | |||||||||||
F : | |||||||||||
S : | |||||||||||
|
|
|
|
|
|
|
|
|
|
| CANCEL |
|
|
|
|
|
| OK | |||||
|
|
|
|
|
| TO MOVE |
|
|
| TO CHANGE | |
|
|
|
|
|
|
| |||||
4.2.4 Externally triggered Recording
By connecting the RECORD IN of ALARM I/O on the rear panel of the DVR, you can activate/deactivate the recording function of a DVR. The file will be kept with a prefixed “R”. Please refer to section 2.3 for more details.
* About the location of the buttons, please refer to Page 10 2.1 Front View.
26 | 27 |