12.4 TCP/IP installation
During the installation, you will be requested to insert the windows
12.5 TCP/IP Configuration setting
zClick Start Æ Settings Æ Control Panel Æ Network.
zSelect TCP/IP, and then click Properties.
zBefore processing the DVR installation in a WAN, please make sure the Internet connection works properly. If not, please contact your ISP provider.
Æ
If you are using a DHCP server, please select Obtain an IP address automatically. Any
assigned IP address for the connected DVRs must be in the same class type as the server. If there is no DHCP server, please select specify an IP address and type in the IP address of your PC. This IP address must be different from the DVR IP but in the same class type.
NOTE: The IP address of a DVR in a network must be unique to itself as opposed to those of the other chosen PCs, but in the same class type
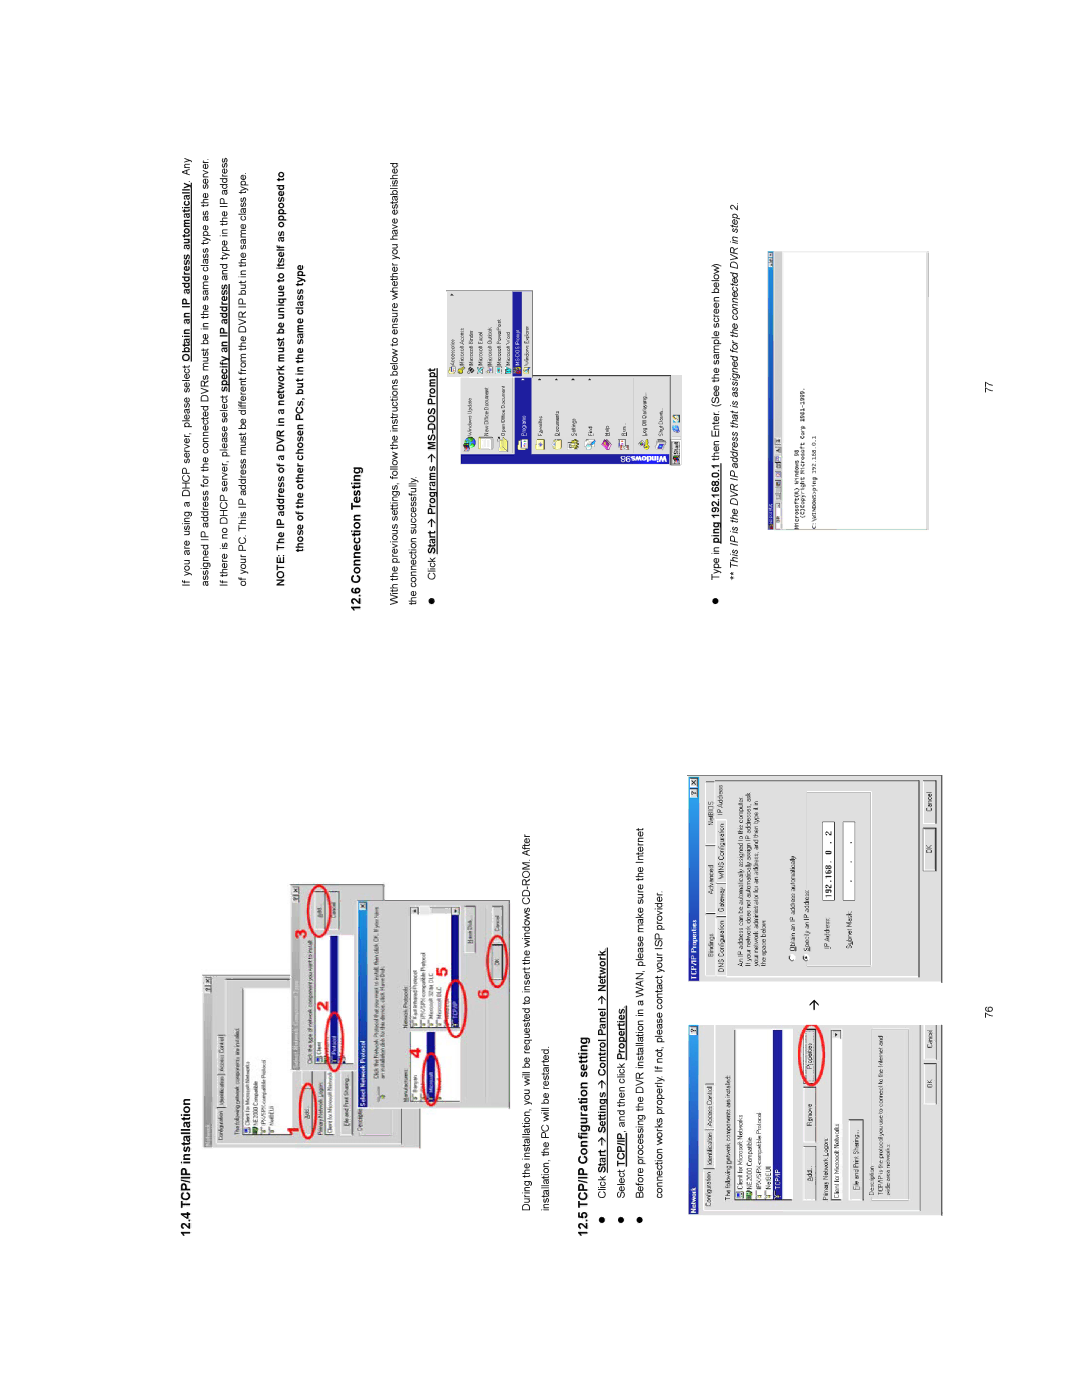
12.6 Connection Testing
With the previous settings, follow the instructions below to ensure whether you have established the connection successfully.
zClick Start Æ Programs Æ MS-DOS Prompt
zType in ping 192.168.0.1 then Enter. (See the sample screen below)
**This IP is the DVR IP address that is assigned for the connected DVR in step 2.
76 | 77 |