NOTE: When only one unit of the DVR is connected to a computer or LAN, you can freely assign an IP address for the DVR. For example, there is a range of DVR IP addresses from 192.168.0.1 to 192.168.0.255. You can pick one for use from the range of the IP. It’s not necessary to set MASK and GATEWAY; leave the settings as default.
When a DVR is connected to a WAN, you must acquire a unique, permanent IP address and correctly configure the MASK and GATEWAY settings according to your network architecture. If you have any questions regarding those settings, please contact a qualified MIS professional or your ISP.
NOTE: When connecting to a network, each connected DVR must be assigned a unique IP, which must be in the same class type as your network address. IP addresses are written as four sets of numbers separated by periods; for example, 192.168.0.1 Therefore, if the connected network is identified as Class C, for example, the first three sets of numbers of the DVR IP address must be the same as the network address. If the connected network is identified as Class B, the first two sets of numbers of the DVR IP address must be the same as the network address. If you have any questions regarding these settings, please contact a qualified MIS professional or your ISP.
12.3 TCP/IP Communication Software
Follow the instructions below to install the TCP/IP communication program into your computer.
zClick the Start Menu from your computer, and point to the Settings/Control panel.
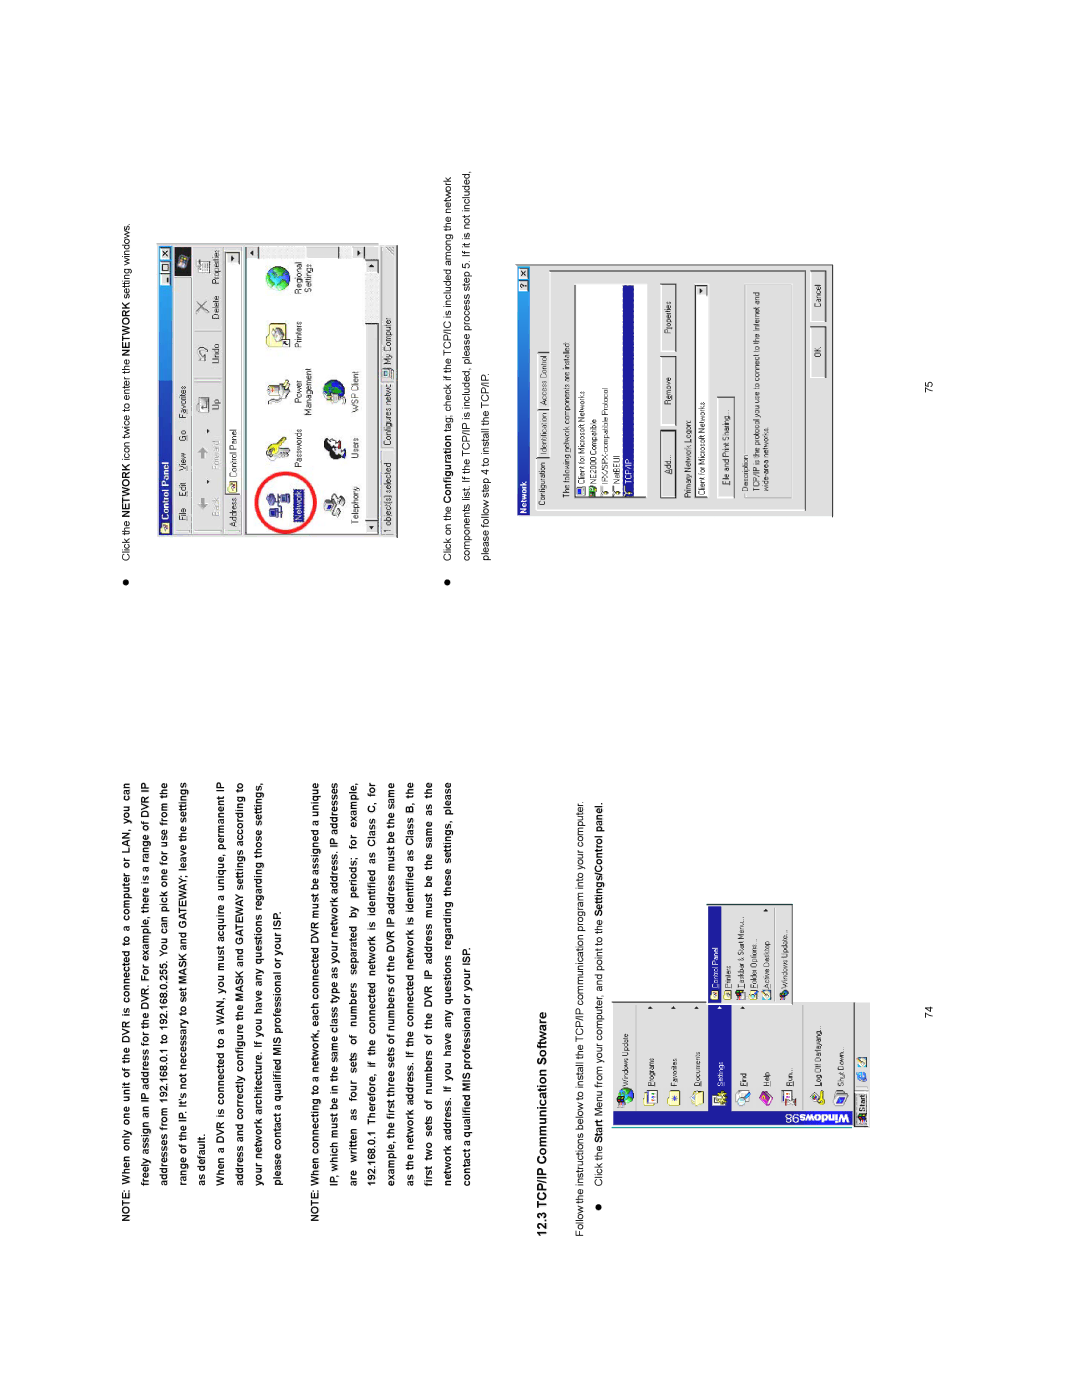
zClick the NETWORK icon twice to enter the NETWORK setting windows.
zClick on the Configuration tag; check if the TCP/IC is included among the network components list. If the TCP/IP is included, please process step 5. If it is not included, please follow step 4 to install the TCP/IP.
74 | 75 |