SERVICE MANUAL
![]() Caution
Caution
The TABS could break.
[3]Bend the 3 TABS of the LAMP BRACKET ASSEMBLY.
[4]Lift the top of the LAMP BRACKET ASSEMBLY up.
[5]Rotate and push the LAMP TERMINAL ASSEMBLY until it releases.
[6]Remove the LAMP TERMINAL ASSEMBLY.
Installing the LAMP SOCKET TERMINAL ASSEMBLY, Painted Models
[1]Do the replacement procedure for the LAMP SOCKET TERMINAL ASSEMBLY in reverse order and check the following during installation:
•Check that the LAMP EJECTOR is aligned correctly before you install the LAMP TERMINAL ASSEMBLY.
•Check that the LAMP TERMINAL ASSEMBLY wires are aligned correctly.
•Bend the 3 TABS down until they are flush with the top of the LAMP BRACKET ASSEMBLY. If the TABS break, use TOP PLATE SCREW 785130 to install a new TAB.
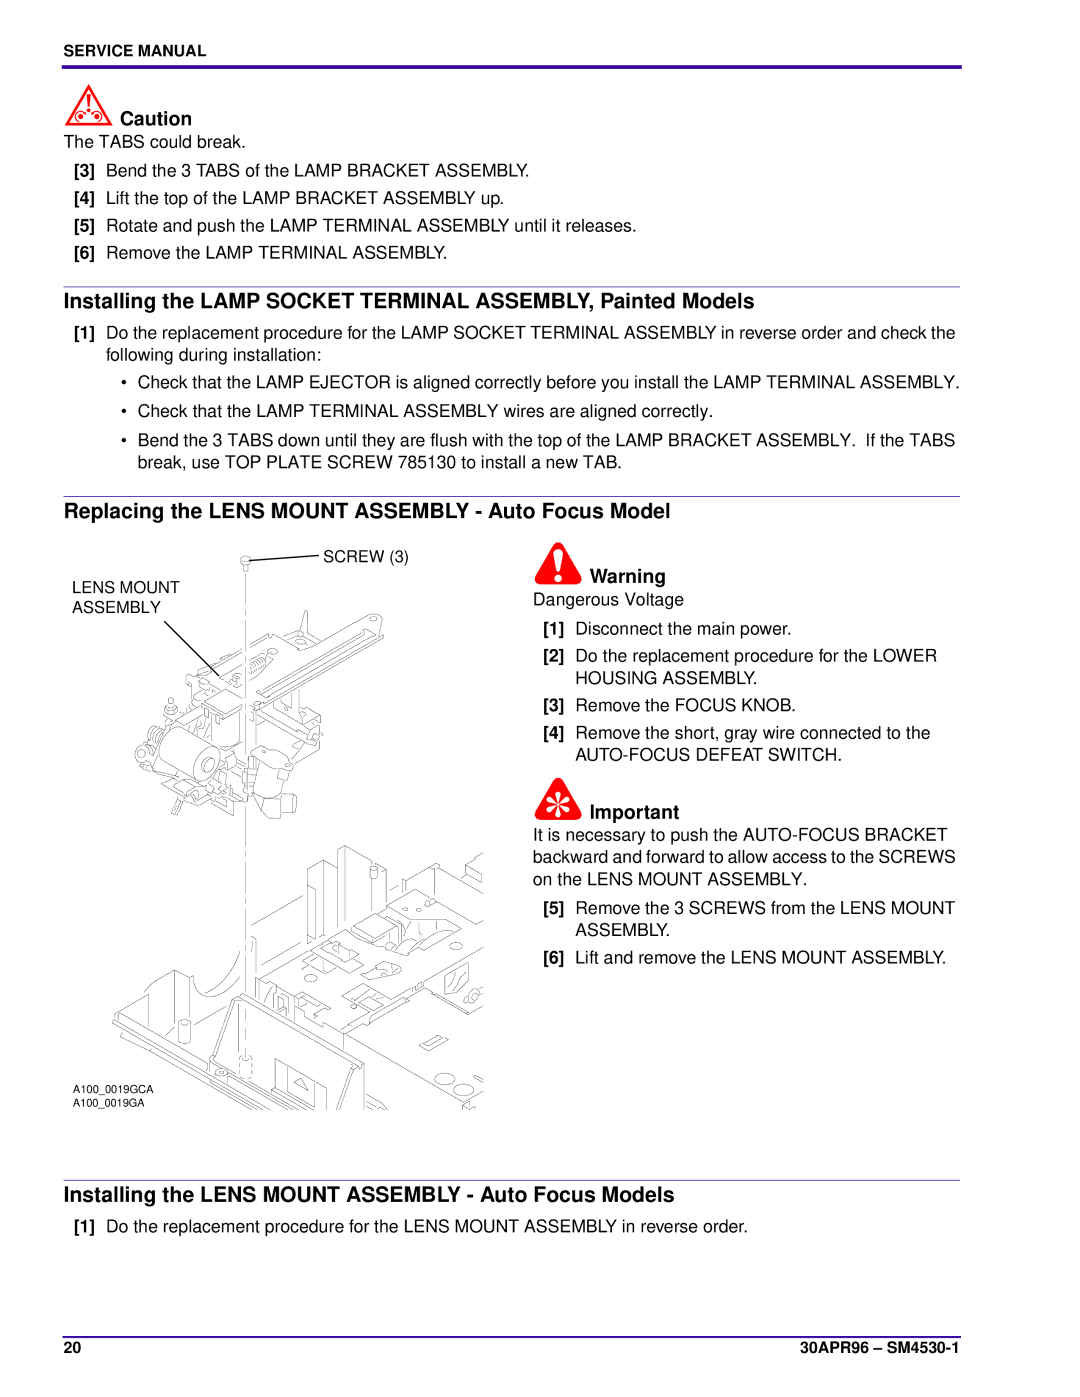
Replacing the LENS MOUNT ASSEMBLY - Auto Focus Model
LENS MOUNT ASSEMBLY
SCREW (3)
Warning
Dangerous Voltage
[1]Disconnect the main power.
[2]Do the replacement procedure for the LOWER HOUSING ASSEMBLY.
[3]Remove the FOCUS KNOB.
[4]Remove the short, gray wire connected to the
AUTO-FOCUS DEFEAT SWITCH.
![]() Important
Important
It is necessary to push the
[5]Remove the 3 SCREWS from the LENS MOUNT ASSEMBLY.
[6]Lift and remove the LENS MOUNT ASSEMBLY.
A100_0019GCA
A100_0019GA
Installing the LENS MOUNT ASSEMBLY - Auto Focus Models
[1]Do the replacement procedure for the LENS MOUNT ASSEMBLY in reverse order.
20 | 30APR96 – |