Setting up the printer to fax | 31 |
Setting up the printer to fax


Step 1: Connect the printer to the telephone line
Check the scenarios below and follow the setup that is applicable to your telephone service.
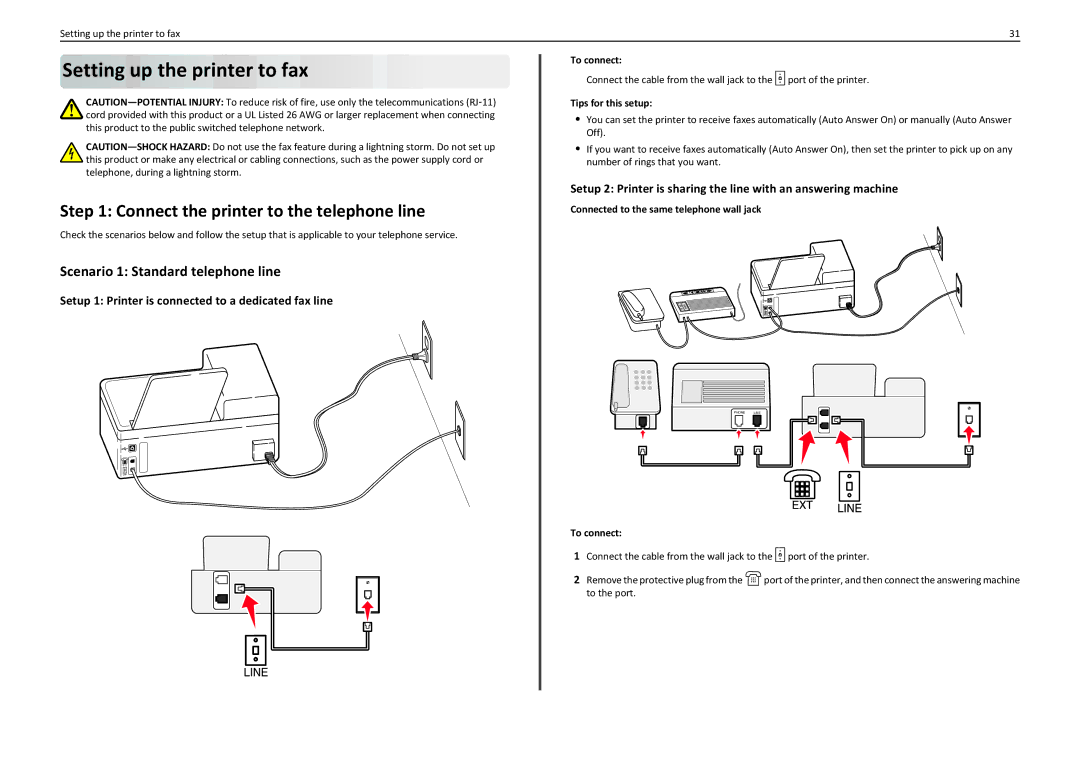
Scenario 1: Standard telephone line
Setup 1: Printer is connected to a dedicated fax line
To connect:
Connect the cable from the wall jack to the ![]() port of the printer.
port of the printer.
Tips for this setup:
•You can set the printer to receive faxes automatically (Auto Answer On) or manually (Auto Answer Off).
•If you want to receive faxes automatically (Auto Answer On), then set the printer to pick up on any number of rings that you want.
Setup 2: Printer is sharing the line with an answering machine
Connected to the same telephone wall jack
EXT
LINE
PHONE | LINE |
|
|
To connect:
1Connect the cable from the wall jack to the ![]() port of the printer.
port of the printer.
2Remove the protective plug from the ![]() port of the printer, and then connect the answering machine to the port.
port of the printer, and then connect the answering machine to the port.