Section 3: Operation
Note that the Clear button will not allow you to exit these screens until all selections have been made.
Set Options Sub-menu (cont’d)
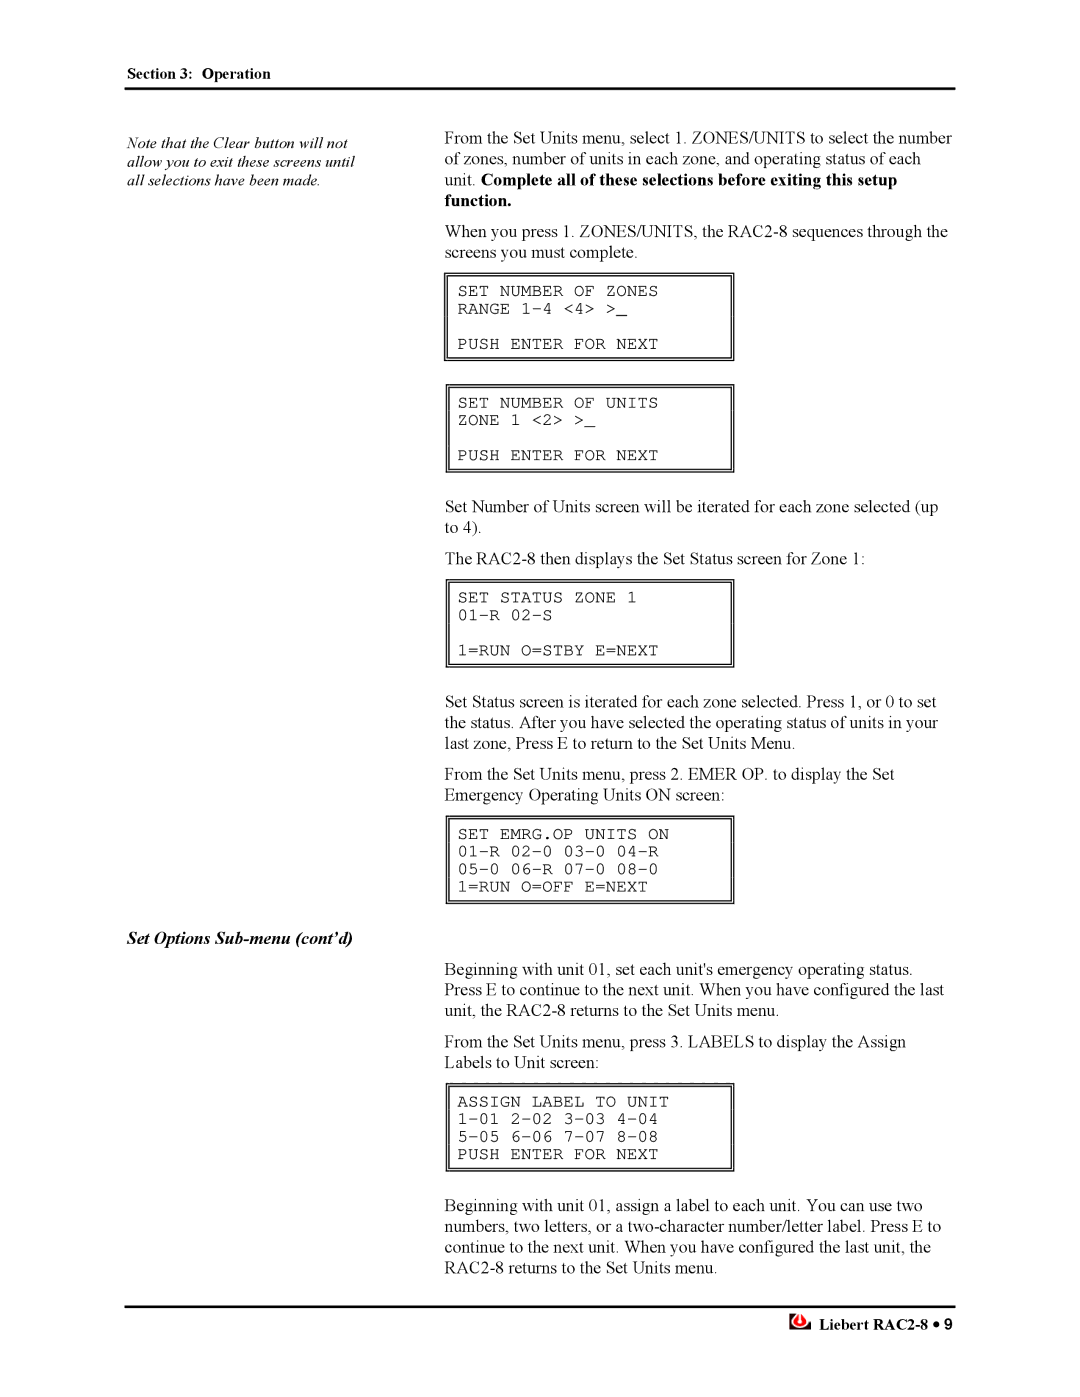
From the Set Units menu, select 1. ZONES/UNITS to select the number of zones, number of units in each zone, and operating status of each unit. Complete all of these selections before exiting this setup
function.
When you press 1. ZONES/UNITS, the
SET NUMBER OF ZONES
RANGE
PUSH ENTER FOR NEXT
SET NUMBER OF UNITS
ZONE 1 <2> >_
PUSH ENTER FOR NEXT
Set Number of Units screen will be iterated for each zone selected (up to 4).
The
SET STATUS ZONE 1
1=RUN O=STBY E=NEXT
Set Status screen is iterated for each zone selected. Press 1, or 0 to set the status. After you have selected the operating status of units in your last zone, Press E to return to the Set Units Menu.
From the Set Units menu, press 2. EMER OP. to display the Set Emergency Operating Units ON screen:
SET EMRG.OP UNITS ON
Beginning with unit 01, set each unit's emergency operating status. Press E to continue to the next unit. When you have configured the last unit, the
From the Set Units menu, press 3. LABELS to display the Assign Labels to Unit screen:
ASSIGN LABEL TO UNIT
PUSH ENTER FOR NEXT
Beginning with unit 01, assign a label to each unit. You can use two numbers, two letters, or a
![]() Liebert
Liebert